
No-Churn Tiramisu Ice Cream

This no-churn tiramisu ice cream turns the classic Italian dessert into a creamy, coffee-laced frozen treat, no ice cream maker needed.
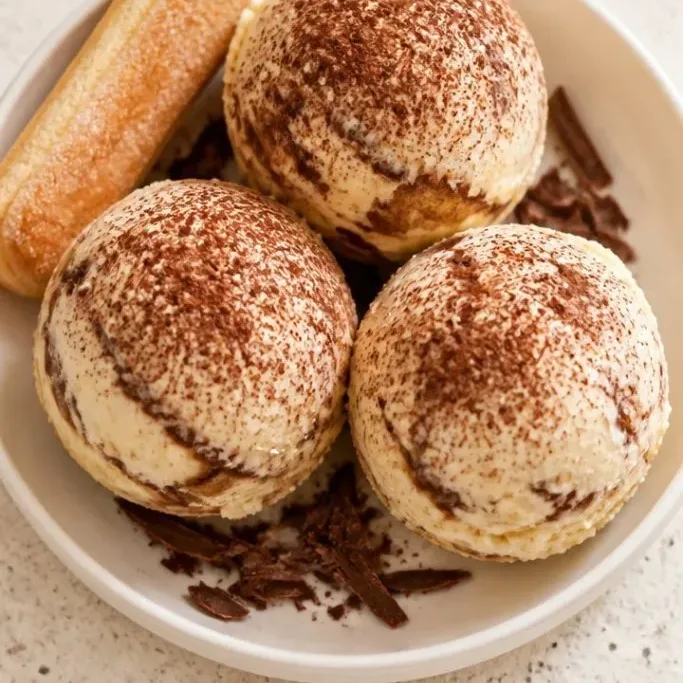
With mascarpone, espresso, and chunks of cocoa-dusted ladyfingers, it tastes just like the real thing, only cold.
What Makes This Ice Cream So Good
The mascarpone keeps it rich and silky without any eggs, and the coffee syrup soaks into the ladyfinger bits for that signature tiramisu kick.
It sets up in the freezer without churning, so you can make it in the morning and scoop it after dinner. The layered look is impressive, but the whole thing comes together with one bowl and a loaf pan.
Ingredients

- 2 cups heavy cream, cold: the base for no-churn ice cream, cold for best whip
- 1 (14-ounce) can sweetened condensed milk: sweetness and silkiness, do not use evaporated milk
- 8 ounces mascarpone cheese, softened to room temperature: classic tiramisu tang
- ½ cup strong brewed espresso or very strong coffee, cooled: use decaf if preferred
- 2 tablespoons coffee liqueur, optional: deepens the flavor; omit for non-alcoholic
- 1 teaspoon vanilla extract
- Pinch of fine sea salt
- 12 crisp ladyfinger cookies: typical Italian savoiardi, the crisp kind, not soft sponge
- 1 to 2 tablespoons unsweetened cocoa powder, for dusting
Variations / Substitutions
- Swap the espresso: Use decaf espresso or 1 tablespoon instant espresso powder dissolved in 2 tablespoons hot water, cooled.
- Skip the liqueur: Leave it out for an alcohol-free version; the coffee flavor will still be there.
- Switch the ladyfingers: Crumbled biscotti or thin chocolate wafers work in a pinch, but the texture will be crunchier.
Zucchini Pie is another reader favorite dessert worth making next.
How to Make No-Churn Tiramisu Ice Cream
Step 1: Whip the Cream Base

Pour the 2 cups cold heavy cream into a large bowl and whip with an electric mixer on medium-high speed until stiff peaks form, about 3 to 4 minutes.
Stop when the cream holds a firm point when you lift the beaters; if it looks curdled or separates, you have gone too far and will need to start over with fresh cream.
Step 2: Fold in the Coffee Syrup

In a separate bowl, whisk the softened mascarpone, the entire can of sweetened condensed milk, vanilla, salt, and the cooled ½ cup espresso until smooth. Gently fold this mixture into the whipped cream until no white streaks remain, being careful not to deflate the air.
The mixture will turn pale tan and smell like a creamy latte. A few thin streaks of mascarpone are fine; they will blend in the freezer.
Step 3: Layer the Ladyfingers and Cocoa

Crumble the 12 ladyfingers into bite-sized pieces, roughly the size of a grape. In a standard loaf pan or a freezer-safe container, spread one-third of the coffee cream, scatter half the ladyfinger pieces and dust with a little cocoa, then repeat the layers, finishing with a final spread of cream on top. Dust the surface generously with cocoa.
The crisp ladyfinger bits will soften slightly as they absorb moisture, giving you those tender cakey pockets just like real tiramisu.
Step 4: Freeze and Scoop

Cover the pan tightly with plastic wrap or a lid and freeze until firm, at least 6 hours or overnight.
Scoop the ice cream into bowls. If it is too hard to scoop straight from the freezer, let it sit at room temperature for 5 minutes. Serve with an extra dusting of cocoa and a few crunchier ladyfinger crumbles if you like. The scoops will have ribbons of coffee and chocolate running through creamy white ice cream.
Tips for the Creamiest Ice Cream
- Let the mascarpone come to room temperature so it blends into the condensed milk without lumps.
- Use strong brewed espresso, not weak drip coffee, or the flavor gets lost under all that dairy.
- A metal loaf pan chills faster than glass; freeze it for 10 minutes before layering if your kitchen is warm.
- For bigger ladyfinger pieces that keep a bit of crunch, fold half the crumbles directly into the bowl just before the final freeze instead of layering them all.
Storing Leftovers
Keep the ice cream in an airtight container in the freezer for up to 1 week. Press a piece of parchment directly on the surface to prevent ice crystals from forming.
For the creamiest scoop, let the ice cream soften at room temperature for 5 to 10 minutes before digging in.
Frequently Asked Questions
Can I use decaf espresso?
Yes, the flavor is the same. Just make sure it is very strong and completely cooled.
What if my ladyfingers are the soft kind?
You really want the crisp, hard savoiardi here. Soft ones turn to mush in the ice cream and will not hold any texture.
Why did my ice cream turn out icy?
The most common causes are overwhipping the cream until it breaks, or adding espresso that was still warm. Both introduce extra water that forms ice crystals.
Can I churn this in an ice cream maker instead?
Absolutely. Prepare the base through Step 2, churn according to your machine’s instructions, then fold in the ladyfinger pieces and freeze until firm.
Is there a dairy-free version?
It is tricky with mascarpone, but you can use full-fat coconut cream in place of heavy cream and a thick dairy-free cream cheese alternative for the mascarpone. The result will be slightly icier and less tangy, but still tasty.
No-Churn Tiramisu Ice Cream Recipe
Ingredients
Method
- Whip the cold heavy cream in a large bowl on medium-high speed until stiff peaks form, about 3 to 4 minutes.
- In a separate bowl, whisk the mascarpone, sweetened condensed milk, vanilla, salt, and cooled espresso until smooth. Gently fold this into the whipped cream until no white streaks remain.
- Crumble the ladyfingers into grape-sized pieces. In a loaf pan, spread one-third of the cream, scatter half the ladyfingers and a dusting of cocoa, repeat layers, then top with remaining cream and a generous cocoa dust.
- Cover and freeze until firm, at least 6 hours. Scoop and serve, softening at room temperature for 5 minutes if needed.
Notes
