
No-Spread Snowman Sugar Cookies

These no-spread snowman sugar cookies hold their shape beautifully, so every snowman looks as cute baked as it does raw. They’re sturdy enough for decorating but still tender to bite into.

The dough comes together in one bowl, and a quick chill keeps the edges crisp. Once baked, you can turn them into snowmen with a simple glaze and a few candies.
Why These Cookies Stay on My Holiday List
I love a sugar cookie that tastes like vanilla butter, not cardboard. This dough has just enough sugar to be sweet without spreading into a puddle in the oven.
The secret is a bit of cornstarch tucked into the flour, which keeps the cookies tender and gives them that neat, crisp edge. They stay fresh for days, so you can bake ahead and decorate when you’re ready.
Ingredients
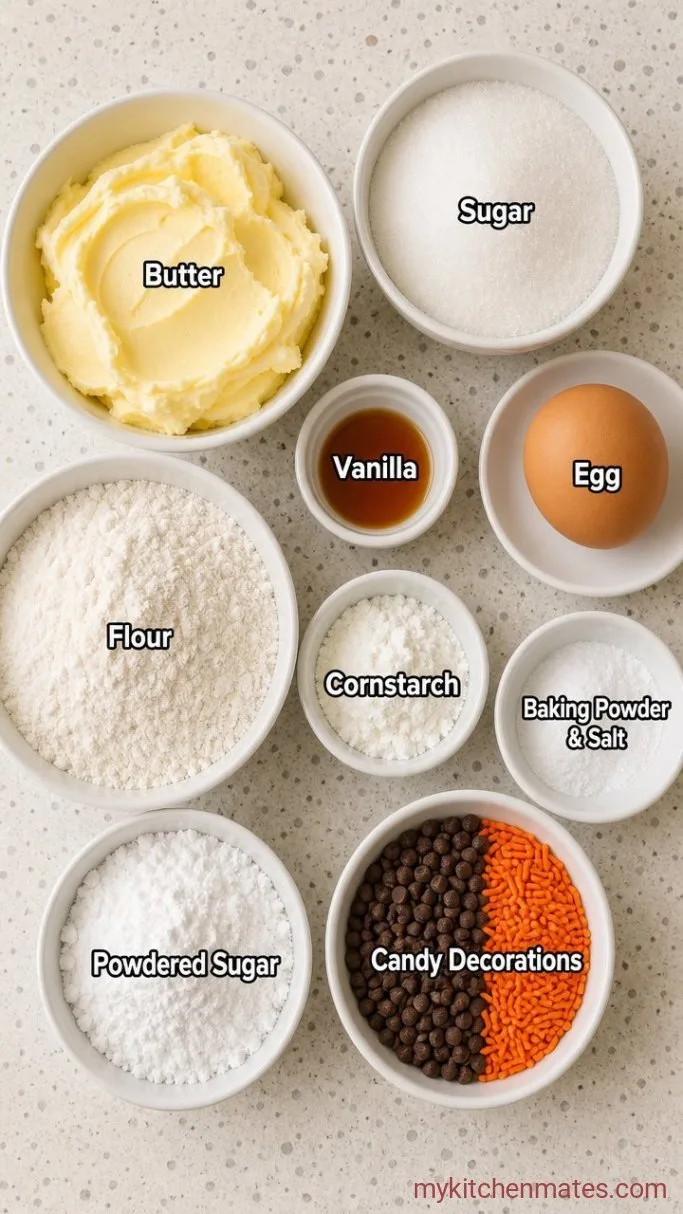
For the cookies
- 1 cup (226 g) unsalted butter, softened: let it sit out until it gives easily when pressed
- 1 cup (200 g) granulated sugar
- 1 large egg: cold is fine, just mix it in slowly
- 2 tsp vanilla extract
- ¼ tsp almond extract (optional): adds a subtle nutty note that feels festive
- 2 ½ cups (313 g) all-purpose flour: spoon and level, don’t scoop
- 2 tbsp cornstarch: the key for holding shape and staying tender
- ½ tsp baking powder
- ½ tsp fine sea salt
For the quick icing
- 2 cups (240 g) powdered sugar
- 2 to 3 tbsp milk: add a little at a time until the glaze is thick but pipeable
- ½ tsp vanilla extract
- Food coloring (optional): gel colors work best without thinning the icing
- Mini chocolate chips, orange sprinkles, or small candies: for snowman faces
Variations / Substitutions
- Make it lemony: swap the almond extract for the finely grated zest of 1 lemon and use lemon juice in the icing.
- Use royal icing: if you want a frosting that dries rock-hard, substitute the simple glaze with a royal icing made from meringue powder.
- Go dairy-free: use a good vegan butter stick and your favorite unsweetened nondairy milk for the icing.
- Switch the extract: a couple drops of clear peppermint extract in the dough makes them taste like candy canes.
- Keep it gluten-free: a 1-to-1 gluten-free flour blend that contains xanthan gum works well here; the dough may feel a bit stickier.
Soft and Chewy Sourdough Christmas Cookies are next on our list if these cookies are your kind of dessert.
How to Make No-Spread Snowman Sugar Cookies
Step 1: Cream the Butter and Sugar
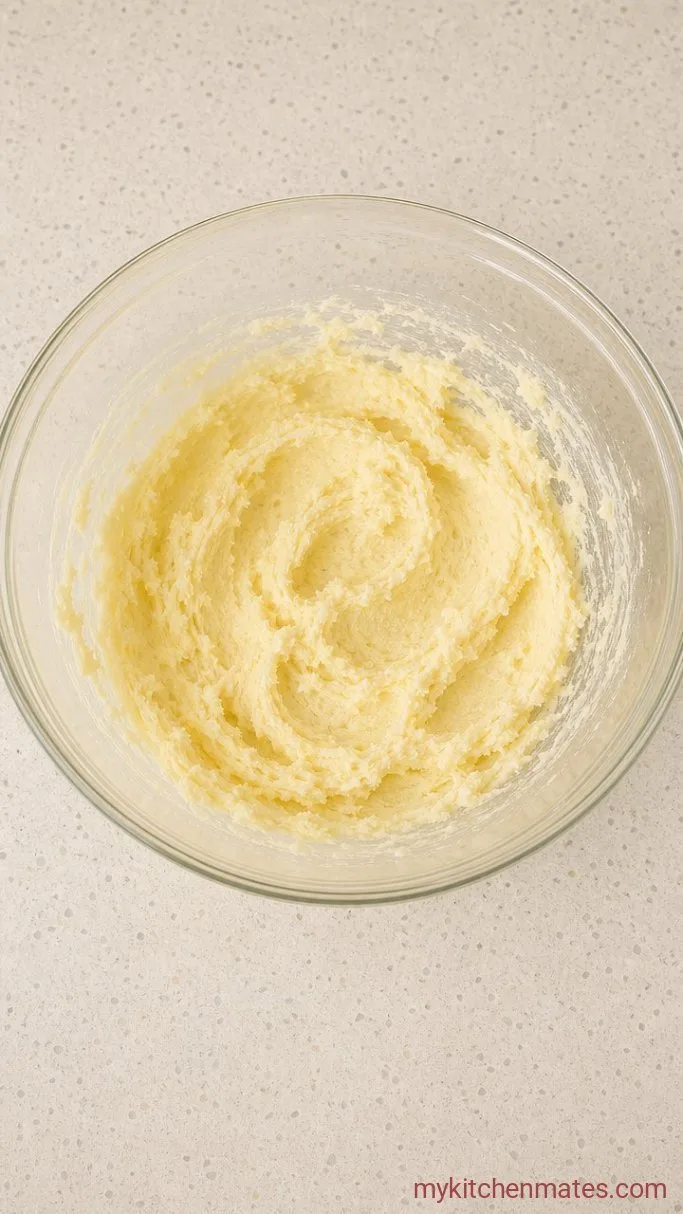
Beat the 1 cup softened butter and 1 cup granulated sugar in a large bowl with an electric mixer on medium speed until pale and fluffy, about 3 minutes. While you mix, preheat your oven to 350°F (175°C) so it’s ready when you are.
The mixture will look light and airy, with no visible grains of sugar scraping the sides. Stop once or twice to scrape down the bowl with a spatula so everything creams evenly.
Step 2: Add the Egg and Vanilla

With the mixer on low, add the 1 large egg, 2 tsp vanilla, and the ¼ tsp almond extract (if using). Beat until just combined, about 30 seconds. The dough will loosen and look glossy.
If the egg is cold, the butter may look slightly curdled at first; keep mixing slowly and it will come together. Don’t overbeat or the cookies can puff unevenly.
Step 3: Mix the Dry Ingredients and Chill
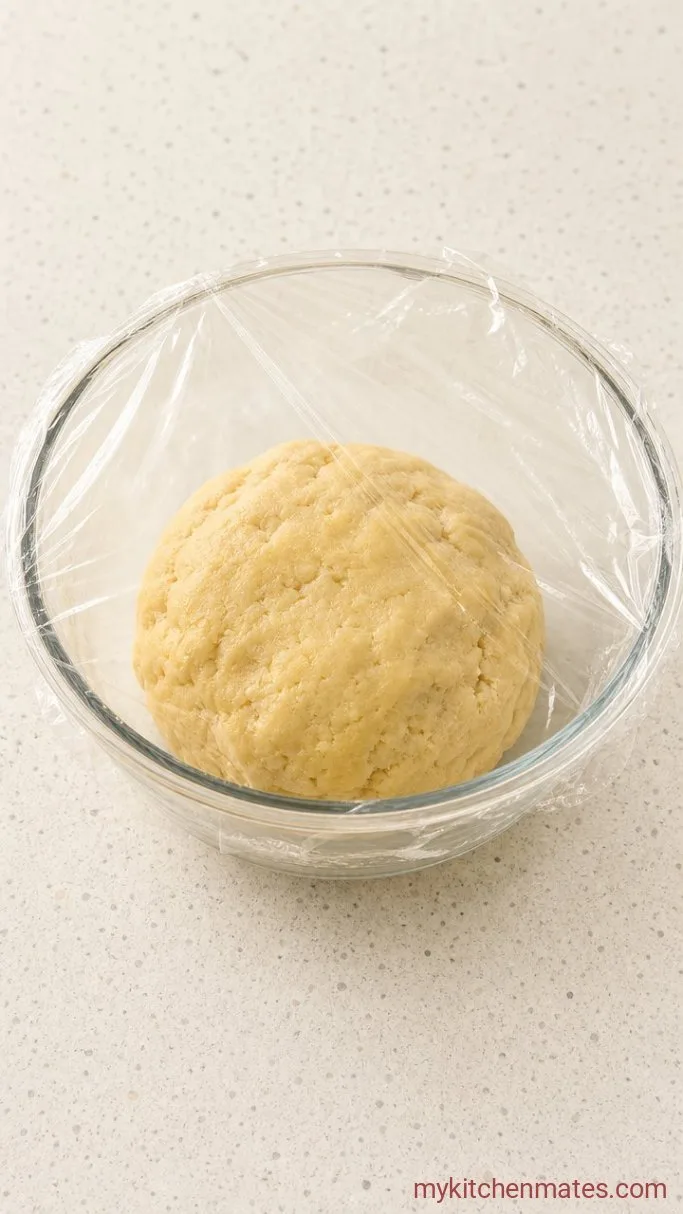
Whisk together the 2 ½ cups flour, 2 tbsp cornstarch, ½ tsp baking powder, and ½ tsp salt in a separate bowl. With the mixer on low, slowly add the dry mixture to the wet ingredients until no streaks of flour remain. The dough will feel soft and a little sticky.
Turn it out onto a piece of plastic wrap, shape it into a flat disc, and wrap tightly. Refrigerate for at least 30 minutes so the butter firms up; this is what stops the cookies from spreading. The dough can chill up to 2 days if you want to bake later.
Step 4: Roll and Cut the Cookies
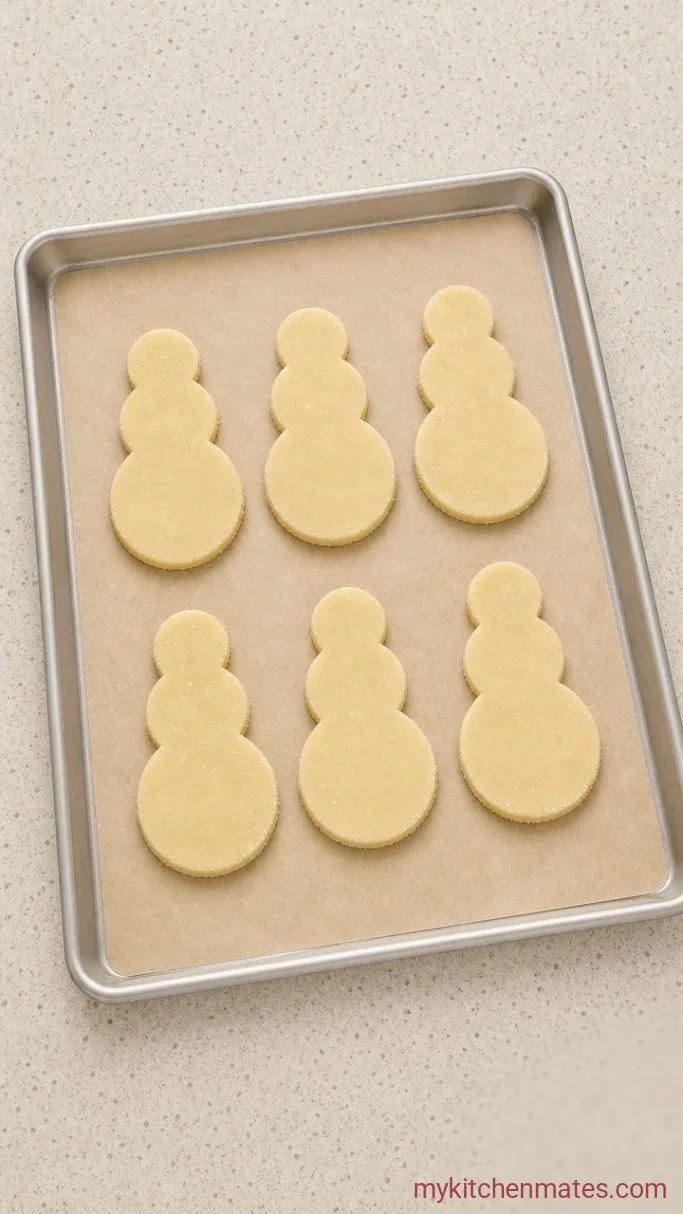
Lightly flour your counter and roll the chilled dough to about ¼‑inch (6 mm) thick. If the dough cracks, let it sit at room temperature for 5 minutes. Work one half of the disc at a time, keeping the rest cold.
Cut out circles of different sizes (a 3‑inch, a 2‑inch, and a 1‑inch round cutter) to stack into snowmen, or use a single snowman-shaped cutter. Gather the scraps, press them together without kneading, chill for 10 minutes, and roll again.
Step 5: Bake the Cookies
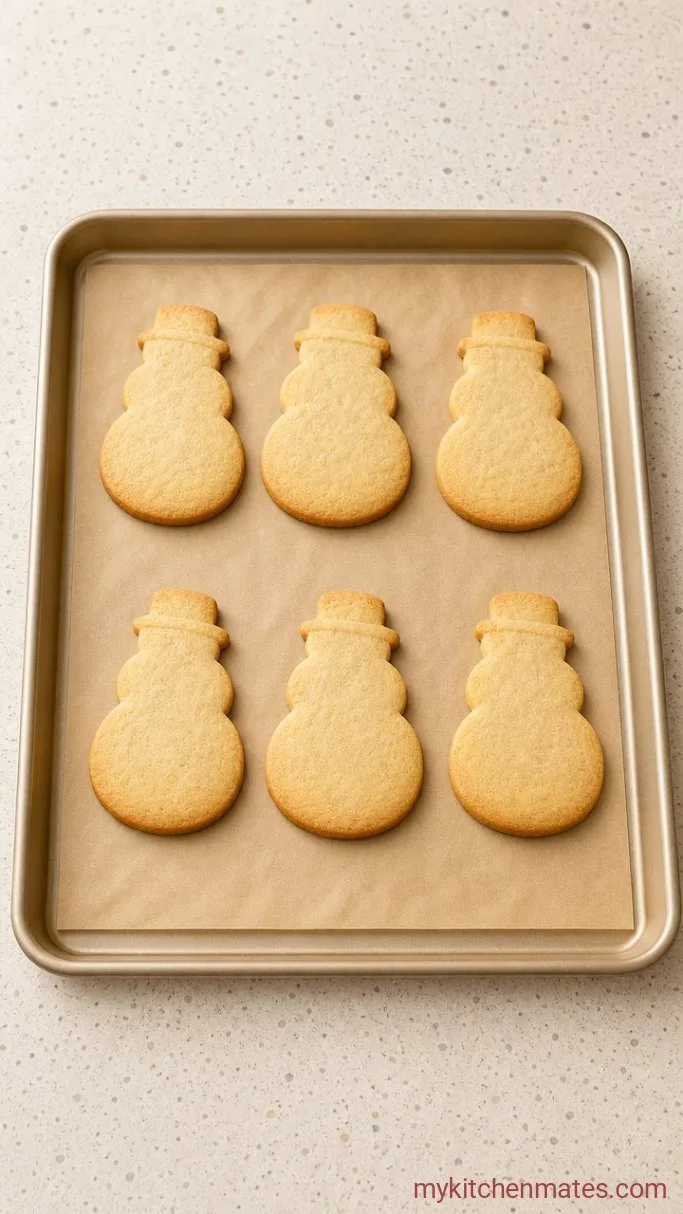
Place the cut shapes on parchment‑lined baking sheets at least 1 inch apart. Bake at 350°F (175°C) for 8‑10 minutes for the smallest cookies, 10‑12 for medium, and 12‑14 for large ones, until the edges are just barely golden. The centers will look pale and set.
Let the cookies cool on the sheet for 5 minutes; they’ll be soft. Then move them to a wire rack with a thin spatula. They firm up completely as they cool.
Step 6: Decorate the Snowmen

Once the cookies are completely cool, make the icing: whisk the 2 cups powdered sugar with 2 tbsp milk, ½ tsp vanilla, and a little more milk if needed until the mixture is smooth and thick but still flows slowly off a spoon. Divide and tint with food coloring if you like.
Spoon the icing into a piping bag or a small zip‑top bag with the corner snipped. Pipe the outlines of snowman bodies, scarves, buttons, and hats. While the icing is still wet, press mini chocolate chips for eyes and orange sprinkles or a tiny candy for the nose. Let the icing set for 30 minutes before moving or stacking the cookies.
Tips for Picture‑Perfect Snowman Cookies
- Roll the dough between two sheets of parchment paper to avoid adding too much extra flour; this keeps the cookies tender.
- Use a thin metal spatula to transfer the cut shapes to the baking sheet without stretching them.
- Bake similar sizes on the same tray so they all finish at the same time.
- If the icing runs too much, stir in a tablespoon more powdered sugar until it holds a pipeable line.
- Clean edges are easier when the dough stays cold: pop the cut shapes into the fridge for 10 minutes before baking if your kitchen is warm.
Bake times by cookie size:
| Cookie Size | Thickness | Bake Time (350°F) |
|---|---|---|
| 1‑inch (small) | ¼ inch | 8‑10 minutes |
| 2‑3 inch (medium) | ¼ inch | 10‑12 minutes |
| 3‑4 inch (large) | ¼ inch | 12‑14 minutes |
Storing Snowman Cookies
Store baked, undecorated cookies at room temperature in an airtight container for up to 5 days. They stay crisp and buttery on the counter.
Once iced, let the snowmen dry completely. Stack them with wax paper between layers and keep in a cool spot. The icing stays set, but the cookies taste best within 2 days of decorating.
Frequently Asked Questions
Why did my cookies spread instead of holding their shape?
The dough might have been too warm, or the oven may not have been fully heated. Make sure the dough is well chilled and the oven is at 350°F (175°C) before baking.
Can I freeze the baked cookies?
Yes. Freeze undecorated cookies in a single layer with parchment paper between them for up to 3 months. Thaw at room temperature before icing.
What is the best icing for decorating snowmen?
Royal icing dries the hardest, but the quick glaze here sets enough to hold features. Use a small piping tip for clean lines and let it set 30 minutes.
No-Spread Snowman Sugar Cookies Recipe
Ingredients
Method
- Cream butter and sugar until fluffy, about 3 minutes. Preheat oven to 350°F (175°C).
- Beat in egg, vanilla, and almond extract until combined.
- Whisk flour, cornstarch, baking powder, and salt. Slowly mix into butter mixture. Shape dough into a disc, wrap, and chill 30 minutes.
- Roll dough to ¼‑inch thickness on a floured surface. Cut circles or snowman shapes. Reroll scraps once.
- Bake on parchment‑lined sheets 8‑14 minutes (depending on size) until edges are barely golden. Cool 5 minutes on sheet, then transfer to a rack.
- Whisk powdered sugar with 2 tbsp milk and ½ tsp vanilla for icing; add color if desired. Pipe on snowmen features and press candies while wet. Let set 30 minutes.
Notes
