
Overnight Rosemary Garlic Sourdough Bread

This rosemary garlic sourdough bread bakes up with a deep, crackly crust and a soft, holey crumb studded with ribbons of fragrant rosemary and sweet, mellow garlic. The smell alone will have you standing by the oven waiting for the timer.

It’s the loaf I reach for when I want something that feels rustic and special but fits into a busy week—the dough does its longest rise while you sleep, so you wake up to puffy, bubbly dough that just needs a quick shape and a rest before it hits the hot Dutch oven.
Why This Sourdough Works
The overnight bulk ferment builds real sourdough tang and makes the dough incredibly extensible, so shaping it takes almost no effort. There’s no frantic kneading, just a few folds during the first hour or two, and then the fridge or counter does the rest of the work.
Roasting the garlic before it goes into the dough changes everything. Raw garlic can taste sharp or burn easily in the hot oven, but roast garlic turns soft, buttery, and slightly sweet, melting into the crumb in little pockets that never overwhelm the rosemary.
Ingredients
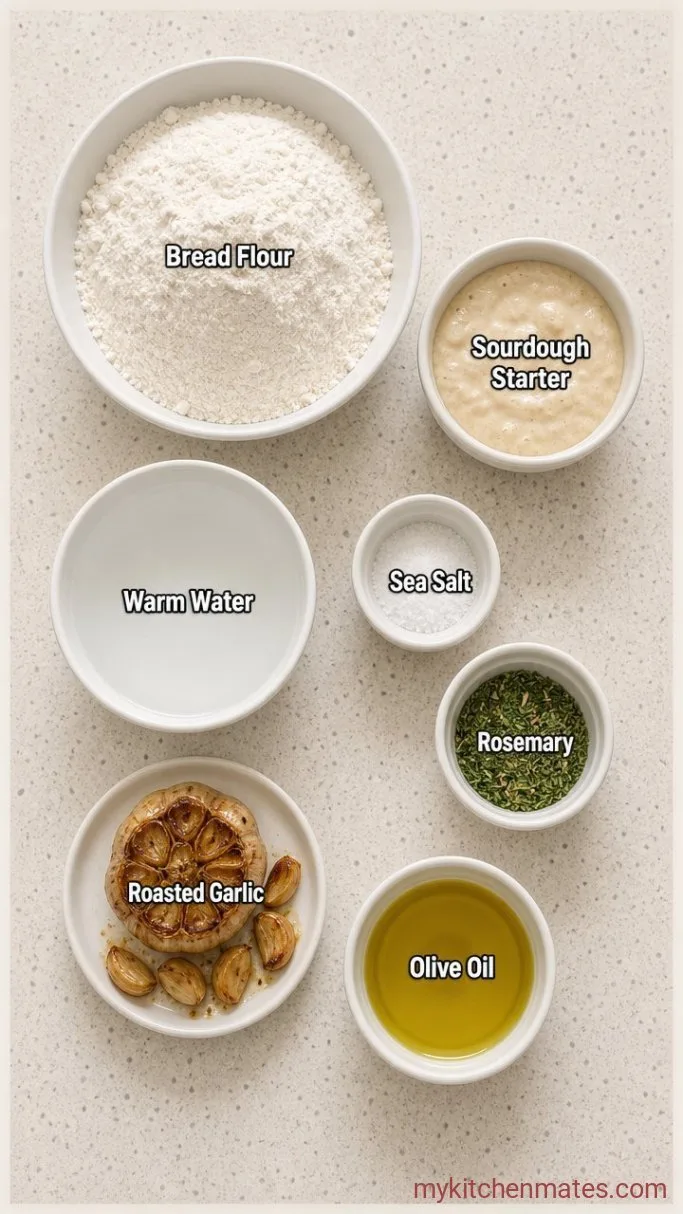
- 500g bread flour, plus more for dusting: a strong flour gives the loaf its chew and oven spring
- 100g active sourdough starter, 100% hydration: make sure it passes the float test before you begin
- 350g warm water, about 85°F (29°C): cool enough that fermentation moves slowly overnight
- 10g fine sea salt: fine salt dissolves evenly, coarse salt can leave salty spots
- 1 whole head of garlic, roasted until soft and caramelized
- 3 tablespoons finely chopped fresh rosemary, plus a pinch more for the top
- 1 tablespoon extra virgin olive oil, for roasting the garlic
Variations / Substitutions
- Fresh herb swap: try thyme, sage, or oregano instead of rosemary, using the same amount
- Dried herbs: if fresh rosemary is not handy, use 1 tablespoon dried rosemary instead
- Starter insurance: if your starter has been sluggish, add ¼ teaspoon instant yeast with the salt to guarantee a lift
- Flour matters: you can swap in up to 20% whole wheat for a nuttier loaf, but do not replace all the bread flour or the texture will turn dense
Creamy Roasted Garlic Tomato Soup goes perfectly with this bread for a cozy meal.
How To Make Overnight Rosemary Garlic Sourdough Bread
Step 1: Mix the Autolyse
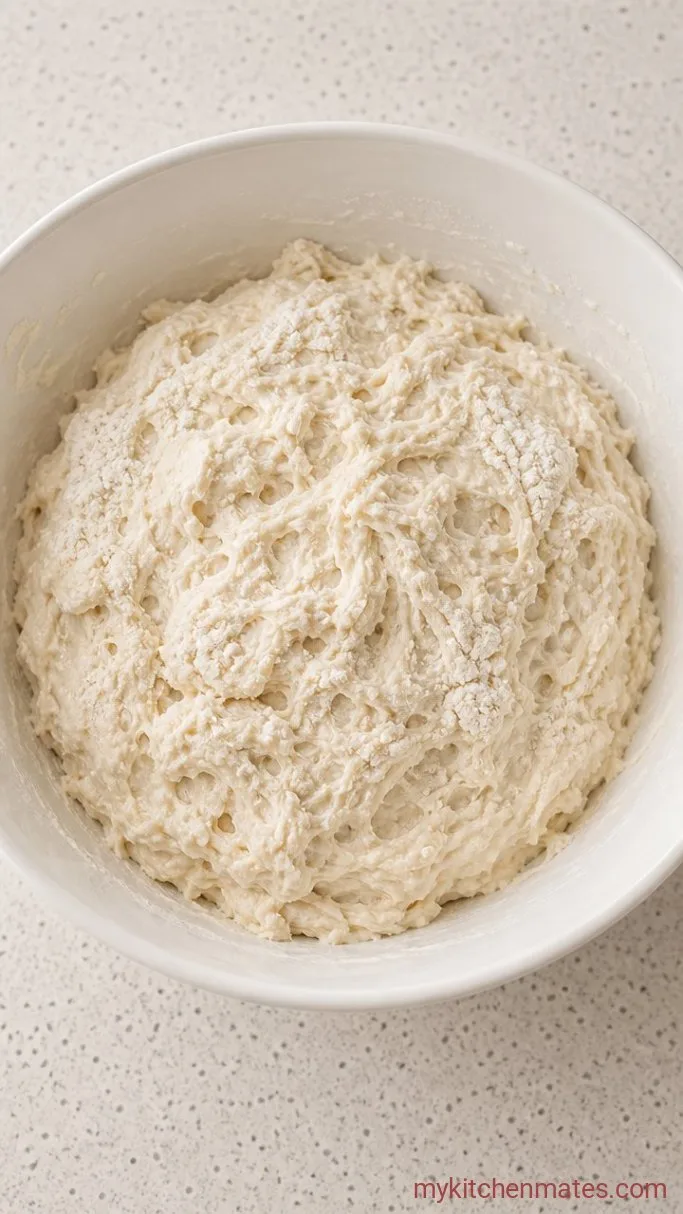
Pour the 500g bread flour and 350g warm water into a large bowl and stir with a dough whisk or spatula until no dry bits remain. Cover the bowl with a damp towel and let it rest for 30 minutes to an hour.
After that rest, the dough will look like a shaggy, lumpy mass, which is exactly right. The flour has absorbed the water and gluten bonds are already forming without any effort on your part.
Giving the flour and water this head start means the dough will handle more smoothly later and need far less kneading. Even if you only manage 30 minutes, it makes a difference.
Step 2: Incorporate the Starter
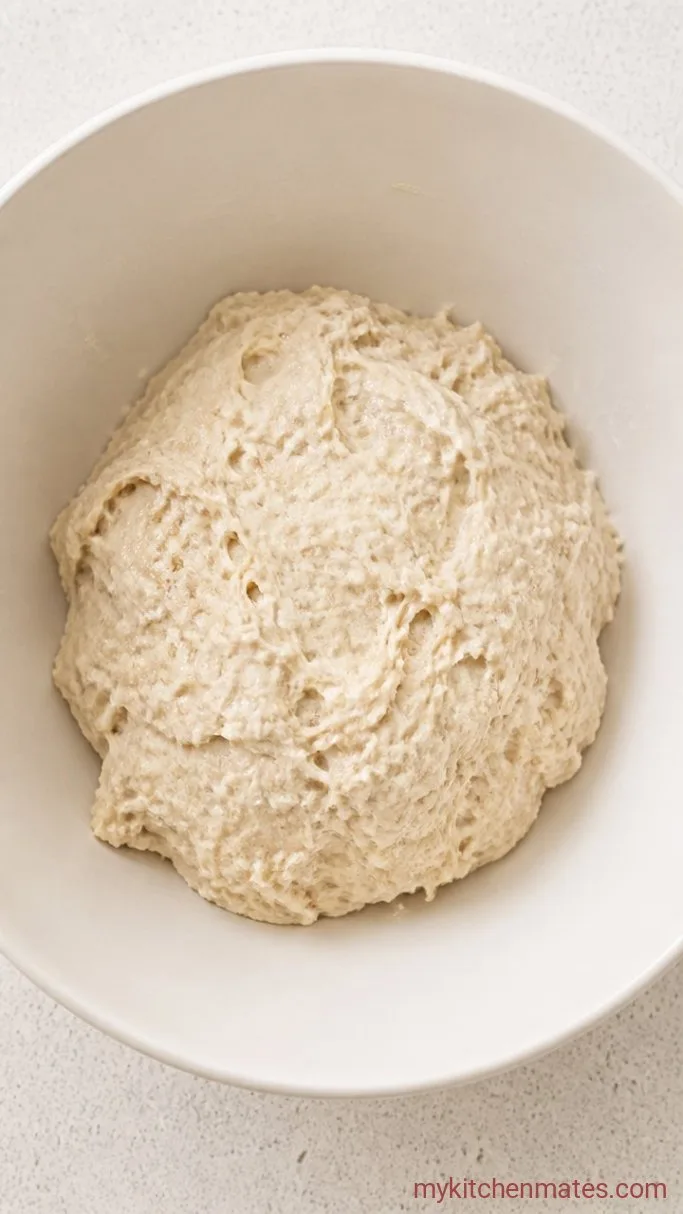
Add the 100g active sourdough starter to the autolyzed dough. Using wet hands, pinch and squeeze the starter into the dough, folding and pressing until it is evenly distributed and the mass starts to feel more cohesive.
The dough will go from fairly stiff and separate to a softer, slightly tacky ball after a minute or two of working it. Cover again and let it rest for 30 minutes to give the starter time to start feeding.
Resting after adding the starter lets the yeast get going before the salt goes in, which helps the rise later. The dough will look smoother around the edges after this short nap.
Step 3: Add Salt, Rosemary, and Garlic
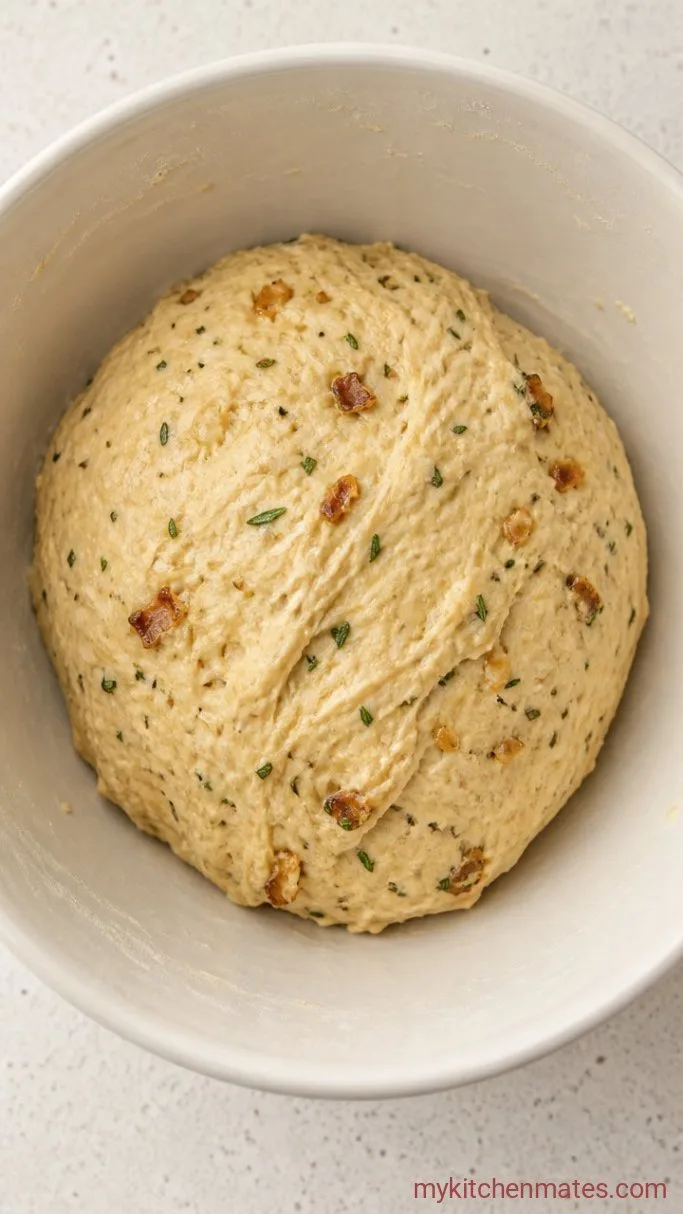
Sprinkle the 10g sea salt and the 3 tablespoons chopped rosemary over the surface of the dough, then dot it with the soft, roasted garlic cloves. Use your wet fingers to poke and fold everything into the dough, pressing the garlic into smaller flecks as you go.
The salt you should rub in well for an even distribution. The rosemary will feel like a lot, but it mellows during the long ferment and bakes into fragrant ribbons running through the loaf. The garlic will not stay in neat pieces; that is fine, little pockets of caramelized garlic throughout are what you want.
Take your time folding the dough over itself until you cannot see streaks of salt or large chunks of garlic. Another 30-minute covered rest follows, so the dough relaxes before the folds begin.
Step 4: Fold and Bulk Ferment Overnight
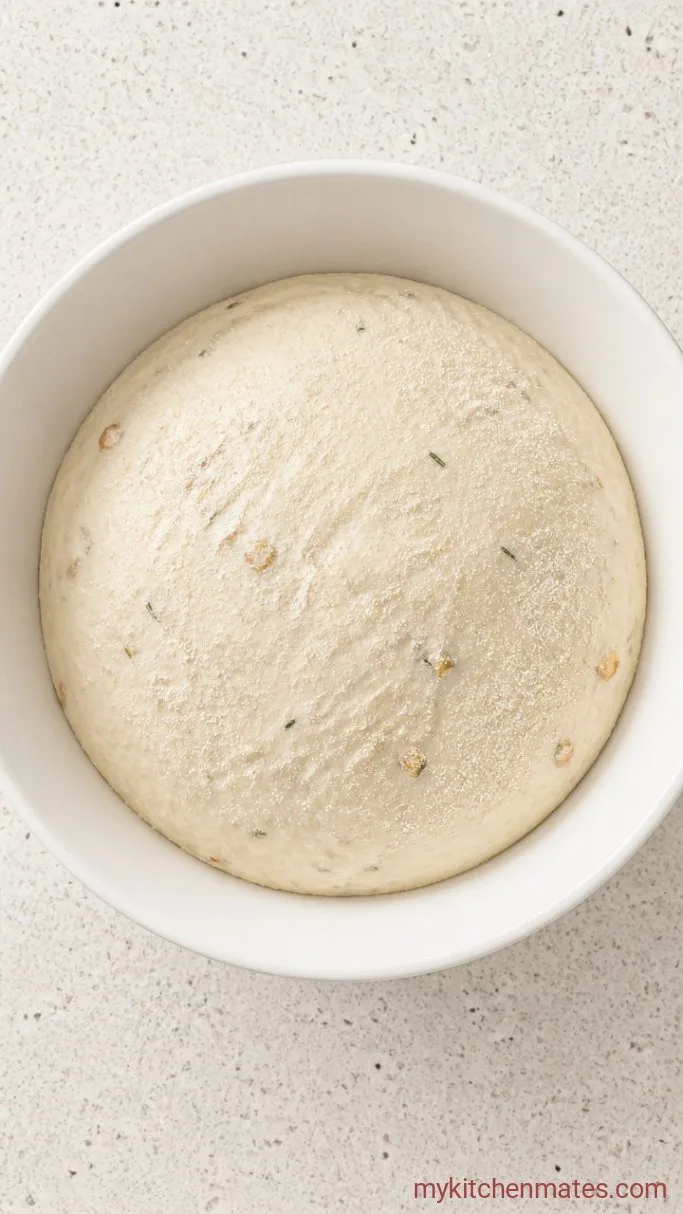
Over the next 2 hours, perform 4 sets of stretch and folds, one every 30 minutes. To do a set, grab one side of the dough with a wet hand, stretch it upward gently, and fold it over the center. Rotate the bowl and repeat until you have gone all the way around. After the final set, cover the bowl tightly and leave it on the counter to ferment overnight, 8 to 10 hours, at a cool room temperature around 68 to 70°F (20 to 21°C).
By morning, the dough will have nearly doubled and look domed and bubbly on top. When you jiggle the bowl, the whole mass should wobble like a water balloon. If it still feels dense after 10 hours, give it another hour and check again.
This is the most hands-off step and the one that builds the tangy flavor and open crumb. The yeast works slowly in the cool overnight environment, so you do not have to monitor a clock.
Step 5: Shape the Loaf
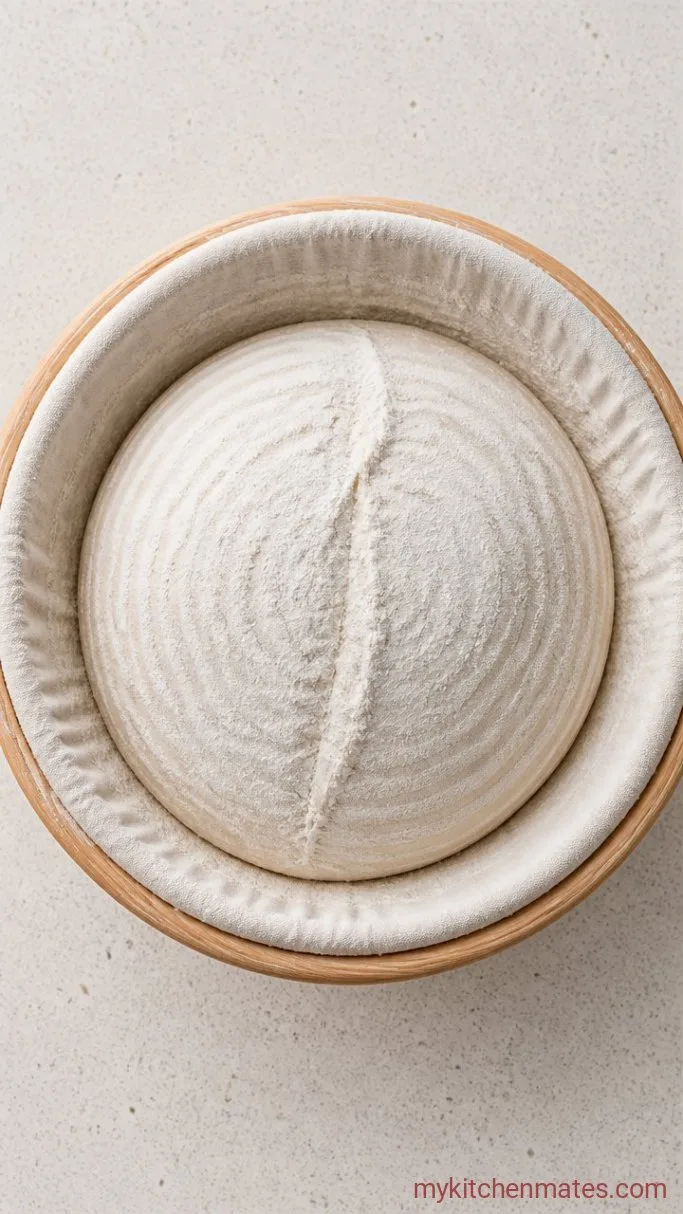
Turn the fermented dough out onto a lightly floured surface. Gently pull the edges into the center to form a loose round, then let it rest uncovered for 15 minutes. After the bench rest, shape the dough into a tight boule or batard by folding and rolling, creating surface tension on the outside. Place it seam side up in a floured banneton or a bowl lined with a floured tea towel, cover, and let it proof for 1 to 2 hours at room temperature until puffy and a fingertip dent springs back slowly.
A well-floured banneton makes a pretty spiral pattern and prevents sticking. If you want a more pronounced sour flavor and an easier scoring experience, instead of proofing on the counter, put the covered banneton straight into the refrigerator for a cold proof of up to 12 hours after shaping.
Either way, the loaf will feel lighter and look noticeably fuller after proofing. When you press it lightly, the indent should not stay deep; it should slowly fill back in partway.
Step 6: Score and Bake the Loaf

About 45 minutes before you want to bake, set a 4 to 6 quart Dutch oven with its lid inside the oven and preheat to 450°F (230°C). When the oven is hot, tip the proofed loaf onto a piece of parchment paper, gently dust off excess flour, and slash the top with a sharp lame or serrated knife. Use the parchment to lift the dough and lower it into the scorching Dutch oven, cover, and bake for 30 minutes. Remove the lid and continue baking another 15 to 20 minutes, until the crust is a deep amber and an instant-read thermometer poked into the center reads 205 to 210°F (96 to 99°C).
The slash is not just for looks; it directs the loaf’s expansion so it springs open dramatically. You will hear the baked crust crackle as soon as it hits the cooler air.
Lift the finished loaf out with the parchment, set it on a wire rack, and let it cool for at least an hour. The wait is the hardest part, but cutting into the bread while it is still steaming hot turns the crumb gummy, and that beautiful open texture you worked for will squish flat.
Tips for a Tall, Open-Crumb Loaf
- Give the roasted garlic a quick smash with the side of your knife before adding it so no entire clove goes in whole. Small spreadable bits distribute better.
- If your kitchen runs cold at night, turn the oven light on and ferment the dough inside the oven with the door cracked open a couple of inches. It creates a cozy 75 to 80°F spot.
- Too much flour on the banneton can make a dry, tough skin that hinders oven spring. Use just enough to prevent sticking.
- For a softer crust that isn’t quite so shatteringly crisp, brush the hot loaf with a little melted butter as it cools. It will soften within an hour.
Bake times depend a little on your setup. Here is a rough guide:
| Baking method | Covered time | Uncovered time | Internal temp |
|---|---|---|---|
| Dutch oven (5qt) | 30 mins | 15-20 mins | 205-210°F (96-99°C) |
| Baking stone with steam | 15 mins | 25-30 mins | 205-210°F (96-99°C) |
Keeping Sourdough Fresh
- Refrigerate: wrap the cooled loaf in a clean tea towel or beeswax wrap and keep it on the counter for 2 days, then move to the fridge for up to 5 days. Sourdough stays fresher longer than yeasted bread.
- Reheating: to bring back the crisp crust, pop slices in a 350°F (175°C) oven for 5 minutes or toast them directly. Avoid the microwave if you can; it turns the crumb chewy in the wrong way.
- Freeze: slice the bread first, then freeze slices in a zip-top bag for up to 3 months. You can grab a slice and toast it straight from frozen.
What To Serve With Rosemary Garlic Sourdough
A bowl of creamy tomato soup is a classic, letting you soak up every last drop. For something heartier, this bread alongside garlicky shrimp pasta means there’s barely a plate left to clean. It’s also excellent on a cheese board with a wedge of nutty gruyère and a drizzle of honey, the sweet and savory notes bouncing off the herbs.
Frequently Asked Questions
Can I use active dry yeast instead of a sourdough starter?
Yes, but you will not get the same tang or chew. Use 1 teaspoon of active dry yeast, reduce the water to 300g, and do not ferment overnight—bulk ferment for 2 to 3 hours at room temperature until doubled instead.
Can I make this without a banneton?
Absolutely. Line a medium bowl with a clean kitchen towel and dust it generously with a 50/50 mix of rice flour and all-purpose flour. The rice flour prevents sticking better than wheat flour alone.
Why did my loaf spread out flat instead of rising tall?
A weak starter is the most common cause. Run a float test before you bake: a teaspoon of starter dropped in a glass of water should bob on the surface. Also check that you built enough dough tension during shaping; a loose boule cannot hold its form in the oven.
Overnight Rosemary Garlic Sourdough Bread Recipe
Ingredients
Method
- Stir flour and warm water together, cover, and rest 30 to 60 minutes.
- Pinch and squeeze the starter into the dough until cohesive, cover, and rest 30 minutes.
- Sprinkle in the salt, rosemary, and roasted garlic, fold to distribute, cover, and rest 30 minutes.
- Perform 4 sets of stretch and folds over 2 hours, then cover and bulk ferment on the counter for 8 to 10 hours overnight.
- Turn out onto a floured surface, pre-shape, rest 15 minutes, shape tightly, and place seam side up in a floured banneton. Proof 1 to 2 hours at room temperature or refrigerate overnight.
- Preheat a Dutch oven in a 450°F (230°C) oven for 45 minutes, transfer the scored loaf to the hot pot, bake covered 30 minutes, uncovered 15 to 20 minutes, and cool fully on a rack.
Notes
