
Roasted Garlic Sourdough Bread with a Buttery, Crisp Crust

This roasted garlic sourdough bread folds mellow, caramelized cloves into a tangy, open-crumbed loaf that fills the kitchen with a smell you have to experience to believe.
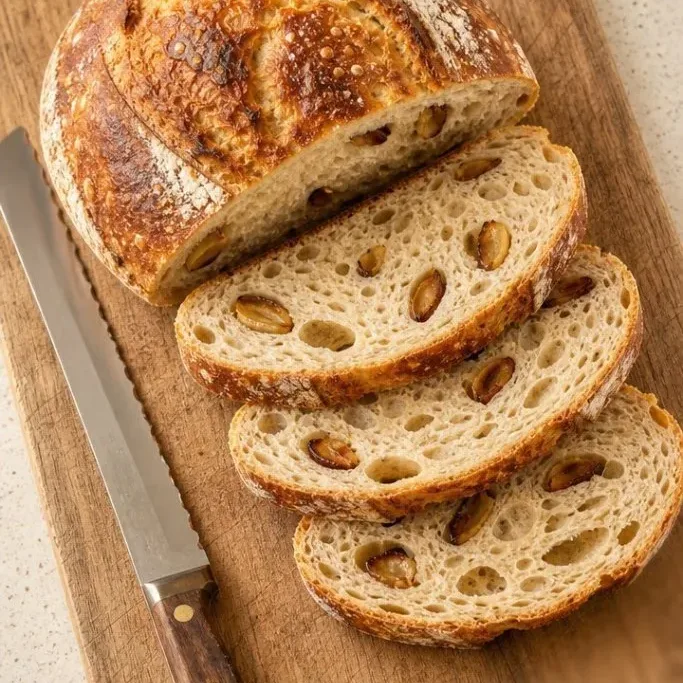
The dough is straightforward to handle, and the garlic blends into the crumb without leaving gummy pockets. Slice it warm and watch it disappear.
Why This Sourdough Works Every Time
Roasting the garlic turns it sweet and buttery, so it melts into the dough instead of fighting the gluten. You still get a lofty, chewy crumb with an airy structure, but every bite carries that deep, savory garlic flavor.
The crust shatters under a knife, thanks to baking in a steaming hot Dutch oven, and the loaf stays soft inside for days. It is the one I keep coming back to when I want a bread that does something special but never fussy.
Ingredients

- 3 cups (375g) bread flour: gives the loaf strength and chew; you can swap up to half with all-purpose flour in a pinch
- 1 cup (120g) all-purpose flour: softens the crumb a little
- 1 1/2 cups (340g) water, room temperature: filtered or spring water works best
- 1/2 cup (100g) active sourdough starter: bubbly and doubled in volume
- 2 tsp fine sea salt: do not skip it, it balances the garlic’s sweetness
- 1 whole head garlic: roasted until soft and caramelized
- 1 tbsp olive oil: for roasting the garlic
- 2 tbsp unsalted butter, melted: for brushing the hot crust
Variations / Substitutions
- Use fresh herbs: fold 1 tbsp chopped rosemary or thyme in with the garlic for an herbal lift
- Add cheese: press 1/2 cup cubed sharp cheddar or gruyère into the dough during the last stretch and fold for rich, savory pockets
- Make it dairy free: skip the butter brush and rub the hot crust with a little olive oil instead
- Switch the flour: replace up to half the bread flour with whole wheat flour; the loaf will be earthier and denser, but still delicious
Mediterranean White Bean Soup goes perfectly with this bread for a cozy meal.
How to Make Roasted Garlic Sourdough Bread
Step 1: Roast the Garlic
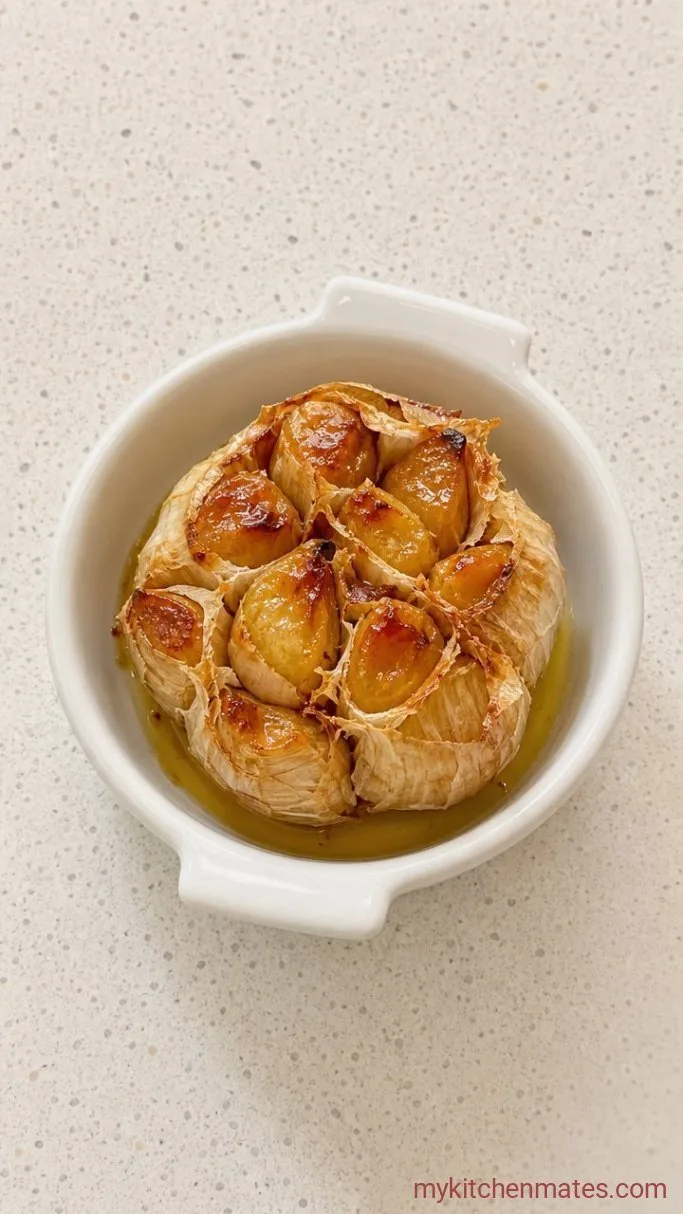
Preheat your oven to 400°F (200°C). Slice the top 1/4 inch off the head of garlic to expose the cloves, set it on a square of foil, and drizzle the 1 tbsp olive oil over the cut side. Wrap the foil up tightly into a packet and roast for 45 minutes, until the cloves are completely soft and lightly golden.
When you unwrap the packet, the kitchen will smell sweet and nutty, and the cloves will squeeze out of their skins without any resistance. The skins will be papery and the garlic inside will look translucent and caramelized.
Roasting tames the sharp bite of raw garlic, which is key here. Raw cloves would tear the gluten and leave harsh, uneven pockets of flavor. The caramelized version blends into the dough smoothly and gives the bread a deep, savory warmth.
Step 2: Mix the Dough
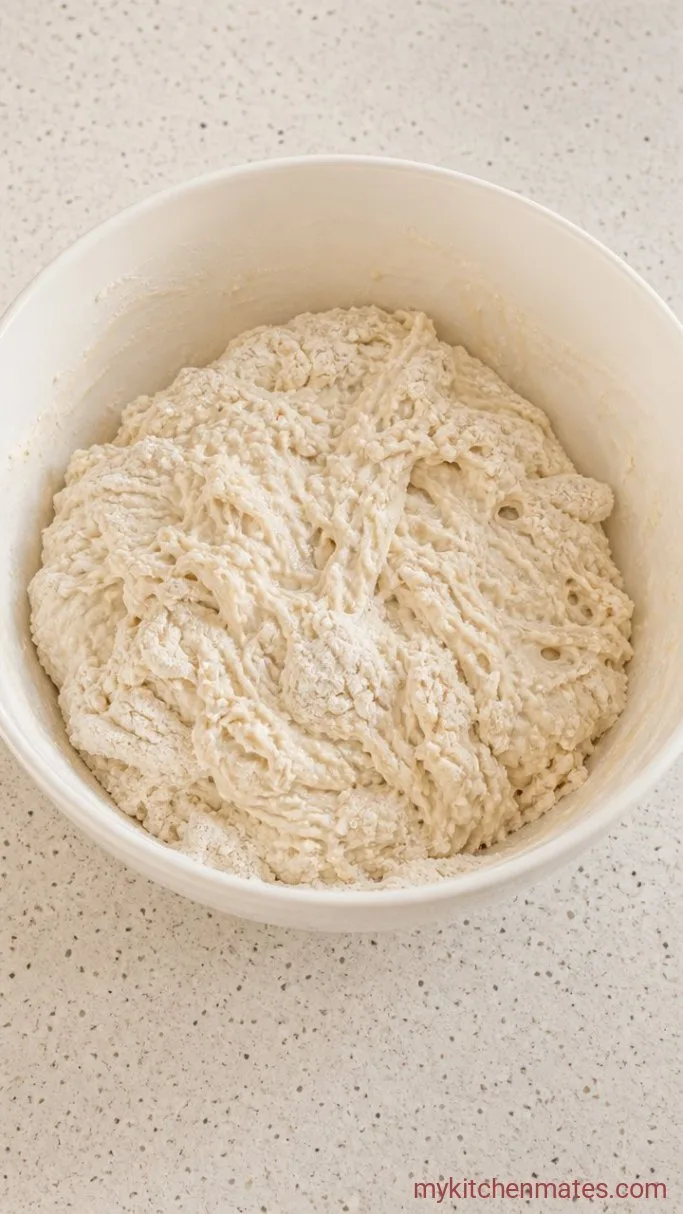
In a large bowl, whisk the 1/2 cup active starter into the 1 1/2 cups water until it looks like cloudy milk. Add both flours and the 2 tsp salt, then stir with a sturdy spatula or your hand until no dry bits remain. The dough will be shaggy and sticky. Cover the bowl with a damp towel and let it rest for 30 minutes. This short rest, called an autolyse, lets the flour fully hydrate and starts building gluten on its own.
After 30 minutes, the dough will feel slightly softer and a little less sticky, though it will still look rough. Do not add extra flour. Resist the urge, because a higher hydration dough gives you the open, irregular crumb you want in sourdough.
Trust the process. The next step will bring it all together, and by the end, the dough will feel smooth and pillowy.
Step 3: Fold the Dough with Roasted Garlic
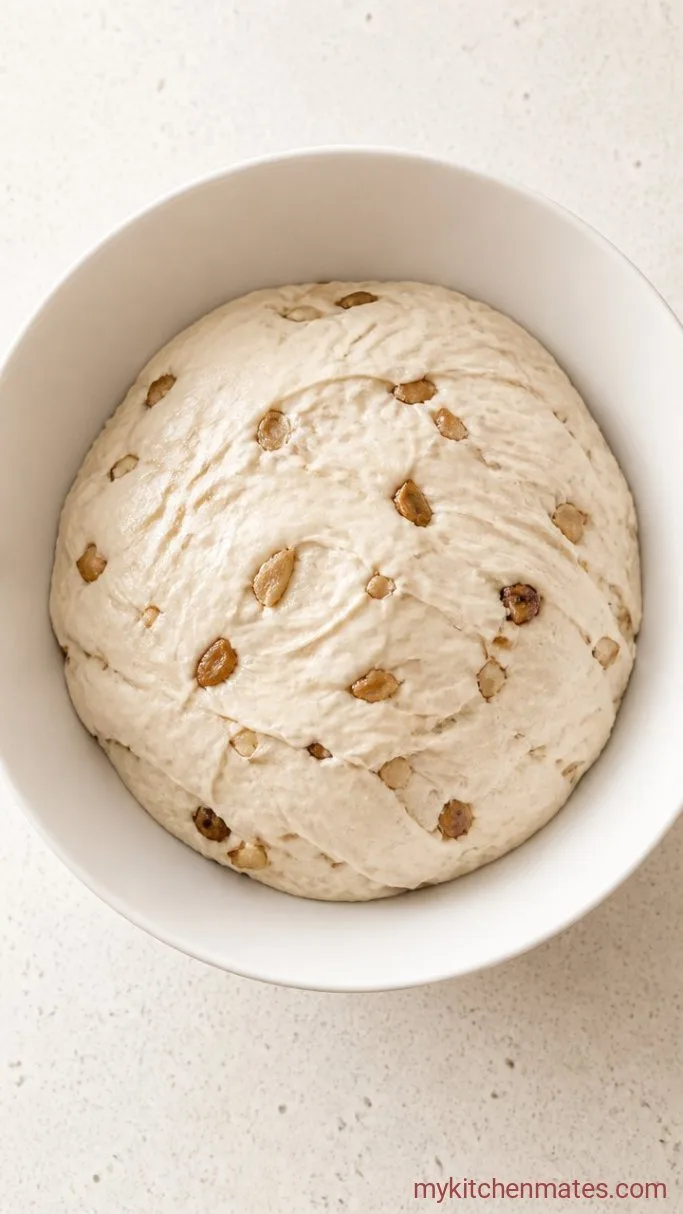
Squeeze all the roasted garlic cloves out of their skins directly onto the dough. With a wet hand, perform your first set of stretch and folds: grab one side of the dough, stretch it up and fold it over itself, give the bowl a quarter turn, and repeat until you have done 4 folds. The garlic will smash and smear into the dough as you go. Cover again and rest 30 minutes.
Over the next 2 hours, repeat the stretch and fold two more times, every 30 minutes. With each set, the dough will become smoother, more elastic, and the garlic will disperse into little creamy flecks. After the final fold, cover and let the dough bulk ferment at room temperature until it has increased by about 50 to 75 percent and the surface looks bubbly. This usually takes another 2 to 3 hours, depending on the warmth of your kitchen.
A cooler room slows everything down, and that is okay. Pay attention to how the dough jiggles when you shake the bowl and whether you see air bubbles just under the surface. If your kitchen runs cold, tuck the bowl into an oven with just the light on to speed things up gently.
Step 4: Shape the Loaf
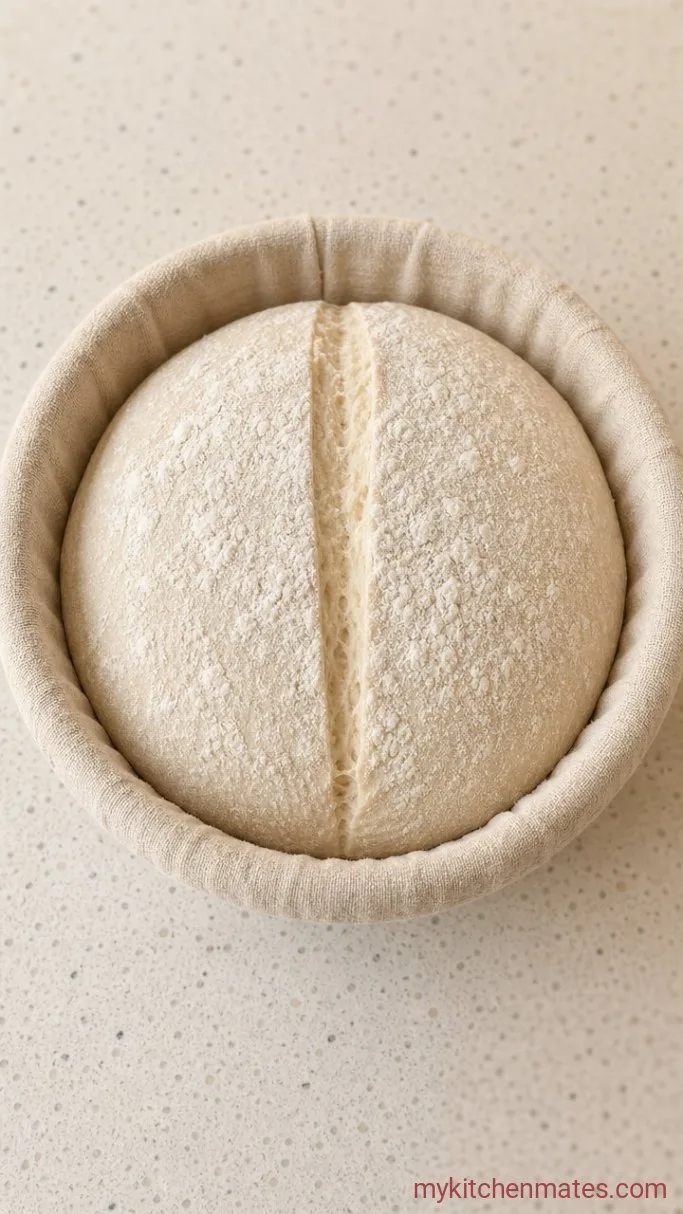
Turn the dough out onto a lightly floured work surface. Using floured hands, gently pull the edges toward the center to create a round, then flip it seam side down. Cup your hands around the dough and drag it in a circular motion across the counter to build surface tension. You will feel the dough tighten into a smooth ball under your palms.
Dust a banneton or a bowl lined with a clean, floured tea towel with a little extra flour. Place the dough seam side up into the basket, cover loosely with plastic wrap or a damp towel, and move it to the refrigerator. Let it cold-proof overnight, anywhere from 8 to 18 hours.
A long, cold proof not only deepens the tangy flavor but also firms the dough, which makes scoring much cleaner the next day. If you need it sooner, let the shaped loaf proof at room temperature for about 2 hours, until it passes the poke test.
Step 5: Bake in a Dutch Oven
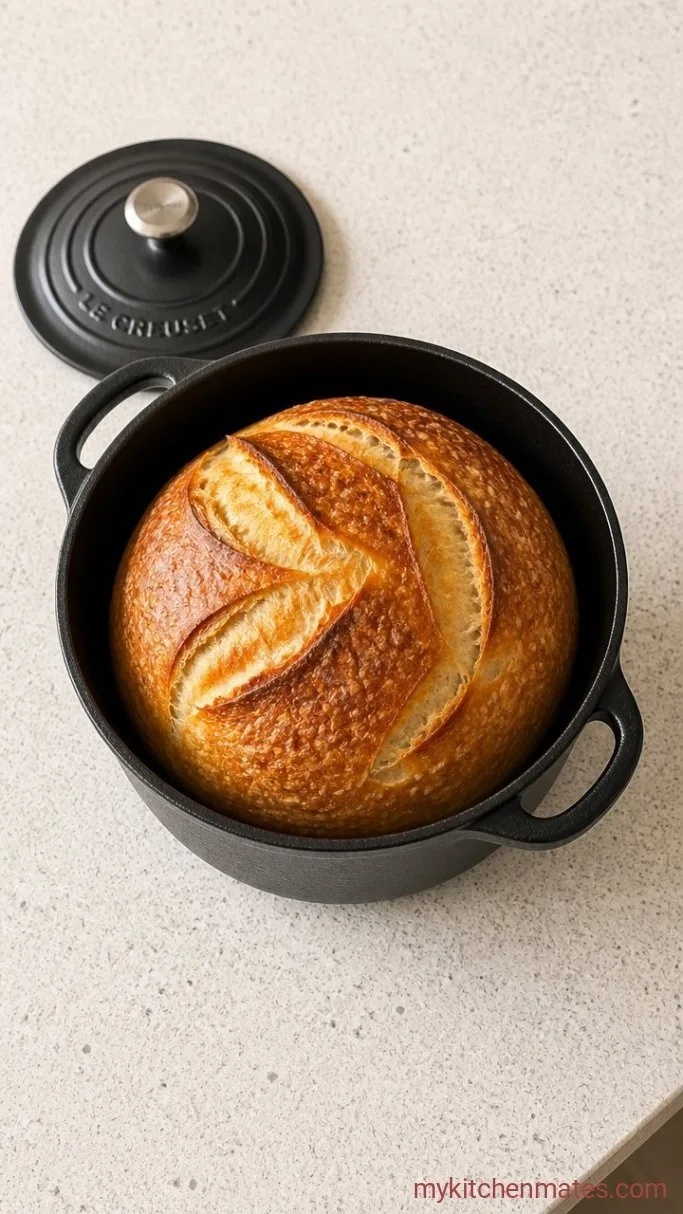
Place a Dutch oven with its lid into the oven and preheat to 500°F (260°C) for at least 30 minutes. When the pot is screaming hot, remove the dough from the fridge. Turn it out onto a sheet of parchment paper, dust the top lightly with flour, and score a deep slash across the surface with a sharp blade. Quickly lift the dough by the parchment and lower it into the hot pot. Cover with the lid and bake for 20 minutes.
After 20 minutes, remove the lid, reduce the oven temperature to 450°F (232°C), and bake for another 20 to 25 minutes. When you take the lid off, the loaf will have sprung dramatically, and the crust will be pale gold. In the next phase, it will deepen to a crackly, deep mahogany.
The steam trapped inside the covered pot is what gives the bread its dramatic oven spring and blistered crust. If you want an even thicker crust, spritz the loaf with water right before closing the lid.
Step 6: Slice and Serve
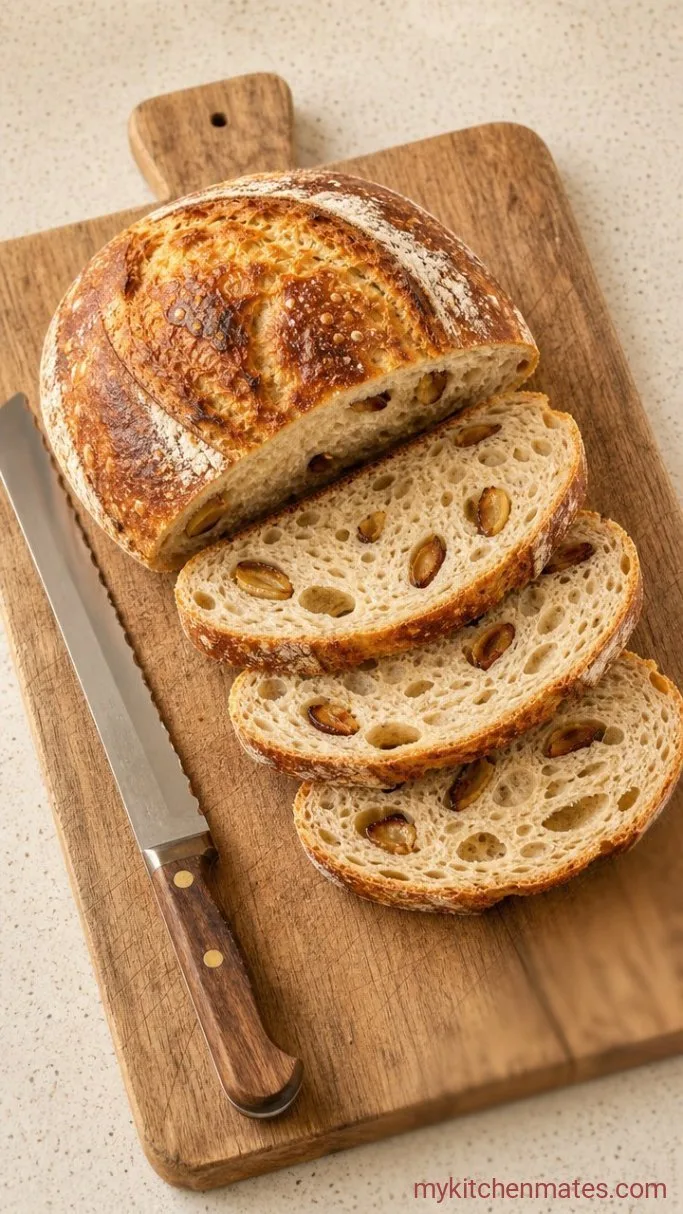
Transfer the finished loaf to a wire rack and let it cool for at least 1 full hour. The wait is hard, but cutting into hot bread will make the crumb gummy. Once it has rested, take a long serrated knife and slice through that shattering crust. The inside will be open and airy, with golden swirls of roasted garlic throughout.
Serve the slices warm, with a smear of good butter, and watch the steam curl up. The crust will crackle under the knife, and the kitchen will fill with that toasty, garlicky smell all over again.
Tips for the Best Roasted Garlic Loaf
- Weigh your ingredients instead of using cups for the flours. A few extra grams of flour can make the dough too stiff.
- A sharp lame or a simple razor blade gives you much cleaner scores than a paring knife. Draw the cut quickly without pressing down.
- Brush the hot crust with melted salted butter as soon as it comes out of the oven. It will soak in and leave the top glossy and even more savory.
- If the dough feels too sticky to shape comfortably, chill it in the refrigerator for 30 minutes first. The cold firms up the gluten and makes handling much easier.
- For an extra tangy flavor with a more pronounced sour note, extend the cold proof to 18 hours.
Keeping Leftover Sourdough Fresh
- Room temperature: wrap the cut loaf in a clean tea towel or store it in a bread bag for up to 3 days. Keep the cut side facedown on a board.
- Freeze: slice the bread completely, then freeze the slices in a single layer inside a zip-top bag. Toast them straight from frozen.
- Reheating: to revive the crust on a whole loaf, mist it lightly with water and warm in a 350°F (175°C) oven for 10 minutes.
What to Serve with Roasted Garlic Sourdough
A bowl of creamy tomato soup is made for dunking. The bread soaks up the broth without disintegrating, and the garlic threads right through every bite. For a larger meal, serve thick slices alongside braised short ribs or a slow-cooked pot roast. The tangy crumb cuts through rich meat and gravy perfectly, turning a simple loaf into something the whole table reaches for.
Frequently Asked Questions
Can I use jarred roasted garlic?
I would not. Jarred garlic often has a softer texture and an acidic aftertaste that can throw off the bread’s flavor. Freshly roasted heads are sweeter and blend into the dough more cleanly.
Why did my bread not rise during baking?
The most common culprit is a starter that was not bubbly and active when you mixed the dough. Make sure your starter doubles in volume within 4 to 6 hours of feeding before you use it.
Can I add cheese to this bread?
Yes. Fold in about 1/2 cup of cubed sharp cheddar or gruyère during the last stretch and fold before bulk fermentation ends. The cheese will melt into little savory pockets.
How do I know when bulk fermentation is done?
Look for a dough that jiggles when you shake the bowl and has visible bubbles just under the surface. It should have grown by about 50 to 75 percent in volume, not necessarily doubled.
Can I skip the overnight cold proof?
You can. Shape the loaf and let it proof at room temperature for 2 to 3 hours, until a gentle poke springs back slowly. The flavor will be milder and less tangy, but the loaf will still bake up beautifully.
Roasted Garlic Sourdough Bread Recipe
Ingredients
Method
- Preheat oven to 400°F. Slice top off garlic, drizzle with olive oil, wrap in foil, and roast 45 minutes until soft.
- Whisk starter into water, then add both flours and salt. Mix to a shaggy dough, cover, and rest 30 minutes.
- Squeeze roasted garlic cloves onto dough. Perform stretch and folds every 30 minutes for 2 hours (3 sets total), then bulk ferment until increased by 50 to 75 percent.
- Turn dough onto floured surface, shape into a tight boule, and place seam side up in a floured banneton. Cold-proof in the refrigerator overnight or for up to 18 hours.
- Preheat Dutch oven at 500°F for 30 minutes. Turn dough onto parchment, score, and lower into the hot pot. Cover, bake 20 minutes, then uncover, reduce to 450°F, and bake 20 to 25 minutes until deep golden.
- Cool on a wire rack for at least 1 hour, then slice with a serrated knife and serve warm.
Notes
