
Baked Red Velvet Cheesecake with a Chocolate Cookie Crust

This baked red velvet cheesecake blends tangy cream cheese, deep cocoa, and a hint of buttermilk into a striking scarlet dessert on a chocolate cookie crust.
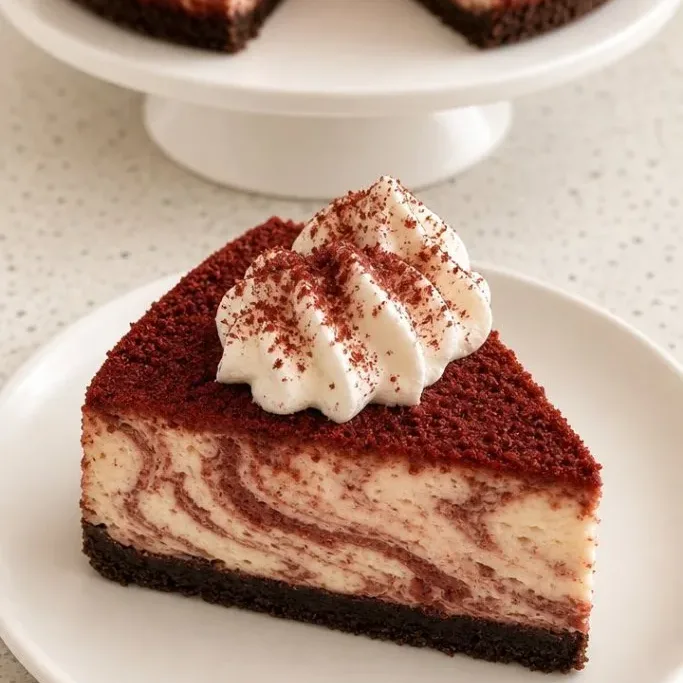
It’s rich but balanced, and a stunner on any table without needing to stack a layered cake.
Why This Cheesecake Works
The buttermilk and vinegar give the cheesecake a gentle tang that cuts through the richness, so it never tastes heavy. The cocoa is just enough for a subtle chocolate note without overwhelming the cream cheese.
A dark chocolate cookie crust adds contrast, both in color and texture, and its bitterness keeps the whole dessert from being too sweet.
Ingredients

- 8 oz chocolate wafer cookies: Nabisco Famous Wafers or chocolate graham crackers work well
- 1/4 cup granulated sugar: for the crust
- 6 tbsp unsalted butter, melted: binds the crust
- 24 oz full-fat cream cheese, softened: use block cream cheese, not spread
- 1 cup granulated sugar: balances the tang
- 1/4 cup Dutch process cocoa powder: gives a deep red-brown color and rich taste
- 1/2 cup buttermilk, room temperature: adds moisture and a slight tang
- 1 tbsp vanilla extract: rounds out the flavors
- 1 tsp white vinegar: enhances the red velvet character
- 2 tbsp red gel food coloring: gel gives the most vivid color without thinning the batter
- 3 large eggs, room temperature: incorporate slowly so the batter stays smooth
- 2 tbsp cornstarch: helps prevent cracks and sets the texture
- 1/4 tsp salt: lifts all the flavors
Variations / Substitutions
- Chocolate sandwich cookies: swap the wafers for Oreos, keeping the filling, and reduce the melted butter to 5 tbsp
- Natural color: use 1 tbsp beet powder or freeze-dried raspberry powder; the red will be more muted
- No swirl: skip the plain batter reserve and color the entire batch red for a solid cheesecake
- Cream cheese frosting: spread a thin layer of tangy cream cheese frosting fully on top after chilling, before slicing
Lemon Cheesecake Bars are next on our list if this cheesecake is your kind of dessert.
How to Make Baked Red Velvet Cheesecake
Step 1: Make the Crust

Preheat your oven to 350°F. Drop the 8 oz chocolate wafer cookies into a food processor and pulse until you have fine crumbs. Pour them into a bowl and stir in the 1/4 cup sugar and the 6 tbsp melted butter until the mixture feels like damp sand.
Press the crumbs firmly into the bottom of a 9-inch springform pan. Use the flat bottom of a measuring cup to pack it evenly. Slide the pan into the oven for 10 minutes, then set it aside to cool and lower the oven temperature to 325°F.
Step 2: Mix the Batter

Take the 24 oz softened cream cheese and beat it in a large bowl with a hand mixer or in a stand mixer on medium speed until it’s smooth and lump-free, about 2 minutes. Scrape down the bowl and add the 1 cup sugar, then mix just until combined.
Add the 1/4 cup cocoa powder, 1/2 cup buttermilk, 1 tbsp vanilla, 1 tsp vinegar, and 1/4 tsp salt. Beat on low speed until everything is incorporated and the batter is uniform. Stop to scrape the sides again so no streaks of white cream cheese hide underneath.
Step 3: Color and Swirl the Batter

Remove 1 cup of the plain batter and set it aside in a small bowl. Add the 2 tbsp red gel food coloring to the remaining batter and mix on low until the color is evenly distributed and a deep red.
Sprinkle the 2 tbsp cornstarch over the red batter and mix on low for a few seconds, then add the 3 eggs one at a time, mixing each on low just until the yolk disappears. Do not overbeat. Drop spoonfuls of the reserved plain batter over the red batter, then pour everything into the chilled crust. Gently drag a butter knife through the batter in figure-eight motions to create soft swirls. Tap the pan on the counter once to release any trapped air bubbles.
Step 4: Bake the Cheesecake

Wrap the outside of the springform pan with two layers of heavy-duty foil, pressing it tight so no water seeps in. Place the pan inside a large roasting pan, then put it on the middle rack of the oven. Carefully pour hot water into the roasting pan until it reaches about halfway up the sides of the springform.
Bake at 325°F for 60 to 70 minutes. The edges will look set and puffed, and a 2-inch circle in the center will still wobble slightly when you nudge the pan. Turn off the oven, crack the door a few inches, and leave the cheesecake inside for 1 hour to cool gently.
Step 5: Chill the Cheesecake

Lift the springform out of the water bath and remove the foil. Let it cool completely on a wire rack. Once it reaches room temperature, cover the top loosely with plastic wrap and place it in the refrigerator.
Chill for at least 6 hours, but overnight is best. The texture firms up, the red deepens, and the tangy cocoa notes settle into something lush and balanced.
Step 6: Slice and Top with Whipped Cream

Slide a thin knife around the edge of the pan and release the sides. Transfer the cheesecake to a serving plate. Pipe swirls of lightly sweetened whipped cream around the border and scatter a few chocolate cookie crumbs in the center if you like.
Cut into slices with a knife dipped in hot water and wiped clean between cuts. The inside will be creamy, the swirls visible, and the crust dark and crisp.
Tips for a Crack-Free Cheesecake
- All your dairy and eggs should be at room temperature so the batter blends without curdling.
- Use gel food coloring, not liquid, to get a powerful red without adding extra liquid that can thin the batter.
- To slice cleanly, dip a long sharp knife in hot water and dry it between each cut.
- For the firmest crust, use chocolate sandwich cookies with their filling and cut the melted butter back by 1 tbsp.
Bake times by pan size:
| Pan Size | With Water Bath | Without Water Bath |
|---|---|---|
| 9-inch springform | 60–70 mins | 50–55 mins |
| 8-inch springform | 70–80 mins | 60–65 mins |
Storing Leftovers
Refrigerate the cheesecake tightly covered for up to 5 days. It stays creamy and the crust holds its crunch. For longer storage, wrap the whole cheesecake or individual slices in plastic and then foil, and freeze for up to 2 months. Thaw overnight in the fridge before serving.
Frequently Asked Questions
Can I make this without a water bath?
Yes, but the top may crack more easily. A water bath provides gentle, even heat that keeps the surface smooth.
Why is my cheesecake brown instead of red?
Dutch process cocoa delivers a darker color that pairs well with red gel, but overbaking can dull the red. Pull the cheesecake when the center still has a soft jiggle.
How far in advance can I make it?
You can make it up to 2 days ahead. The flavor actually improves as it chills, so it’s a perfect dessert for a party.
Can I top it with cream cheese frosting instead of whipped cream?
Absolutely. Spread a thin layer of tangy cream cheese frosting on the chilled cheesecake before slicing for an extra rich finish.
Baked Red Velvet Cheesecake Recipe
Ingredients
Method
- Preheat oven to 350°F. Pulse cookies into fine crumbs, mix with 1/4 cup sugar and melted butter, and press into a 9-inch springform pan. Bake 10 minutes, then cool and reduce oven to 325°F.
- Beat cream cheese until smooth, add 1 cup sugar, cocoa, buttermilk, vanilla, vinegar, salt, and mix on low. Reserve 1 cup plain batter.
- Add red gel coloring and cornstarch to the remaining batter, then beat in eggs one at a time on low. Drop plain batter over the red, pour into crust, and swirl with a knife.
- Wrap pan in foil, set in a roasting pan, and add hot water halfway up. Bake at 325°F for 60–70 minutes until edges are set and center jiggles slightly.
- Turn off oven, crack door, and let cheesecake cool inside for 1 hour. Remove from water bath, cool to room temperature, then cover and refrigerate for at least 6 hours, ideally overnight.
- Remove pan sides, top with whipped cream, and slice with a hot knife.
Notes
