
No-Knead Overnight Sourdough Bread

No-knead overnight sourdough bread gives you a deep, tangy flavor and a shatteringly crisp crust with just four ingredients and a few minutes of hands-on work.
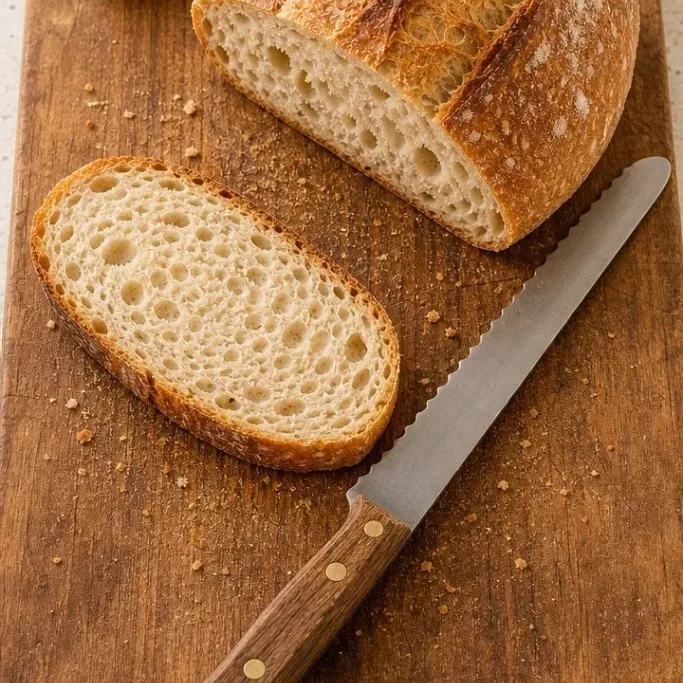
Mix it up before bed, let the dough ferment while you sleep, and bake a loaf that smells like your favorite bakery.
Why This No-Knead Sourdough Works
The long overnight fermentation keeps the flavor mild and tangy without being aggressively sour. The crumb is open and chewy, dotted with irregular holes, and the crust crackles loudly as it cools.
I love how little actual labor this method asks of you. A quick mix and a few folds in the first hour, then the yeast does the rest while you sleep. In the morning you shape, proof, and bake to a glossy, deep brown shell.
With a kitchen scale and a patient hand, this bread turns out tall, airy, and deeply satisfying every time.
Ingredients
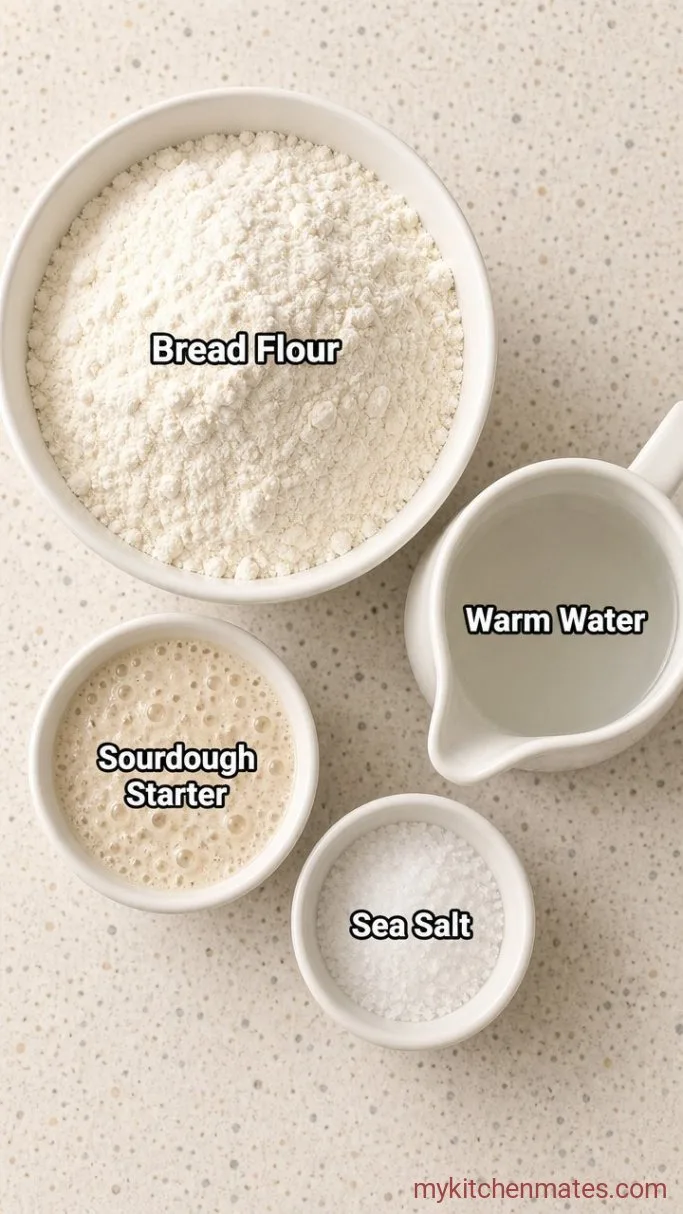
- 4 cups (500g) bread flour: a high-protein flour gives the chewiest crumb and best rise; all-purpose works but yields a softer loaf.
- 1½ cups (360g) warm water: about 85°F (29°C) to encourage fermentation.
- ½ cup (100g) active sourdough starter: fed and bubbly, at its peak.
- 2 teaspoons (12g) fine sea salt: for flavor and gluten strength.
Variations / Substitutions
- Swap up to 1 cup bread flour for whole wheat or rye: adds a nutty, earthy flavor and a slightly denser crumb.
- Add ½ cup seeds or oats: fold in sunflower seeds, sesame seeds, or rolled oats after the overnight fermentation for a seeded loaf.
- No sourdough starter?: you can use a poolish or biga, but the tang will be much milder. For a sourdough-free option, try my No-Knead Dutch Oven Bread.
Slow-Simmered Beef and Mushroom Stew makes a comforting soup to pair with this bread.
How To Make No-Knead Overnight Sourdough Bread
Step 1: Mix and Fold the Dough

In a large bowl, combine the 500g bread flour and 12g salt. Pour in the 360g warm water and 100g active starter. Mix with a dough whisk or your wet hands until no dry flour remains. Cover with a damp towel and let it rest for 30 minutes. This autolyse helps the flour hydrate and starts gluten development.
After the rest, the dough will look shaggy and rough, but it should feel softer and more pliable. With wet hands, grab a piece of dough from one side, stretch it upward, and fold it over the center. Rotate the bowl a quarter turn and repeat until you have done all four sides.
Cover the bowl again and let it rest 30 minutes. Perform two more sets of stretch and folds, spaced 30 minutes apart. By the last set, the dough will feel noticeably smoother and more elastic. This small effort builds enough gluten strength without any kneading.
Step 2: Let It Rise Overnight

Cover the bowl tightly with plastic wrap or a snug lid and leave it on the counter at room temperature (about 68°F to 72°F / 20°C to 22°C) for 10 to 12 hours. The dough will puff up and nearly triple in size, with a network of small bubbles visible on the surface.
In the morning, the surface will be domed and glossy, and you will smell a pleasant, gently sour aroma. Give the bowl a gentle shake. The dough should wobble like a water balloon, a sign of a strong gluten network.
If your kitchen is cool, the rise will take longer. In a very warm kitchen (above 75°F), check after 8 hours to avoid overproofing. The dough is ready when it has increased dramatically in volume and a jiggle of the bowl sends a ripple through it.
Step 3: Shape the Loaf

Turn the dough out onto a lightly floured surface. Use a bench scraper or your hands to gently pull the sides outward into a rough rectangle, being careful not to deflate it. Fold the top third down toward the center, then fold the bottom third up, like a letter. Next, fold the left and right sides inward to form a round.
Flip the round seam-side down and cup both hands around it. Pull the dough toward you in a circular motion to build surface tension. The dough will feel tight and smooth, and you will see a taut skin forming on the outside.
This tension is what gives the loaf a tall rise and a nice ear. If the surface feels sticky, dust your hands and the dough lightly with bread flour. Once shaped, let it rest seam-side down for a few minutes while you prepare the banneton or bowl for proofing.
Step 4: Proof the Dough

Line a banneton or a medium bowl with a clean, floured tea towel. Gently transfer the dough into it seam-side up. Dust the top with a little flour and cover loosely with plastic wrap. Let it proof at room temperature for 1 to 2 hours, until it is puffy and a gentle poke with a floured finger leaves an indentation that slowly springs back.
During this proof, the dough should grow by about half, not double. Look for a dome that feels airy and light. If the indentation springs back quickly, it needs more time; if it collapses, the dough has overproofed.
About 30 minutes before the proof is done, place a Dutch oven with its lid inside the oven and preheat to 450°F (230°C). A thoroughly heated pot creates the initial burst of steam that makes a crackling crust.
Step 5: Bake the Bread

When the oven and pot are screaming hot, carefully remove the Dutch oven. Uncover the dough, lay a piece of parchment over the banneton, invert it onto the parchment, and peel off the towel. Use a lame or sharp knife to score the top with one decisive slash, about ½ inch deep. Lower the dough on the parchment into the hot pot, put the lid on, and bake for 25 minutes.
After 25 minutes, remove the lid. The loaf will have risen and turned pale golden. Continue baking uncovered for 15 minutes more, until the crust is a deep, dark brown and sounds hollow when tapped on the bottom.
If your oven runs hot, check the color after 10 minutes uncovered and lower the temperature to 425°F if it is browning too fast. The internal temperature of the finished loaf should sit around 205°F to 210°F (96°C to 99°C).
Step 6: Slice and Serve

Lift the bread from the pot using the parchment, then transfer it to a wire rack. Let it cool for at least 1 hour before slicing. Cutting too soon will compress the crumb and make it gummy.
When you finally slice in, you will hear the crust crackle and see an airy, irregular crumb with a glossy, chewy texture. The tang is mellow but unmistakable.
Serve thick slices with butter, drizzle with olive oil, or use them to mop up a hearty soup. The bread also makes incredible toast the next day.
Tips for the Best Overnight Sourdough
- Use a kitchen scale.: Weights make this recipe consistent; even a slight variation in flour can change the dough.
- Feed your starter ahead of time.: Give it a feeding 4 to 6 hours before mixing so it passes the float test and is at its peak.
- Do not rush the cooling.: Cutting into hot bread ruins the crumb; give it a full hour on the rack.
- Boost the steam.: For an extra crisp crust, spritz the dough with water just before adding the lid, or toss a few ice cubes between the parchment and the side of the hot pot.
Bake times for the Dutch oven method (internal temp should reach 205°F to 210°F):
| Dutch Oven | Lid On Time | Lid Off Time | Total Time |
|---|---|---|---|
| 4-5 qt cast iron | 30 mins | 15 mins | 45 mins |
| 5-6 qt cast iron | 25 mins | 15 mins | 40 mins |
Keeping Your Sourdough Fresh
- Refrigerate:: store the cooled loaf in a paper bag or wrapped in a clean towel, then inside a plastic bag, at room temperature for up to 3 days. Slice and freeze for longer storage.
- Reheating:: to revive the crust, warm slices in a 350°F oven for 5 to 7 minutes or toast them until crisp.
What Goes Well With This Sourdough Bread
A crusty slice of this bread is right at home beside a bowl of lentil soup or minestrone. Its tang and chew cut through the richness of creamy potato leek soup, and it makes a sturdy partner for a simple green salad dressed with a sharp vinaigrette.
Frequently Asked Questions
Can I use all-purpose flour instead of bread flour?
Yes. Use the same weight, but the loaf will be slightly softer and less chewy.
My starter is not bubbly. Can I still use it?
You can, but the bread will likely turn out dense. Feed it and wait until it doubles in 4 to 6 hours for the best result.
How can I speed up the overnight fermentation?
Warm the water to 90°F and place the dough in a spot around 75°F to 78°F; it will be ready in 8 to 10 hours instead of 10 to 12.
Why did my bread turn out flat and dense?
Often it is due to under-proofing or a weak starter. Make sure the dough tripled during bulk fermentation and that the shaped proof passed the poke test.
Can I bake this in a regular loaf pan?
Yes, but you will not get the same crisp crust. If using a loaf pan, add a pan of boiling water to the oven for steam.
No-Knead Overnight Sourdough Bread Recipe
Ingredients
Method
- Mix flour and salt in a large bowl, add water and starter, and mix until no dry flour remains. Cover and rest 30 minutes. Perform three sets of stretch and folds, 30 minutes apart.
- Cover tightly and let rise at room temperature for 10 to 12 hours, until tripled and jiggly.
- Turn out onto floured surface, fold into a round, and shape into a tight ball with surface tension.
- Place seam-side up in a floured banneton, cover, and proof 1 to 2 hours until puffy and a finger poke slowly springs back. Preheat Dutch oven to 450°F (230°C) 30 minutes before the proof ends.
- Invert dough onto parchment, score the top, lower into the hot pot, and bake covered for 25 minutes. Uncover and bake 15 minutes more until deep brown.
- Cool on a rack at least 1 hour before slicing and serving.
Notes
