
Minecraft Sugar Cookies (No-Spread, Easy Pixel Icing)

Square, thick, and built for blocky designs. These cut-out sugar cookies bake up with sharp edges and a flat surface that takes royal icing like a tiny screen. No spreading, no blurry corners, just a blank canvas for creeper faces, swords, and diamond shapes.

The dough comes together fast, chills into a firm block, and rolls out with almost no sticking. Once you ice a few extra blocky cookies, you’ll have a full Minecraft tray in under an hour of hands-on work.
Why These Cookies Work for Minecraft Decorating
Sugar cookie dough can be a letdown when it puffs up and rounds every edge. This one uses a higher ratio of butter to keep it tender but adds just enough flour to lock in the shape. I chill it solid, roll it thick, and bake at a slightly lower temperature so the sides stay vertical.
The finished cookie is crisp at the corners and softer in the middle, like a good sugar cookie should be. The flat top makes icing look clean, not smeared. If you want to build a cookie village, this is the foundation.
Ingredients
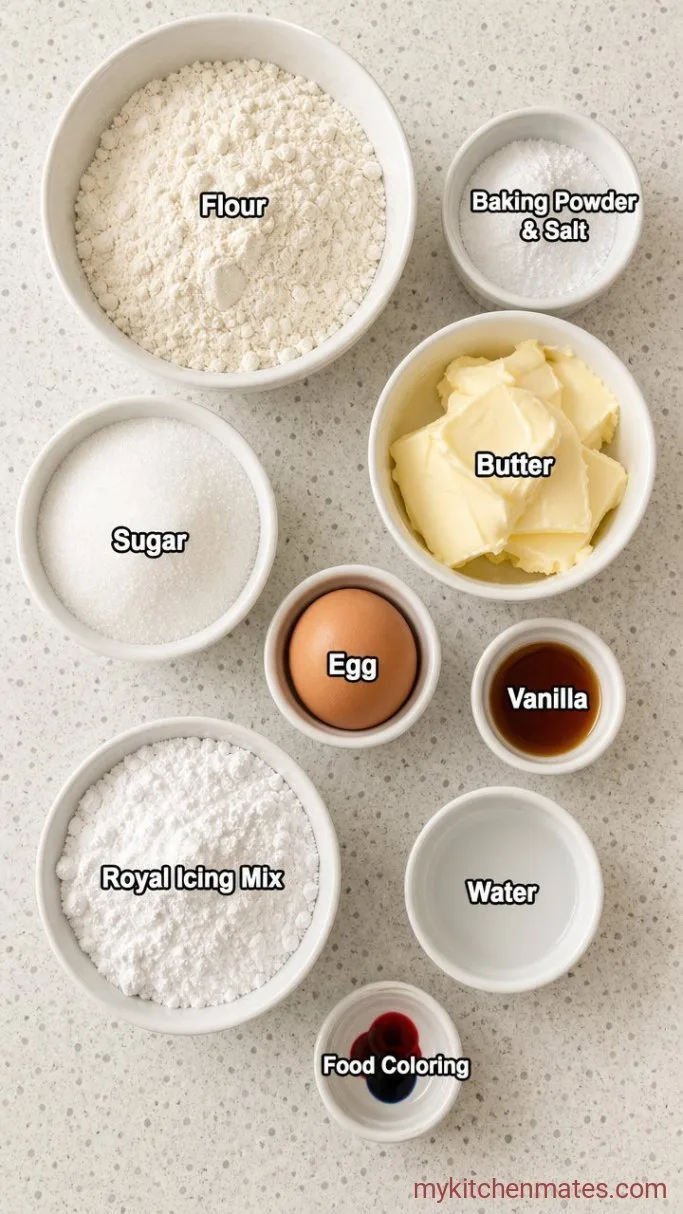
- 2 ½ cups all-purpose flour: spooned and leveled, not scooped
- ½ tsp baking powder: gives a tiny lift without puffing out the shape
- ¼ tsp salt: fine sea salt or table salt
- 1 cup unsalted butter, softened to room temperature: you want it pliable but not greasy
- 1 cup granulated sugar: plain white sugar, not powdered
- 1 large egg, at room temperature: cold egg can seize the butter
- 1 ½ tsp vanilla extract: pure vanilla gives the best flavor, but imitation works in a pinch
- Royal icing or thick glaze, for decorating: a simple mix of powdered sugar, meringue powder, and water, tinted with gel food coloring
Variations / Substitutions
- Almond extract: swap ½ tsp of the vanilla for almond extract for a nutty, bakery-style cookie
- Gluten-free flour: use a cup-for-cup gluten-free blend; the cookies will be slightly more delicate but still hold a square shape
- Dairy-free butter: a plant-based butter stick (not margarine from a tub) works; chill the dough an extra 30 minutes
- Cookie paint instead of icing: brush baked cookies with a thin mix of food coloring and a drop of vodka for a painted pixel look that dries fast
- Mini cookie cutters: small square or hexagon cutters speed up shaping if you want many identical blocks
Buttery Cat Sugar Cookies are next on our list if these cookies are your kind of dessert.
How to Make Minecraft Sugar Cookies
Step 1: Cream the Butter and Sugar

In a large bowl, beat the 1 cup of softened butter and 1 cup of granulated sugar with an electric mixer on medium speed for about 3 minutes, scraping down the sides once. The mixture should look pale and fluffy, with no visible sugar grains when you rub a little between your fingers.
You are not just combining them; you are building the cookie’s structure. The tiny air pockets will keep the baked cookie tender without making it puff up and lose its square edges.
Step 2: Form the Dough

Add the egg and 1 ½ tsp vanilla extract, then beat on low until the yellow streaks disappear. In a separate bowl, whisk the 2 ½ cups flour, ½ tsp baking powder, and ¼ tsp salt. Add the dry mix to the butter mixture in three parts, mixing on low each time just until the flour vanishes.
The dough will look shaggy at first, then come together into a soft but not sticky mass. Turn it out onto a piece of plastic wrap, press it into a flat disc, and wrap tightly. Refrigerate for at least 1 hour, or up to 2 days. Chilling firms the butter so the cookies sit still in the oven.
Step 3: Roll and Cut the Squares

Preheat the oven to 350°F (175°C) and line two baking sheets with parchment. Dust a work surface and a rolling pin lightly with flour. Unwrap the chilled disc and roll it to an even ⅓‑inch thickness. This is thicker than most sugar cookies, but you want that blocky look.
Cut the dough into Minecraft‑style squares with a sharp knife or a square cookie cutter. For tiny pixel-style blocks, cut 1‑inch squares. For larger character faces, cut 2½‑inch squares and use a paring knife to notch the corners for a creeper shape. Place the shapes an inch apart on the prepared baking sheets and gather the scraps, re‑roll, and chill again if they get soft.
Step 4: Bake the Cookies

Slide one tray at a time into the oven and bake for 10 to 12 minutes. The cookies are done when the centers look set and the bottom edges are just starting to turn a light gold. The tops will stay pale, and the cookies will firm up as they cool.
Do not let them brown deeply, or the edges will crisp too much and lose that clean, straight look. Cool the cookies on the baking sheet for 5 minutes, then transfer them to a wire rack to cool completely before icing.
Step 5: Ice the Pixel Designs

Once the cookies are fully cooled, mix your royal icing. You want a piping consistency that holds a line but settles just enough to merge with neighboring colors. Using gel food coloring, tint small bowls of icing in Minecraft greens, blacks, browns, blues, and white.
Outline each square first, then flood the center with a slightly thinner version of the same color. Let the base dry for 15 minutes, then pipe on block pixel patterns with a small round tip or a snipped plastic bag. Square by square, you get a grass block, a TNT side, or a creeper face. Let the icing set for 2 to 3 hours before stacking them, and then serve them on a big platter so the kids can grab the one they recognize.
Tips for Clean Cookie Shapes
- Chill the dough between batches. Warm dough spreads, so after re‑rolling scraps, pop them in the fridge for 10 minutes before cutting again.
- Roll the dough between two sheets of parchment instead of a floured surface to avoid adding extra flour that can dry out the cookies.
- Use a ruler and a sharp knife for straight squares; a pizza cutter works for quick long lines if you’re making many small blocks.
- If the icing looks too thick, add water a drop at a time; if too thin, stir in powdered sugar until the ribbon holds its shape for a few seconds.
Bake times depend on how thick you roll the dough.
| Dough Thickness | Bake Time at 350°F (175°C) | Cookie Texture |
|---|---|---|
| ¼ inch | 8 to 10 minutes | Crisp all through |
| ⅓ inch | 10 to 12 minutes | Crisp edges, soft center |
| ½ inch | 12 to 14 minutes | Thick and soft |
Keeping the Cookies Fresh
- Refrigerate dough: Unbaked dough keeps in the fridge for up to 3 days tightly wrapped, or freeze for 3 months. Thaw overnight in the fridge.
- Store baked cookies: Undecorated cookies stay fresh in an airtight container at room temperature for 1 week. Iced cookies last about 5 days in a single layer with wax paper between them so the designs don’t smudge.
- Freeze decorated cookies: Arrange them in a single layer in a freezer-safe container. They thaw in 20 minutes at room temperature and the icing stays intact.
Frequently Asked Questions
Can I use store-bought cookie dough?
You can, but most premade doughs spread more and won’t hold a sharp square edge, so expect softer, rounder shapes.
How do I cut the dough without a square cutter?
Use a sharp chef’s knife and a ruler to score and cut straight lines; a pizza cutter speeds up the grid cutting.
Can I make these gluten-free?
Yes, use a 1-to-1 gluten-free flour blend that contains xanthan gum; the dough may be a little stickier so chill it longer.
My icing keeps bleeding colors together. What went wrong?
The base layer was not dry enough. Let each flooded color set for at least 20 minutes before piping an adjacent color, and use a piping icing that’s slightly thicker than your flood.
I want to make larger cookies, like a whole Minecraft face. Will the bake time change?
Bake a 4‑inch square for 14 to 16 minutes, watching for the same light gold edge and set center.
Minecraft Sugar Cookies Recipe
Ingredients
Method
- Cream the butter and sugar with an electric mixer until pale and fluffy, about 3 minutes.
- Beat in the egg and vanilla, then gradually add the whisked dry ingredients. Mix until a soft dough forms. Wrap and refrigerate at least 1 hour.
- Preheat oven to 350°F (175°C). Roll the dough to ⅓‑inch thickness, cut into squares, and arrange on parchment-lined baking sheets.
- Bake for 10 to 12 minutes until the edges are lightly golden. Cool on the sheet for 5 minutes, then transfer to a wire rack.
- Cool completely, then outline and flood each cookie with tinted royal icing. Let the base dry, pipe on pixel details, and set for 2 to 3 hours before serving.
Notes
