
Buttery Cat Sugar Cookies That Hold Their Shape

These cut-out sugar cookies are buttery, crisp on the edges, and they keep their shape in the oven so every cat face comes out just the way you cut it. A quick chill is the only trick you need.

Decorate them with a simple royal icing and a few sprinkles, or leave them plain for a not-too-sweet afternoon cookie that still tastes like you pulled it from a bakery case.
What Makes These Cat Cookies So Good
The dough is easy to handle. It rolls out smooth after a short rest in the fridge and never sticks to the cutter, so those tiny ears stay sharp.
You get the deep butter and vanilla notes of a classic sugar cookie with none of the frustration of puffy, misshapen blobs. The royal icing sets firm but melts on your tongue, and you can tint it any shade you like to draw on whiskers and pink noses.
Ingredients
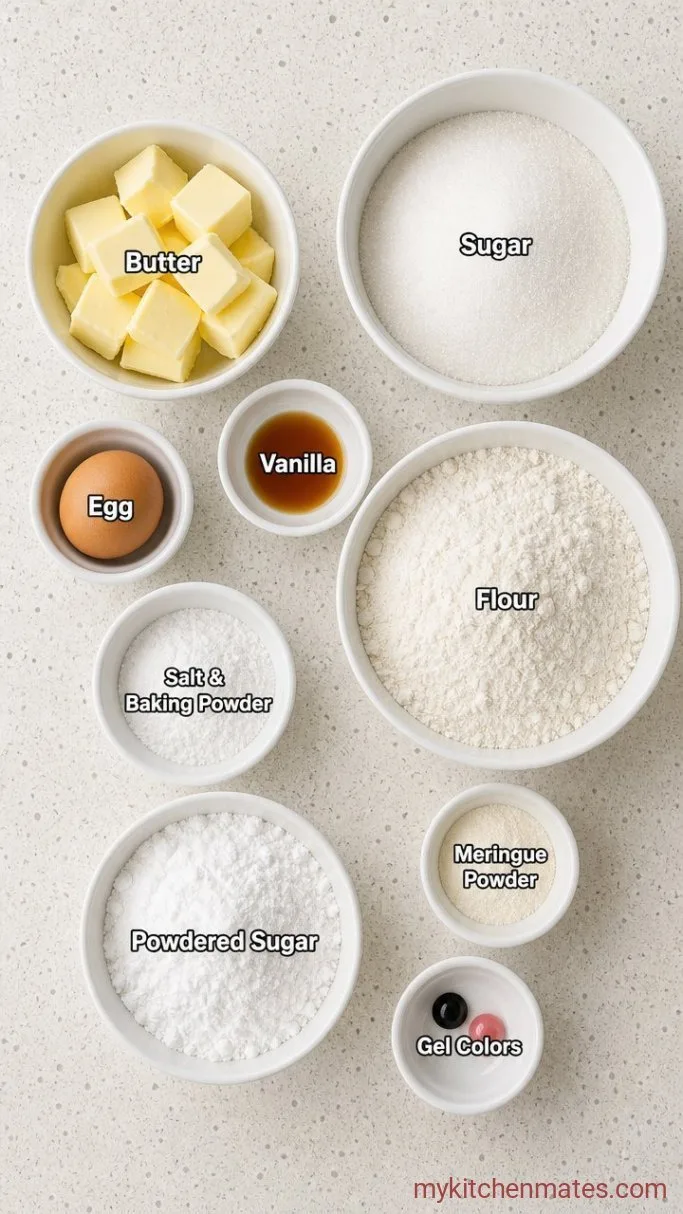
- 1 cup unsalted butter, softened: cold butter will not cream properly, so let it sit out 30 minutes before you start.
- 1 cup granulated sugar: this gives the cookies their crisp edges.
- 1 large egg: helps the dough hold together without becoming tough.
- 1 1/2 tsp vanilla extract: use pure vanilla if you have it; the flavor is cleaner.
- 3 cups all-purpose flour: spooned and leveled, never scooped straight from the bag.
- 1/2 tsp baking powder: just enough lift to keep the cookies tender, nothing more.
- 1/4 tsp salt: fine sea salt cuts the sweetness.
For the royal icing:
- 3 cups powdered sugar: sifted if it is lumpy, but a quick whisk usually does the job.
- 3 tbsp meringue powder: this is the ingredient that lets the icing dry to a hard, shiny finish.
- 5 to 6 tbsp warm water: add one tablespoon at a time until the icing flows in a thick ribbon.
- Gel food coloring: a tiny dot of black or brown for the eyes and one of pink for the nose.
A Few Swaps and Twists
- Swap vanilla for almond extract: use 1/2 tsp almond and 1 tsp vanilla for a nutty, bakery-case note.
- Make them chocolate: replace 1/4 cup of the flour with unsweetened cocoa powder and add a tablespoon of milk to the dough; the cats become dark and rich.
- Use a different cutter: any shape that has clean edges works, but a cat cutter with a long tail needs a gentle hand when moving to the tray.
- Skip the meringue powder: you can use a raw egg white in the icing instead, 1 egg white to 3 cups powdered sugar, beat until glossy; the icing will still set but may stay a touch softer.
- Color the dough: knead a drop of orange or grey food coloring into the dough after mixing for a solid-color cat before you even ice it.
Classic Western Sugar Cookies are another dessert you’d probably love if you enjoy these cookies.
How to Make Cat Sugar Cookies
Step 1: Cream the Butter and Sugar
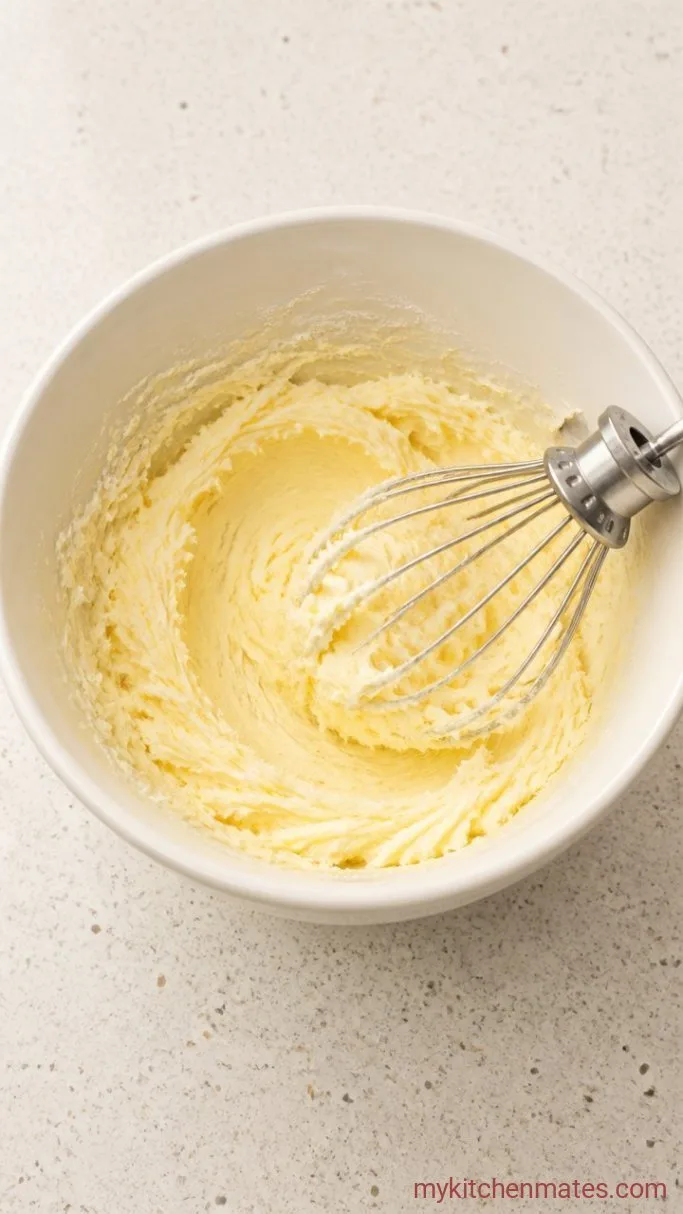
In a large bowl, beat the 1 cup softened butter and 1 cup granulated sugar together with an electric mixer on medium speed for about 2 minutes, until the mixture looks pale and fluffy. Scrape down the sides of the bowl once to catch any butter hiding at the bottom.
You are not just mixing here; you are beating air into the fat, which gives the cookies their tender crumb. The color should lighten noticeably, from deep yellow to a creamy off-white.
Step 2: Mix the Dough
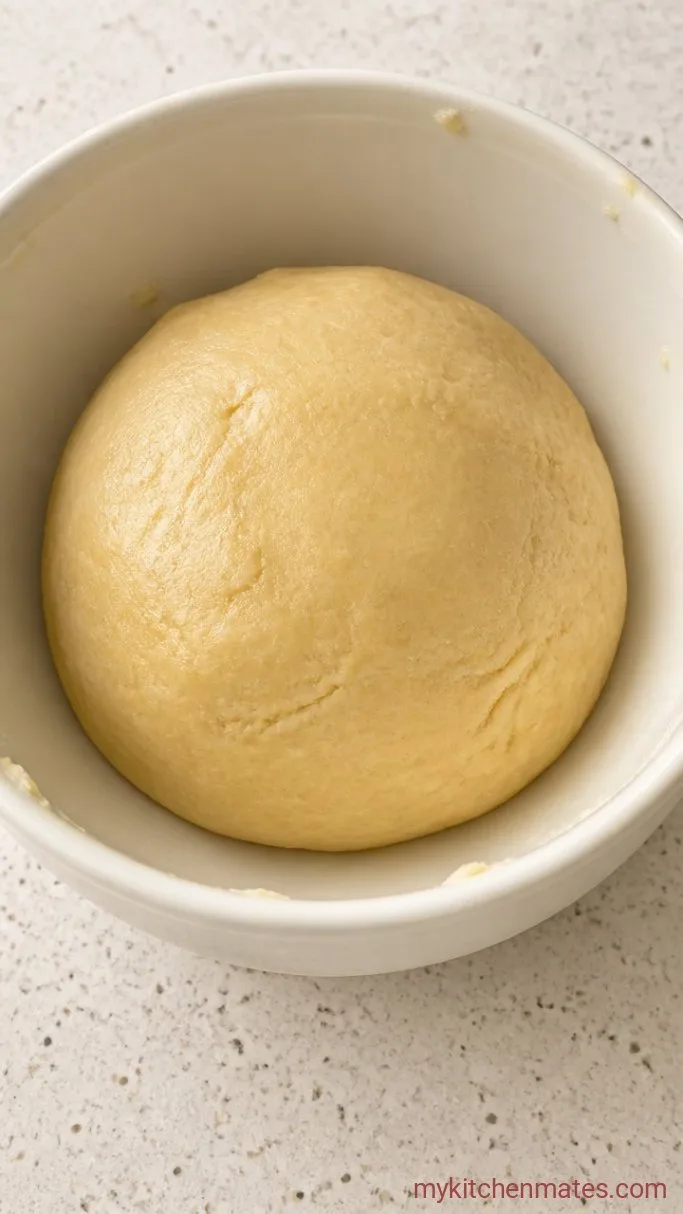
Beat in the 1 large egg and 1 1/2 tsp vanilla extract just until combined, about 30 seconds. In a separate bowl, whisk together the 3 cups flour, 1/2 tsp baking powder, and 1/4 tsp salt. Add the dry ingredients to the butter mixture all at once and mix on low speed until a shaggy dough forms and no dry streaks remain.
The dough will look crumbly at first, then press together into a soft mass when you squeeze it. Turn it out onto a piece of plastic wrap, shape it into a flat disk, and wrap tight. Refrigerate for at least 1 hour, or up to 2 days. This cold rest is what stops the cats from puffing into blobs.
Step 3: Roll and Cut the Cookies
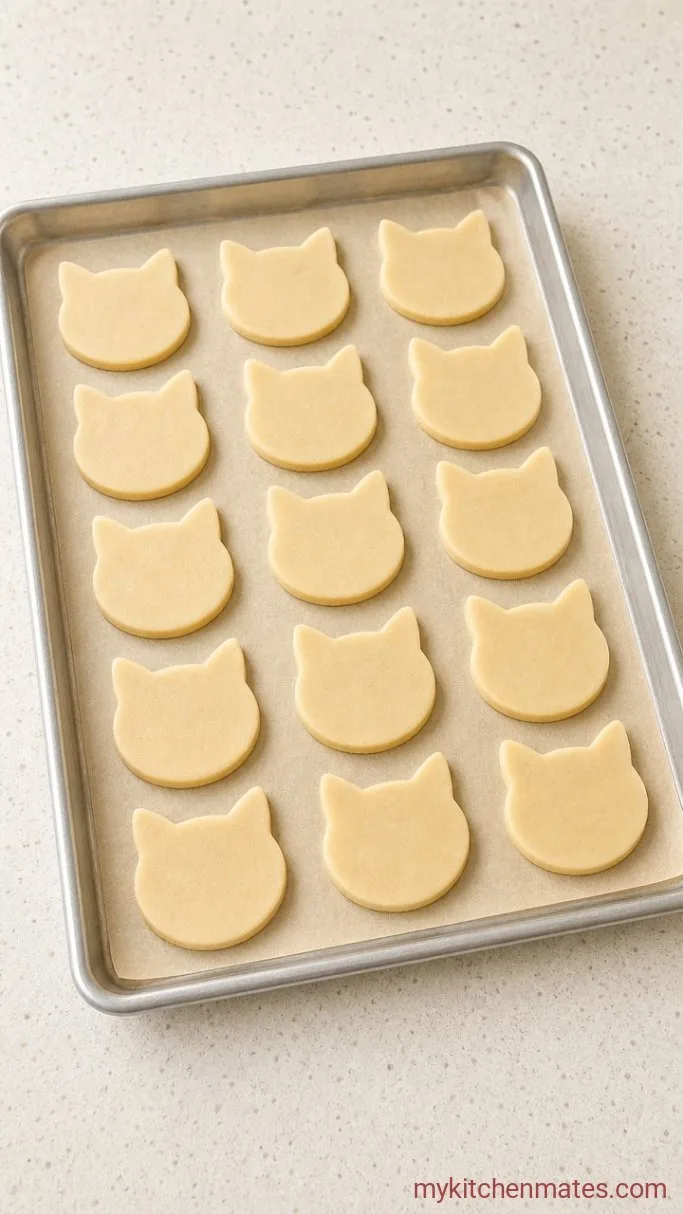
Take the dough out of the fridge and let it sit at room temperature for 5 minutes so it softens just enough to roll without cracking. On a lightly floured surface, roll the dough to an even 1/4 inch thickness, turning it often to make sure it is not sticking underneath. Dip a cat-shaped cookie cutter in flour and press down firmly, cutting as many as you can.
Gather the scraps, press them together gently, and roll again. You can re-roll a couple of times before the dough starts to feel tough. Use a thin metal spatula to transfer each cat to a parchment-lined baking sheet, leaving about an inch between them. Slide the whole tray back into the fridge for 10 minutes while the oven heats.
Step 4: Bake the Cookies
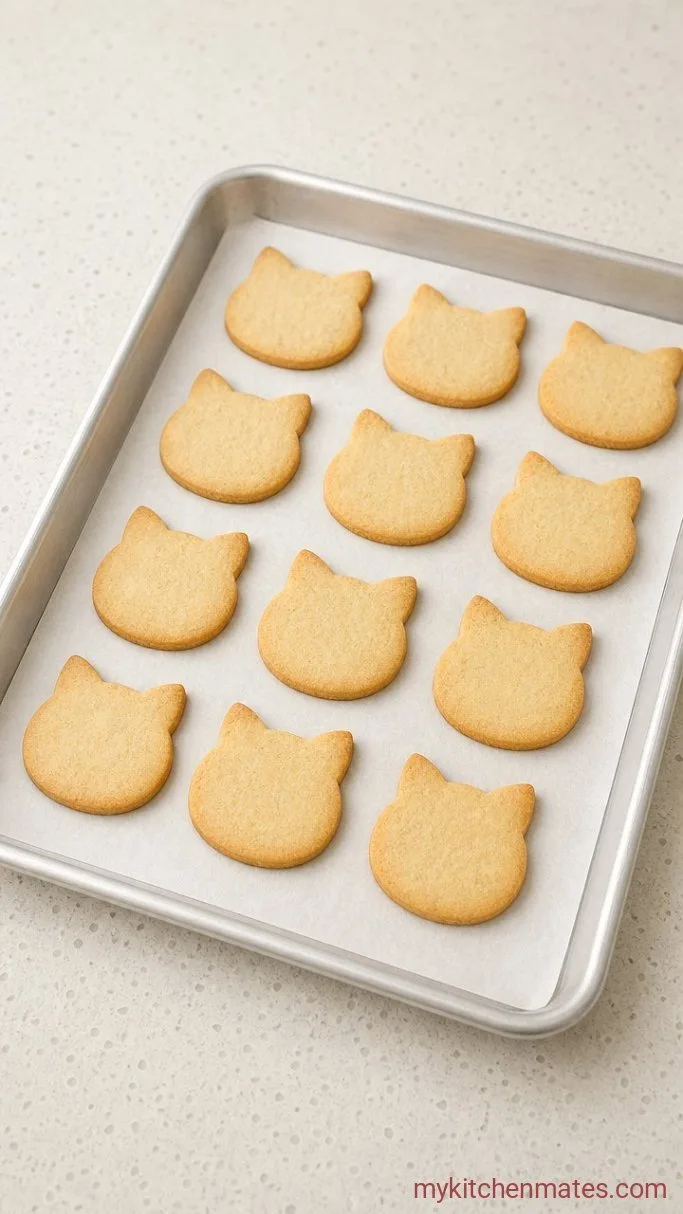
Preheat the oven to 350°F (175°C) and position a rack in the middle. Bake one sheet at a time for 9 to 11 minutes, rotating the tray halfway through. The cookies are done when the edges turn a pale golden brown and the centers look set but not dark.
They will feel soft when you pull them out, but they firm up as they cool. Let them rest on the sheet for 5 minutes, then move them to a wire rack to cool completely before you even think about icing. Any warmth left in the cookie will make the icing run.
Step 5: Pipe the Cat Faces

Whisk the 3 cups powdered sugar and 3 tbsp meringue powder together in a bowl, then stir in 5 tbsp warm water. Beat with a hand mixer on low until the icing thickens and turns bright white, about 3 minutes. It should fall in a thick ribbon that holds its shape for a few seconds before sinking back into itself. Divide the icing into small bowls and tint one black or brown, one pink, and leave the rest white.
Spoon each color into a piping bag fitted with a small round tip. Outline each cookie with white icing, then flood the inside with more white and let it set for 15 minutes. Pipe two little dots for eyes, a tiny pink triangle for the nose, and three straight lines on each side for whiskers. Let the icing dry at room temperature for 1 to 2 hours before stacking or packing.
Tips for Sharp Cat Cookies
- Chill the cut shapes: those 10 minutes in the fridge after cutting are not optional. They lock the shape in place before the heat hits.
- Roll to a true 1/4 inch: thinner than that and the ears burn; thicker and the cookie can puff into a blob.
- Use a light hand with flour: too much flour on the surface dries out the dough and makes the cookies crack.
- Move one tray at a time: baking two sheets on different racks can cause uneven browning, so give the oven your full attention on one tray.
- Let the icing set completely: if you pack the cookies before the royal icing is fully hard, the faces will smudge. Overnight is safest.
Storing and Freezing Cat Cookies
- Refrigerate: store baked and fully iced cookies in an airtight container at room temperature for up to 5 days. The icing stays crisp in low humidity; if you live somewhere damp, add a small food-safe silica packet.
- Freeze: freeze un-iced baked cookies in a single layer for up to 3 months. Thaw on the counter and decorate fresh. You can also freeze the raw dough disk for up to 2 months; thaw overnight in the fridge before rolling.
- Do not refrigerate iced cookies: the fridge adds moisture and makes the icing sticky, so keep them at room temp instead.
Frequently Asked Questions
Can I make the dough ahead and bake later?
Yes. The wrapped dough disk keeps in the fridge for up to 2 days, and the flavor actually deepens. Let it soften a few minutes before rolling.
Why did my cookies spread into round blobs?
The dough was too warm when it went into the oven. Chill the cut cookies on the baking sheet for at least 10 minutes, and do not skip the initial dough rest in the fridge.
Can I use a different icing?
You can, but a glaze made of powdered sugar and milk will not set as firm and the details will blur. Royal icing is worth the extra step for the crisp finish.
How do I get clean lines when I pipe whiskers?
Wait until the white base icing has set at least 15 minutes, so the piped details sit on top instead of sinking in. A thin, steady squeeze and a toothpick to nudge mistakes work wonders.
Cat Sugar Cookies Recipe
Ingredients
Method
- Beat the butter and sugar with an electric mixer until pale and fluffy, about 2 minutes. Beat in the egg and vanilla.
- Whisk together the flour, baking powder, and salt. Add to the butter mixture and mix on low until a shaggy dough forms. Shape into a disk, wrap, and refrigerate at least 1 hour.
- Roll the chilled dough to 1/4 inch thick on a floured surface. Cut with a cat cookie cutter, place on parchment-lined sheets, and chill 10 minutes.
- Preheat oven to 350°F. Bake one sheet at a time for 9 to 11 minutes, until edges turn pale golden. Cool on the sheet 5 minutes, then transfer to a rack to cool completely.
- Whisk powdered sugar, meringue powder, and 5 tbsp water until thick and shiny. Tint small portions black and pink. Pipe and flood white icing on each cookie, let set 15 minutes, then pipe eyes, nose, and whiskers. Let dry 1 to 2 hours.
Notes
