
Vanilla Confetti Fairy Birthday Cake

This vanilla confetti fairy birthday cake is the one I make when a party needs a centerpiece that feels like magic before the candles are even lit. Soft white cake with a shower of rainbow sprinkles, covered in a cloud of pink buttercream and finished with a shimmer of edible fairy dust. It tastes exactly the way a celebration should.
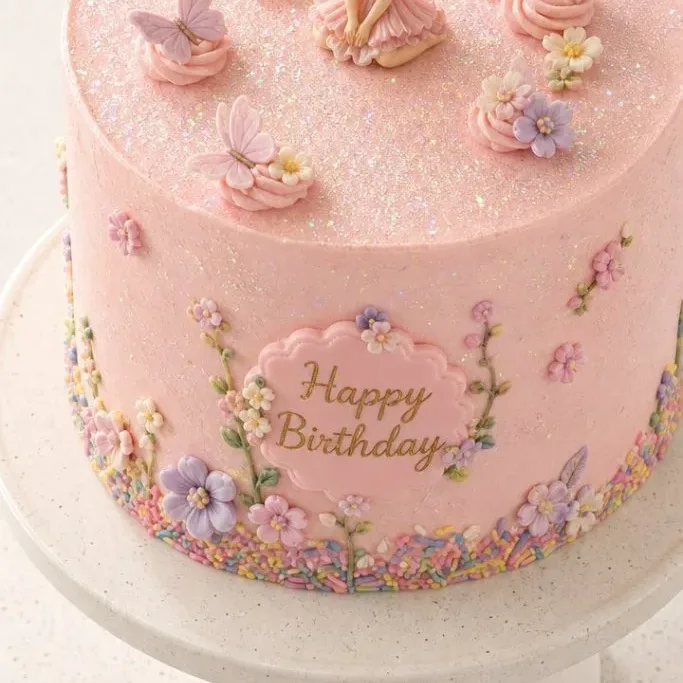
The crumb is tender and moist from buttermilk, the frosting is silky and not too sweet, and the sprinkles give a tiny crunch that makes each bite more fun. If you are baking for a birthday or any afternoon that deserves something special, this cake delivers without asking you to master fussy techniques.
Why This Fairy Cake Works
I keep coming back to this cake because it is both playful and forgiving. The reverse creaming method coats the flour in butter before any liquid goes in, so you do not have to worry about overmixing and the layers stay soft all day.
The pink Swiss meringue buttercream is the real showstopper. It is silky, not cloying, and holds swoopy swirls beautifully. A little vanilla bean paste gives the frosting tiny specks that look homemade and inviting, and the fairy glitter on top catches the light in a way that makes kids and adults smile.
Ingredients
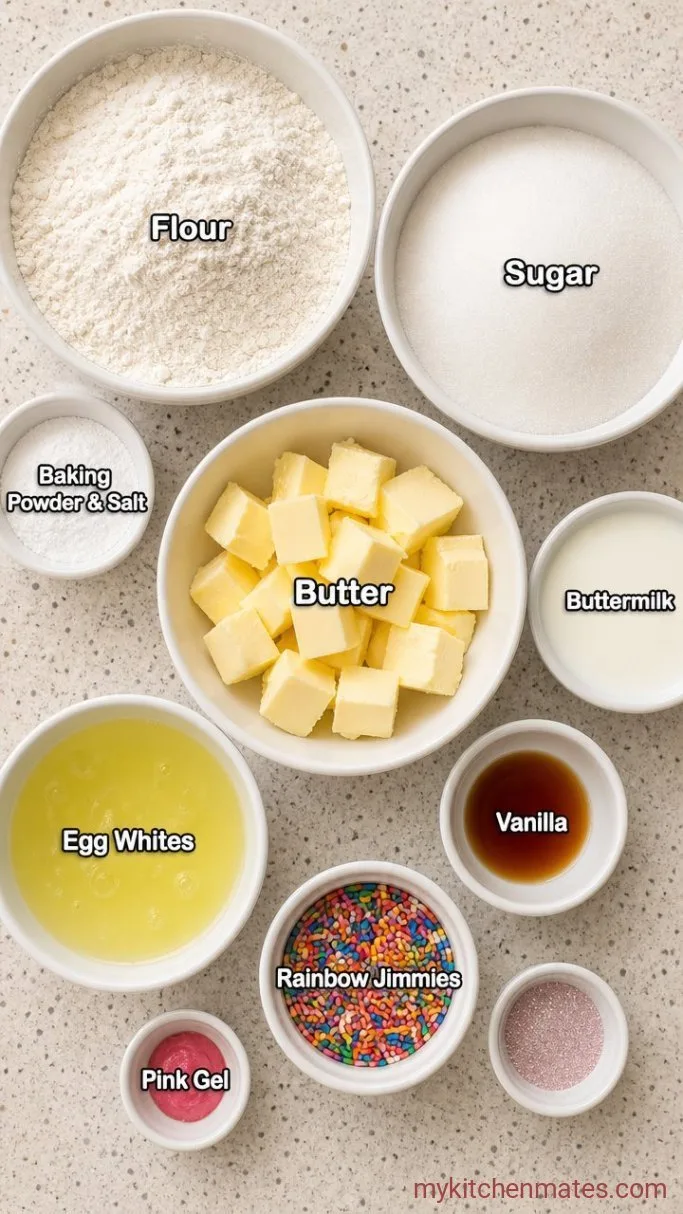
- 2 1/4 cups all-purpose flour: spooned and leveled, not scooped
- 1 1/2 cups granulated sugar
- 2 1/2 teaspoons baking powder
- 3/4 teaspoon fine sea salt
- 1/2 cup unsalted butter, softened to room temperature: adds tenderness
- 1 cup buttermilk, room temperature: keeps the crumb moist and light
- 4 large egg whites, room temperature: lift without the chew of whole eggs
- 2 teaspoons vanilla extract: use real vanilla for a clean flavor
- 1/3 cup rainbow jimmies: avoid nonpareils, they bleed color
- For the pink buttercream
- 3 large egg whites
- 1 cup granulated sugar
- 1 cup unsalted butter, softened to room temperature and cut into tablespoons
- 1 teaspoon vanilla bean paste or vanilla extract
- Pinch of fine sea salt
- Pink gel food coloring
- Edible glitter (fairy dust): for decorating
Variations and Substitutions
- Buttercream shortcut: use an American-style buttercream with 1 cup softened butter, 4 cups powdered sugar, 2 tablespoons cream, and a touch of vanilla. It will be sweeter but easier.
- Dairy-free: swap the butter for a high-quality plant-based stick butter and use oat milk with 1 tablespoon lemon juice instead of buttermilk.
- Color swap: replace pink gel with lavender, pale blue, or a swirl of pastels for a different fairy mood.
- Flavor twist: replace 1 teaspoon of vanilla with a few drops of almond extract in the cake batter for a more delicate, floral crumb.
Toy Story Birthday Cake is another reader favorite dessert worth making next.
How to Make a Fairy Birthday Cake
Step 1: Mix the Dry Ingredients and Butter
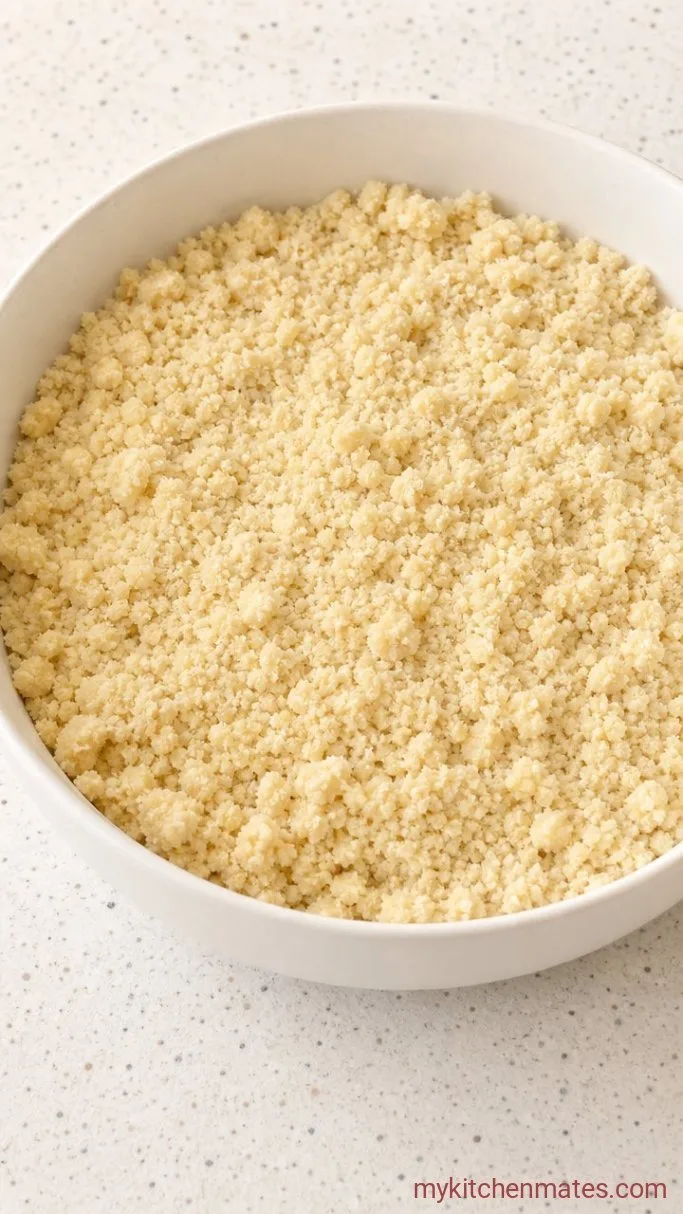
Preheat your oven to 350°F (180°C). Butter two 8-inch round cake pans and line the bottoms with parchment. In the bowl of a stand mixer, whisk the flour, 1 1/2 cups sugar, baking powder, and salt. Add the softened butter and beat on medium speed for 2 minutes until the mixture looks like wet sand with no visible butter chunks.
The texture will be fine and crumbly, but that is exactly what you want. This step coats the flour with fat so the cake stays tender even if you lose count while mixing later.
Step 2: Whisk the Wet Ingredients and Combine
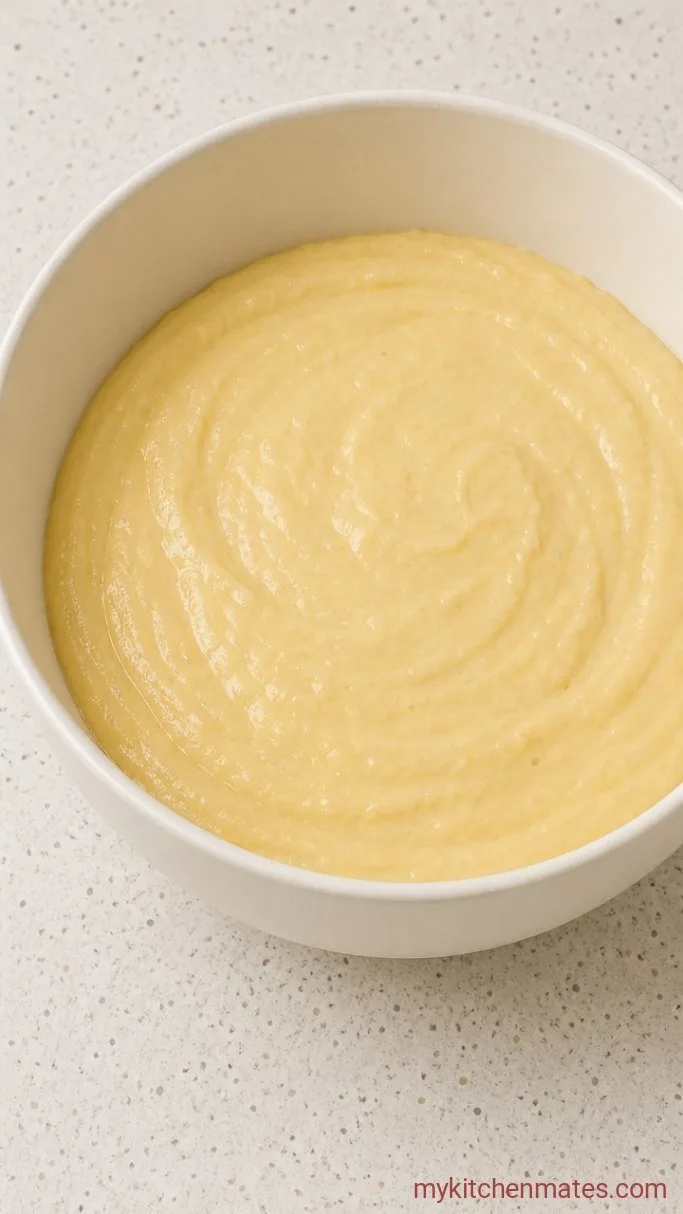
In a large liquid measuring cup, whisk together the buttermilk, egg whites, and vanilla extract. With the mixer on low, pour about a third of the wet mixture into the flour mixture, mix for 15 seconds, then repeat twice more until it is all in. Stop, scrape the bowl, then increase the speed to medium and beat for 30 seconds. The batter will look smooth and pale, thick enough to mound on a spoon.
Pouring gradually gives the flour time to hydrate without building too much gluten. If the batter looks curdled for a second, just keep mixing and it will come together after those 30 seconds.
Step 3: Fold in Sprinkles and Bake
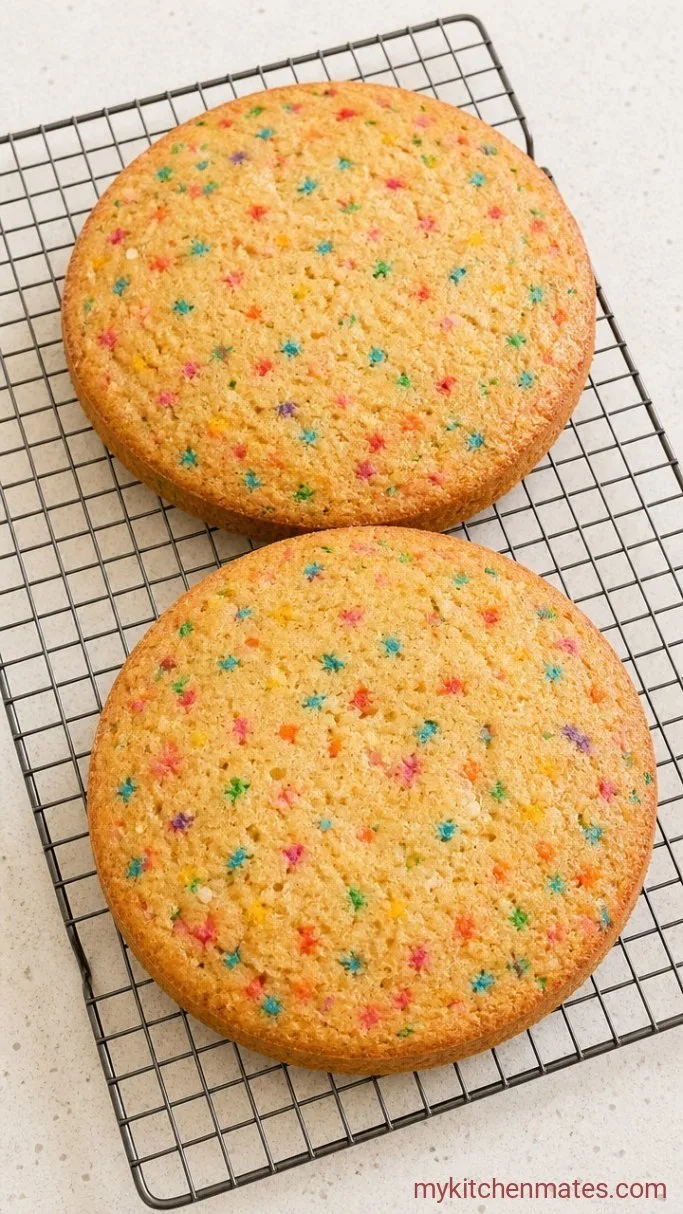
Remove the bowl from the mixer and scatter the rainbow jimmies over the top. Use a flexible spatula to gently fold them in with just a few strokes so you do not streak the batter. Divide evenly between the prepared pans and smooth the tops. Bake for 25 to 30 minutes, until a toothpick inserted in the center comes out with a few moist crumbs and the edges pull away from the pan slightly.
The tops will be pale gold and spring back when pressed lightly. Let the cakes cool in the pans on a rack for 10 minutes, then turn them out and let them cool completely. You want them fully cooled before frosting, or the buttercream will melt.
Step 4: Beat the Pink Buttercream
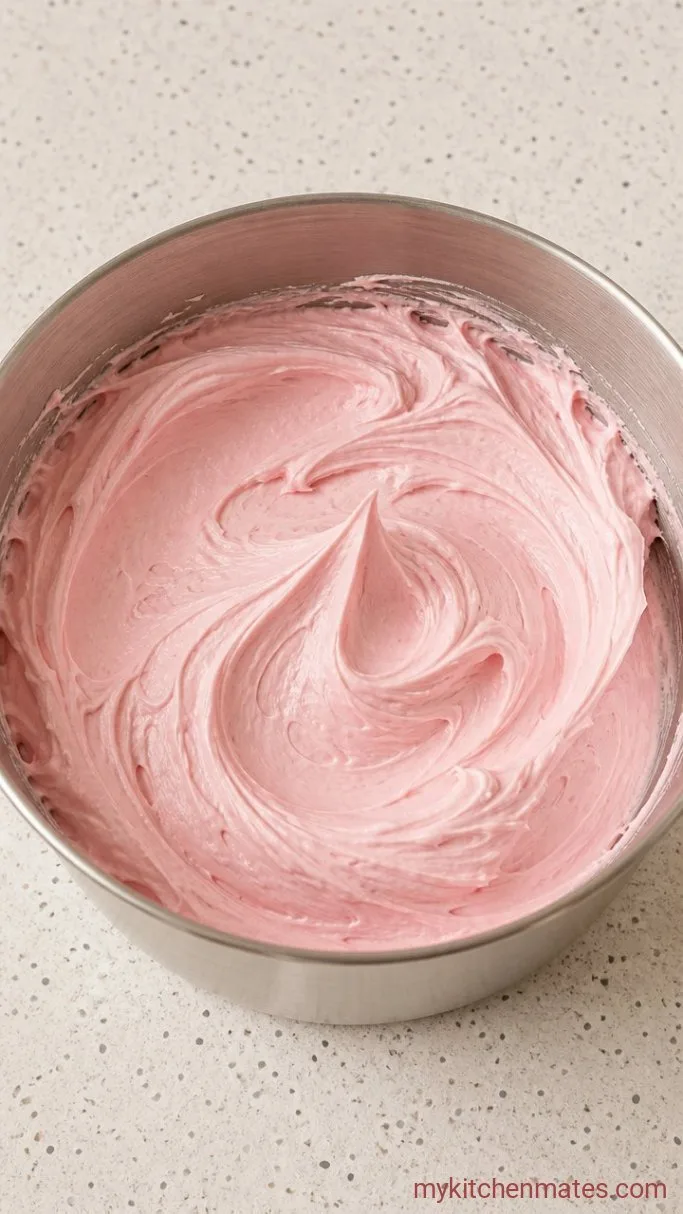
Set a heatproof bowl over a saucepan with an inch of simmering water, making sure the bottom does not touch the water. Add the egg whites and 1 cup sugar and whisk constantly until the sugar dissolves and the mixture reaches 160°F (71°C) on an instant-read thermometer, about 3 to 4 minutes. Pour it into the clean stand mixer bowl and whip on high speed until stiff, glossy peaks form and the bowl feels cool to the touch, about 5 to 7 minutes.
With the mixer running on medium, add the softened butter a few tablespoons at a time, waiting about 30 seconds between additions. Early on the mixture might look soupy or separated, but keep going. Once all the butter is in, beat in the vanilla bean paste, salt, and a few drops of pink gel coloring. The buttercream will turn thick, smooth, and spreadable after another minute or two of beating.
Step 5: Assemble and Frost the Cake
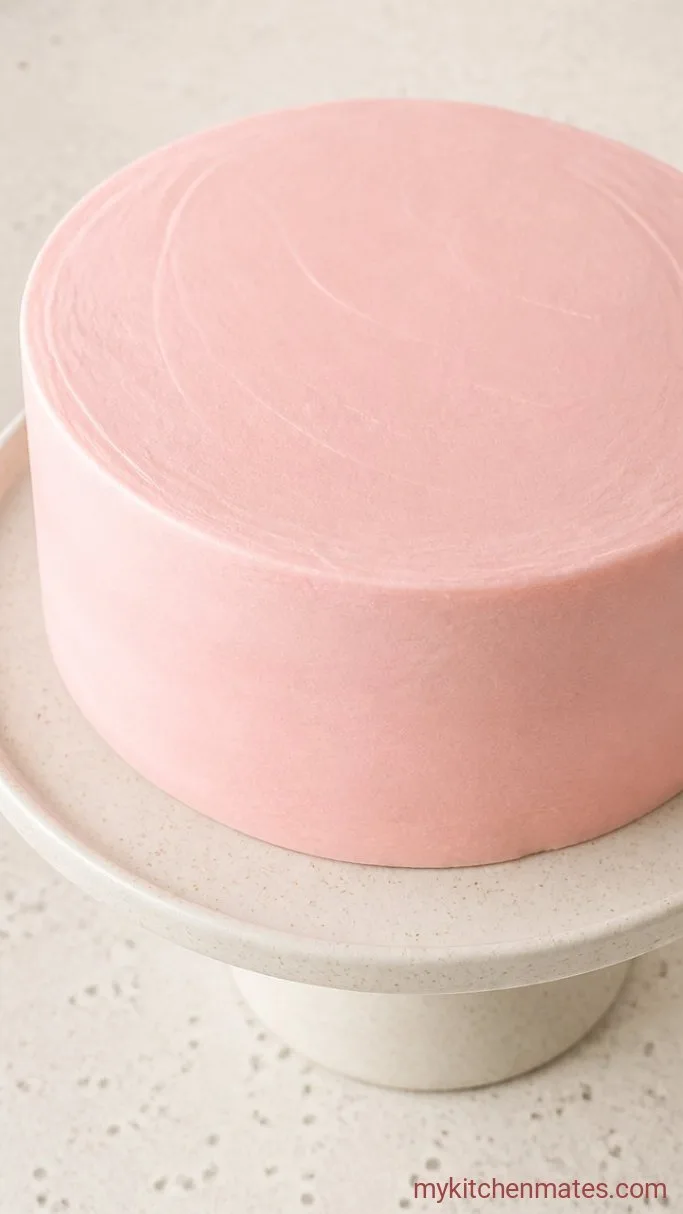
Set one completely cooled cake layer on a serving plate or turntable. Spread about 1 cup of buttercream over the top and scatter a small handful of extra sprinkles if you like a hidden surprise. Place the second layer on top, then spread a thin crumb coat over the whole cake. Chill for 20 minutes so that thin coat firms up and locks in the crumbs.
Once chilled, pile the remaining buttercream on top and spread it across the top and down the sides with an offset spatula. Make soft swoops and swirls, leaving the frosting thick and cloudlike. The soft pink color will look even prettier against a plain white plate.
Step 6: Decorate with Fairy Glitter
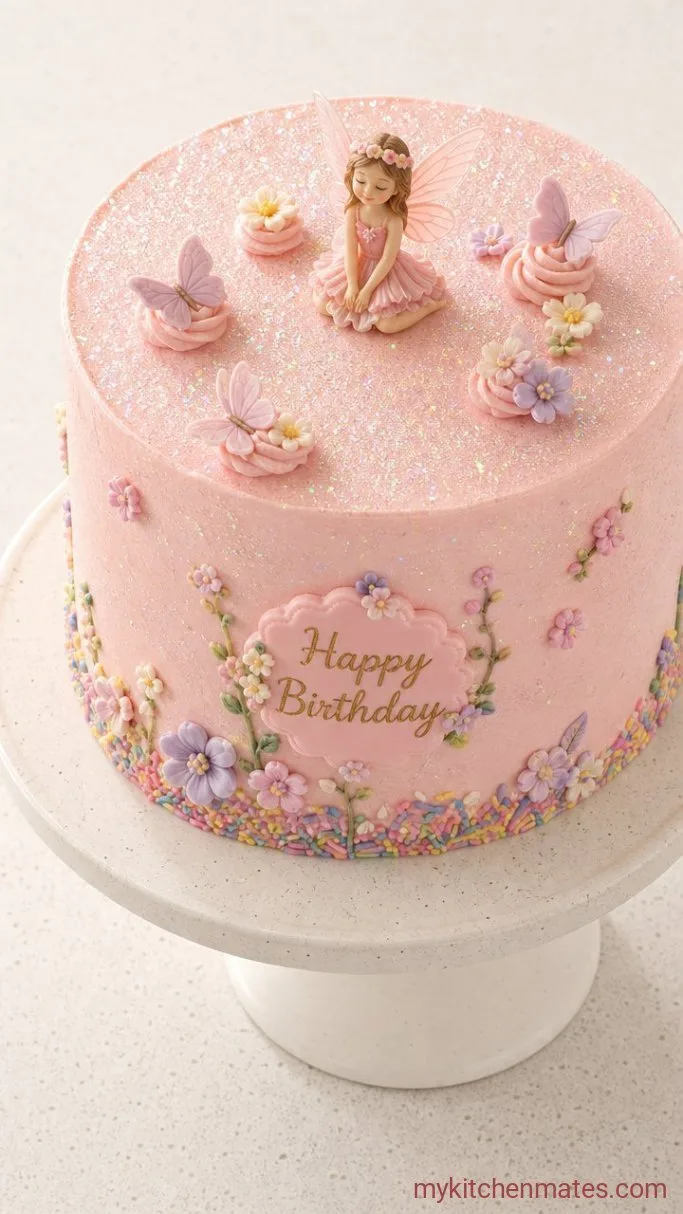
Just before serving, dust the top of the cake lightly with edible glitter so it catches the light. Press a few more rainbow sprinkles around the bottom edge if you want a finished border. Slice and serve with a big knife, and watch the crumb reveal its confetti speckles.
Tips for a Magical Fairy Cake
- Jimmies over nonpareils: rainbow jimmies hold their shape during baking, while nonpareil sprinkles tend to bleed and leave streaks.
- Chilling layers helps: pop the baked cake layers in the freezer for 15 minutes before assembling if your kitchen is warm, and they will be much easier to frost without crumbs.
- Room temperature butter: for the Swiss meringue, the butter must be soft enough to blend but still cool, not greasy, or the emulsion can break.
- No edible glitter? A dusting of powdered sugar mixed with a pinch of pink luster dust gives the same twinkle without buying a specialty item.
Bake times by pan material:
| Pan Material | Bake Time at 350°F |
|---|---|
| Light aluminum | 27-30 mins |
| Dark nonstick | 24-27 mins |
Storing Leftover Fairy Cake
Refrigerate: Store the frosted cake covered at cool room temperature for up to 2 days, or refrigerate for up to 5 days. Bring the slices to room temperature before serving, because the buttercream sets up firm when cold.
Frequently Asked Questions
Can I make this cake as a 9×13 sheet instead?
Yes. Grease a 9×13-inch pan, pour in all the batter, and bake for 30 to 35 minutes at the same temperature. The buttercream recipe will make enough to frost the top generously.
My buttercream looks broken or curdled. What went wrong?
Keep beating it on medium-high speed. Temperature is the culprit: if the butter is too cold, the fat won’t emulsify, so let the bowl warm slightly as it whips, and it should come together smooth.
Can I use whole eggs instead of egg whites?
You can, but the cake will be chewier and less white, so the sprinkle colors will not pop as brightly. For the fluffiest crumb, stick with the whites.
Will liquid food coloring work?
Liquid coloring can thin the buttercream and may not give the same vibrant pink. Gel coloring is stronger, so you only need a tiny drop.
Fairy Birthday Cake Recipe
Ingredients
Method
- Preheat oven to 350°F (180°C). Butter two 8-inch round cake pans and line with parchment. In a stand mixer, whisk flour, sugar, baking powder, and salt. Add butter and beat on medium for 2 minutes until mixture looks like wet sand.
- Whisk buttermilk, egg whites, and vanilla extract together. With mixer on low, add the wet mixture to dry in three additions, then beat on medium for 30 seconds until smooth.
- Fold in rainbow jimmies with a spatula. Divide batter between pans, smooth tops, and bake 25-30 minutes until a toothpick comes out with a few moist crumbs. Cool 10 minutes in pans, then turn out to cool completely.
- For buttercream, whisk egg whites and sugar over simmering water until 160°F (71°C). Whip on high speed until stiff peaks form and bowl is cool, about 5-7 minutes. Gradually beat in butter, then vanilla bean paste, salt, and pink gel coloring until silky.
- Place one cake layer on a plate, spread with 1 cup buttercream, add extra sprinkles if you like, and top with second layer. Apply a thin crumb coat, chill 20 minutes, then frost generously with remaining buttercream.
- Dust the top with edible glitter, press sprinkles around the bottom edge if desired, and serve.
Notes
