
Creamy Dairy Free Banana Pudding (No Coconut Taste)

Dairy free banana pudding sounds like a tall order, but this one comes through with a rich vanilla custard and soft layers of fruit and cookies. It’s the same nostalgic dessert, just built without a drop of milk or cream.
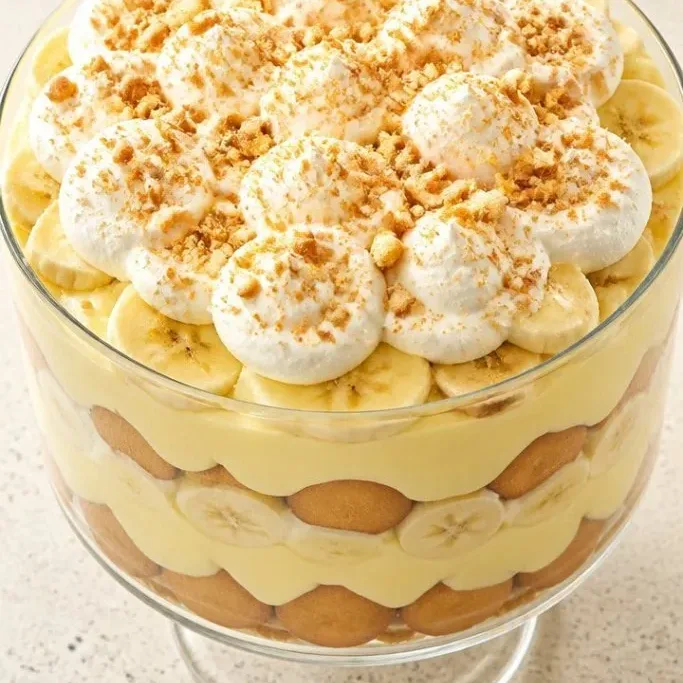
The pudding itself gets its silkiness from oat milk and a few egg yolks, so it tastes like a real cooked custard. Ripe bananas and classic vanilla wafers do the rest.
Why This Dairy-Free Pudding Hits the Spot
The pudding base is thick and glossy, not gummy or thin. It carries a clean vanilla flavor that lets the bananas shine, never reading as “alternative” or coconutty.
You get a soft set that holds a spoon but still melts into the cookie layers. After a few hours in the fridge, the wafers turn tender, the bananas stay sweet, and every bite tastes like a proper banana pudding.
Ingredients

- 3 cups oat milk: choose a full-fat or barista-style oat milk for the creamiest result; almond or soy work too
- 3/4 cup granulated sugar: keeps the sweetness classic
- 1/3 cup cornstarch: thickens the pudding without floury taste
- 1/4 teaspoon fine sea salt: balances the sweetness
- 4 large egg yolks: add richness and a real custard texture
- 2 teaspoons vanilla extract: use pure vanilla, not imitation
- 2 tablespoons vegan butter or refined coconut oil: optional but gives the pudding a silky finish; refined coconut oil has no coconut flavor
- 4 to 5 ripe bananas: sliced into coins, about 1/4 inch thick
- 1 box (11 oz) vanilla wafer cookies: most classic brands are accidentally dairy free, but check the label
- dairy free whipped topping or toasted wafer crumbs: for the top, optional
Variations / Substitutions
- Milk: unsweetened almond milk keeps things neutral, but the pudding will be slightly thinner. Cashew milk gives a result closest to oat milk.
- Sugar: coconut sugar works for a deeper caramel note, though the color will darken a bit.
- Cookies: gluten free vanilla wafers or even shortbread style cookies swap in without issue.
- Egg free: for a no yolk version, make a cornstarch only pudding using 1/2 cup cornstarch and skip the egg step; the texture will be less rich but still sliceable.
Dairy-Free Chocolate Mousse is next on our list if this banana pudding is your kind of dessert.
How To Make Dairy Free Banana Pudding
Step 1: Whisk the Cornstarch and Sugar

Set a medium saucepan on the stove but keep the heat off for now. Whisk the 3/4 cup sugar, 1/3 cup cornstarch, and 1/4 teaspoon salt directly in the pan until no lumps of starch are visible. Pour in the 3 cups oat milk in a slow stream, whisking the whole time, then drop in the 4 egg yolks and whisk until the mixture is smooth and the color is an even pale yellow.
You’re looking for a completely uniform liquid. Even a few stray specks of cornstarch can turn into lumps later, so take 30 seconds here to get it right.
Step 2: Cook the Pudding Until It Thickens

Set the pan over medium heat. Whisk gently but nonstop, scraping the corners and the entire bottom of the pan as it warms up. After about 5 minutes you’ll notice the liquid starting to steam, and around the 6 to 8 minute mark it will suddenly turn thick and begin to bubble low and slow.
Watch for those first lazy bubbles breaking through the surface. That’s your sign to keep whisking for 1 more full minute over the heat to cook out the starchy raw taste, then pull the pan off the burner immediately.
Step 3: Stir In the Vanilla and Butter
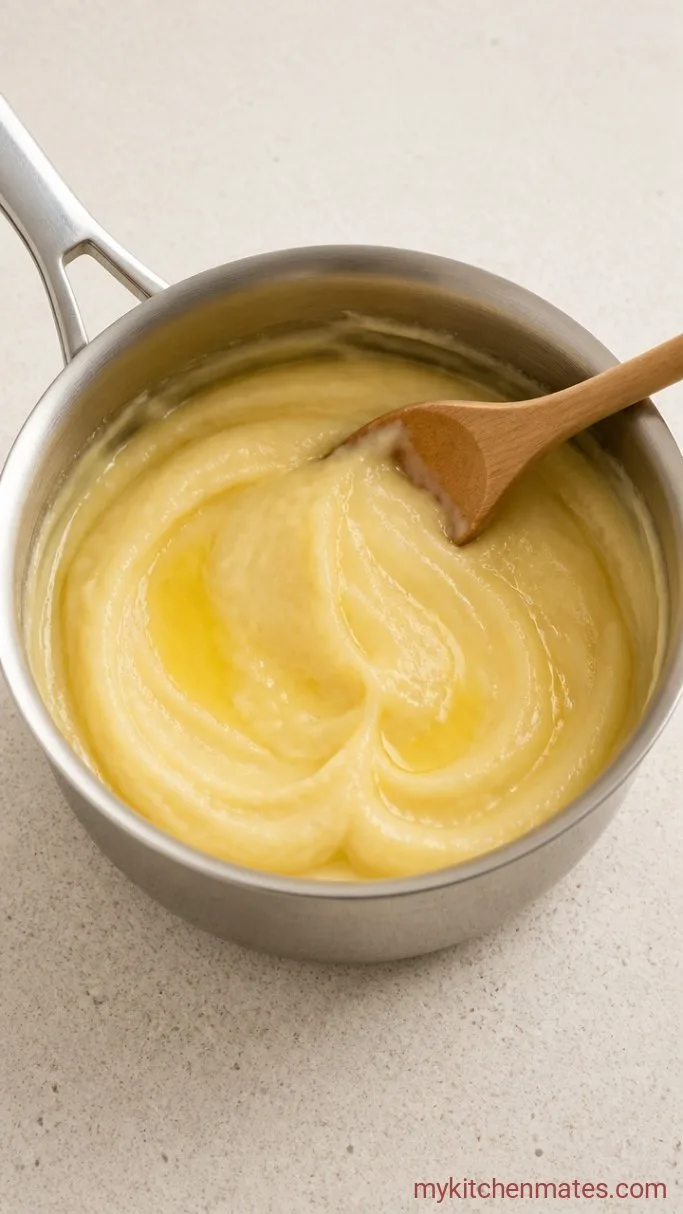
Off the heat, add the 2 teaspoons vanilla extract and the 2 tablespoons vegan butter or refined coconut oil. Stir until the butter melts completely and the pudding is glossy and smooth.
The pudding will be thick enough to coat the back of a spoon and hold a line when you draw your finger through it. Let it cool in the pan for about 10 minutes while you slice the bananas, giving it an occasional stir so a skin doesn’t form.
Step 4: Layer the Bananas and Wafers

Grab a 9 by 13 inch dish or a large trifle bowl. Spread a thin layer of the warm pudding across the bottom, just enough to cover it. Arrange a single layer of vanilla wafer cookies over the pudding, then top with a layer of sliced bananas. Spoon half of the remaining pudding on top and spread it out gently.
Repeat one more time, cookies, bananas, then the last of the pudding. Use all the banana slices, pressing them down lightly so they stay tucked inside the custard as it sets.
Step 5: Top and Serve

Cover the dish with plastic wrap, pressing it right onto the surface of the pudding so no skin forms. Slide it into the fridge for at least 4 hours or up to overnight; the cooler sets the custard and softens the cookies into tender layers.
When you’re ready to serve, peel off the wrap and add a swoop of dairy free whipped topping or a scatter of crushed wafers on top. Scoop down through the layers and serve cold, while the bananas are still firm and the pudding holds its shape.
A Few Notes Before You Start
- Ripe bananas with a few brown spots are ideal; completely green bananas won’t give you the same natural sweetness.
- If your pudding ever feels lumpy, pour it through a fine mesh strainer before layering, then keep whisking more vigorously next time.
- To prevent banana slices from browning too quickly, you can toss them with a tiny squeeze of lemon juice, but that shifts the flavor slightly. Slicing them right before assembly is often enough.
- Leftover pudding tastes even better on day two, as the wafers soften into cake like layers.
Keeping the Pudding Fresh
- Refrigerate: store covered in the fridge for up to 3 days. The bananas will slowly release some liquid, but the flavor stays strong.
- Serve cold: this dessert is meant to be eaten straight from the fridge, so no reheating is needed. Leftovers are great for a quick snack.
Frequently Asked Questions
Can I use coconut milk instead?
You can, but the pudding will have a noticeable coconut taste. If you like that flavor, use full fat canned coconut milk in place of the oat milk. The texture will be even richer, though it sets a bit firmer.
Why did my pudding turn out runny?
If it never thickened on the stove, the cornstarch likely didn’t reach a full boil. You need those bubbles breaking through and about 1 minute of cooking once they appear. Under cooked pudding won’t set up properly, even after chilling.
Can I make this ahead of time?
Yes, up to 24 hours in advance works well. Any longer and the bananas start to soften too much, though the taste is still fine. Keep it chilled right up until serving.
Are all vanilla wafers dairy free?
Most classic yellow box vanilla wafers are made without dairy, but always scan the label for whey or butter. Look for brands that list just flour, sugar, oil, and leavening.
Can I skip the egg yolks?
You can make a cornstarch only pudding by increasing the cornstarch to 1/2 cup and skipping the yolks entirely. The result will be more gel like and less rich, but it still layers nicely.
Dairy Free Banana Pudding Recipe
Ingredients
Method
- Whisk sugar, cornstarch, and salt in a saucepan until smooth. Pour in oat milk and egg yolks, whisking until fully combined.
- Cook over medium heat, whisking constantly, until the mixture thickens and begins to bubble, about 6 to 8 minutes. Cook 1 minute more, then remove from heat.
- Stir in vanilla and vegan butter until smooth. Let cool 10 minutes, stirring occasionally.
- Spread a thin layer of pudding in a 9×13 dish. Layer with vanilla wafers, banana slices, and half the remaining pudding. Repeat another layer, ending with pudding on top.
- Cover with plastic wrap pressed to the surface and chill at least 4 hours. Unwrap, top with whipped topping or wafer crumbs, and serve cold.
Notes
