
No-Soggy-Bottom American Apple Pie

This classic American apple pie has a flaky, buttery double crust and a spiced apple filling that stays crisp on the bottom, not soggy. A few simple tricks make it reliable every time.

The filling leans on two apple varieties for a balance of tart and sweet, and the crust gets a head start on a hot baking sheet so the bottom bakes through fully. It’s the pie I turn to when I want a dessert that feels like an occasion but doesn’t demand a pastry degree.
Why This Pie Works
The preheated baking sheet is the real key here. Placing the pie pan directly onto a hot surface forces the bottom crust to set fast, sealing out the juices and giving you that audible crispness when you cut the first slice. No more gummy, underbaked dough hiding under the apples.
A mix of firm-tart and sweeter apples keeps the filling structured without turning to mush. The lemon juice brightens everything, and a light hand with spices lets the fruit lead. The crust stays tender because you handle it just enough to bring it together, then let it rest in the fridge so the gluten relaxes.
Ingredients

- 2 1/2 cups (315 g) all-purpose flour: spooned and leveled, for a tender crust
- 1 tsp kosher salt: adds balance to the dough
- 1 tbsp granulated sugar: helps browning without making the crust sweet
- 1 cup (2 sticks / 226 g) cold unsalted butter: cut into 1/2‑inch cubes
- 6 to 8 tbsp ice water: add a bit at a time until the dough just holds
- 3 lbs (about 6 to 7 medium) mixed apples: I like half Granny Smith and half Honeycrisp
- 3/4 cup (150 g) granulated sugar: for the filling
- 2 tbsp all-purpose flour: thickens the juices; you can swap cornstarch
- 1 tsp ground cinnamon
- 1/4 tsp ground nutmeg
- 1/4 tsp salt
- 1 tbsp fresh lemon juice: keeps apples from browning and lifts the flavor
- 1 tbsp cold unsalted butter: cut into small pieces for dotting the filling
- 1 large egg: beaten with a splash of water for egg wash
- 1 tbsp coarse sugar: for sprinkling on top, optional
Variations and Substitutions
- Apple swap: any firm baking apple works; Braeburn, Jonagold, or Pink Lady are all good choices. Avoid soft varieties like McIntosh that break down too much.
- Spice it differently: try 1/4 tsp ground allspice or a pinch of cardamom instead of nutmeg.
- Dairy‑free pie: use a vegan butter stick that’s at least 78% fat, and swap the egg wash for a thin nondairy milk glaze.
- Crumb topping: skip the top pastry and cover the filling with a buttery streusel instead for a quicker finish.
Crispy McDonald’s Apple Pie is another dessert you’d probably love if you enjoy this pie.
How to Make No‑Soggy‑Bottom American Apple Pie
Step 1: Mix and Chill the Dough

Whisk the 2 1/2 cups flour, 1 tsp salt, and 1 tbsp sugar in a large bowl. Toss in the cold butter cubes and work them with your fingertips or a pastry blender until the mixture looks like coarse meal with some pea‑sized bits remaining. Drizzle in 4 tbsp of the ice water and stir with a fork; add more water, 1 tbsp at a time, just until the dough begins to clump but is not sticky.
The dough should look shaggy and hold together when you press it. It will feel cool to the touch and you’ll still see flecks of butter, which is exactly what you want for flaky layers.
Divide the mixture in half, shape each into a 1‑inch‑thick disc, wrap tightly, and refrigerate for at least 1 hour. This rest keeps the butter solid and lets the gluten relax, so the crust doesn’t shrink in the oven.
Step 2: Roll Out the Crust

Remove one disc of dough from the fridge and let it sit on a lightly floured surface for about 5 minutes, just long enough to take the chill off but still be firm. Dust your rolling pin and roll the dough into a 12‑inch circle, turning and dusting a tiny bit more flour underneath as needed to prevent sticking.
You’ll see sheets of butter flattening into the dough, and the edges may crack a little—that’s fine. Patch any tears with a wet finger and a scrap of dough. Transfer the circle to a 9‑inch glass pie dish (glass helps you check the bottom browning later), ease it into the corners without stretching, and trim the overhang to 1/2 inch. Slide the dish into the fridge while you roll the second disc into another 12‑inch circle and prep the filling.
Step 3: Toss the Apple Filling

Peel, quarter, and slice the apples into 1/4‑inch‑thick wedges—you want them all roughly the same thickness so they cook evenly. In a large bowl, combine the sliced apples, 3/4 cup sugar, 2 tbsp flour, 1 tsp cinnamon, 1/4 tsp nutmeg, 1/4 tsp salt, and 1 tbsp lemon juice. Toss well with your hands until every slice is coated.
The sugar will start to draw juice from the apples, and the mixture will look glossy. Toss the filling right before you assemble the pie; letting it sit too long can make a syrupy puddle that thins your thickener.
Step 4: Assemble the Pie

Take the bottom crust‑lined dish from the fridge and pile the apple filling inside, mounding it slightly higher in the center. Dot the fruit with the 1 tbsp of cold butter cut into small pieces. Drape the second rolled‑out dough circle over the top, center it, and trim the top edge to match the bottom overhang.
Fold the overhang under itself and crimp the edges with your fingers or a fork to seal. Cut a few 2‑inch vents in the top crust with a sharp knife so steam can escape. Brush the top lightly with the beaten egg and sprinkle with coarse sugar if using. The egg wash will give you a burnished, deep‑golden crust.
Step 5: Bake Until Golden
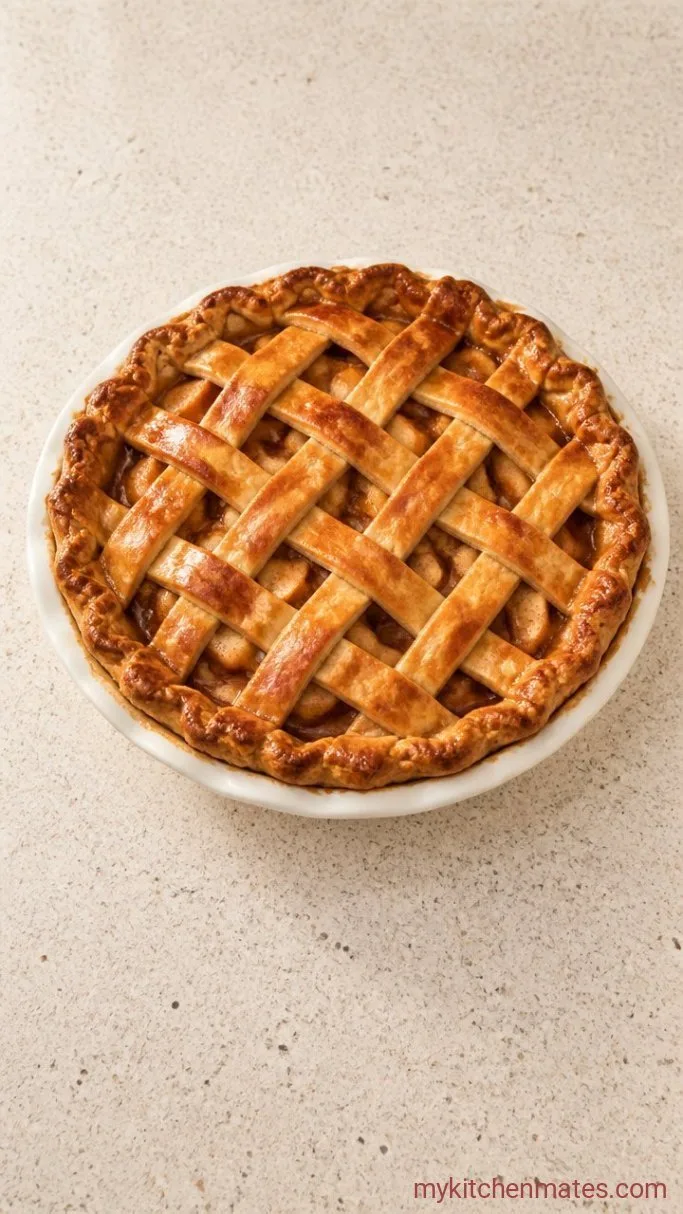
Preheat your oven to 400°F (200°C) with a rack in the lower third and a heavy baking sheet on the rack. When the oven is hot, set the pie dish directly on the preheated baking sheet and bake for 20 minutes. Then reduce the temperature to 375°F (190°C) and continue baking for 40 to 45 minutes more.
After the first 20 minutes, the crust edges should be just starting to color. For the remaining time, check after 35 minutes—the crust will turn deep golden brown and you’ll see thick juices bubbling through the vents. Those bubbles are your signal the filling is cooked through.
If the edges brown too fast, tent them loosely with foil, but don’t cover the whole pie or you’ll trap steam and soften the top. The hot baking sheet underneath is what gives the bottom crust its crisp finish.
Step 6: Cool and Slice the Pie

Transfer the pie to a wire rack and let it cool for at least 4 hours before slicing. Cutting too soon lets the juices run; a long rest lets the filling set up so each slice holds its shape.
The top crust will have a glossy, crackly surface, and the bottom will feel firm when you tap the dish. When you finally slice in, you’ll hear that crisp snap and see clean layers of apple between the crusts. Serve the slices at room temperature or slightly warm.
Tips for a Crisp Bottom Crust
- Use a glass pie dish: you can peek at the underside without lifting the pie, so you know exactly when the bottom is browned.
- Always preheat the baking sheet: a heavy, dark sheet or a pizza stone works best. Place it in the oven while it heats, and set the pie directly on it.
- Keep the butter cold right until the dough hits the oven: if the kitchen is warm, pop the assembled pie back in the fridge for 15 minutes before baking.
- Don’t overwork the dough: mix just until it comes together, or the crust turns tough and shrinks.
- Vent generously: those cuts in the top crust aren’t decorative—they release steam so the bottom doesn’t steam itself soggy.
Bake times by dish material:
| Pie dish material | Oven temp and time |
|---|---|
| Glass | 400°F (20 min), then 375°F (40‑45 min) |
| Ceramic | 400°F (20 min), then 375°F (45‑50 min) |
| Dark metal | 400°F (20 min), then 375°F (35‑40 min) |
Storing Leftover Pie
- Refrigerate: Cover cooled pie loosely with foil or plastic wrap and store in the fridge for up to 4 days. The bottom will soften slightly over time but stays decent.
- Reheating: Warm individual slices in a 350°F (175°C) oven for 8‑10 minutes to re‑crisp the bottom crust. A toaster oven works well too. Microwaving will make it soggy.
Frequently Asked Questions
Can I use a store‑bought crust?
Yes, two refrigerated or frozen pie crusts work here. Just make sure to still preheat the baking sheet and vent the top crust for a crispier bottom.
How do I prevent the filling from getting watery?
The 2 tbsp of flour (or cornstarch) and a long cooling time are key. Baking until juices bubble thickly through the vents also ensures the thickener has activated.
Why did my pie crust shrink down the sides?
Shrinking usually means the dough was overworked or not rested long enough. Chilling the shaped dough in the dish before filling and baking helps the gluten relax.
Can I make the pie ahead of time?
Absolutely. Bake it the day before, let it cool completely, and store at room temperature covered with a clean towel. Reheat in a low oven to refresh the crust if you like.
My bottom crust is still pale after baking. What went wrong?
The oven may not have been hot enough on the bottom, or the baking sheet wasn’t preheated. Using a glass dish and moving the rack to the lower third of the oven fixes this.
No‑Soggy‑Bottom American Apple Pie Recipe
Ingredients
Method
- Whisk flour, salt, and sugar. Cut in cold butter until pea‑sized. Add ice water 1 tbsp at a time until dough clumps. Divide, shape into discs, wrap, and chill at least 1 hour.
- Roll one dough disc into a 12‑inch circle, fit into a 9‑inch glass pie dish, trim overhang to 1/2 inch. Chill. Roll second disc into another 12‑inch circle.
- Toss sliced apples with sugar, flour, cinnamon, nutmeg, salt, and lemon juice until coated.
- Pile filling into chilled bottom crust, dot with butter, drape top crust over, trim, fold overhang under, crimp, cut vents, brush with egg wash, and sprinkle with coarse sugar.
- Preheat oven with a baking sheet on lower rack at 400°F (200°C). Place pie on hot sheet, bake 20 min. Reduce to 375°F (190°C) and bake 40‑45 min until golden and juices bubble thickly.
- Cool on a wire rack at least 4 hours, then slice and serve.
Notes
