
One Piece Bento Cake: A Cute Mini Anime Cake for Fans

This One Piece bento cake is a tiny, lunchbox-sized dessert bursting with your favorite Straw Hat vibes. It’s the perfect excuse to bake something playful for a birthday, a watch party, or just because you want to see a tiny Jolly Roger on a cake.
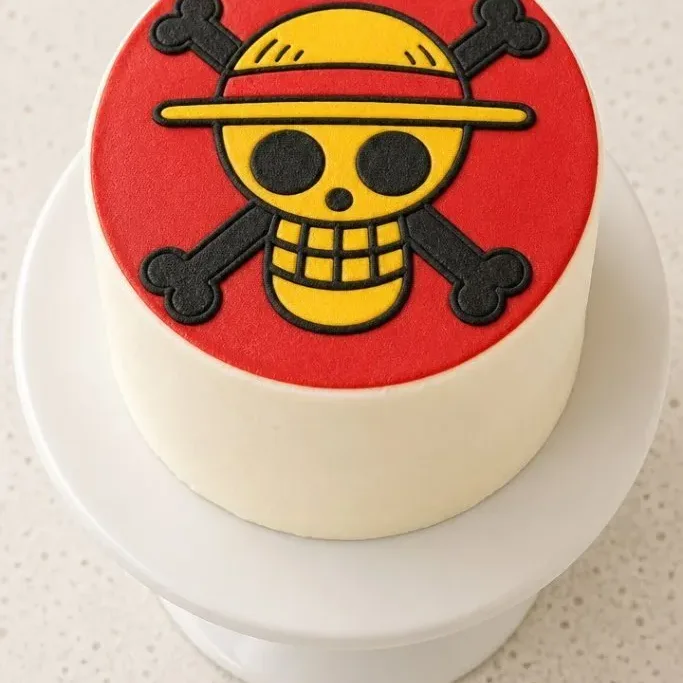
The cake itself is a fluffy vanilla sponge with classic buttercream, scaled down to a 4-inch round so it feels approachable even if you’re not a pro decorator.
Why This Little Cake Always Makes Me Smile
It’s the size that gets me. A 4-inch cake is low stakes, so you can mess up the frosting and scrape it off without wasting a whole layer. The decorating turns into a fun art project instead of a stressful test.
I stick with vanilla and buttercream because both are forgiving room-temperature canvases. A quick chill before piping means the details stay crisp, and that tiny Straw Hat flag never stops feeling like magic.
Ingredients

- 1 cup all-purpose flour: spooned and leveled for a tender crumb
- 1 tsp baking powder: gives just enough lift for small layers
- ¼ tsp salt: balances the sweetness
- ½ cup unsalted butter, softened: 1 stick, at cool room temperature so the batter creams well
- ½ cup granulated sugar: fine white sugar, nothing coarse
- 1 large egg: at room temperature, so the batter doesn’t curdle
- ¼ cup whole milk: at room temperature, any milk works but whole adds richness
- 1½ tsp vanilla extract: use a good one, you’ll taste it
- For the buttercream:: 1 cup unsalted butter, softened, 2½ cups powdered sugar, sifted, 2 tbsp whole milk, 1 tsp vanilla extract
- Food coloring: gel colors in red, black, and yellow for the iconic One Piece details
Variations / Substitutions
- Switch the cake flavor: a chocolate sponge turns this into a Devil Fruit-inspired cake. Reduce flour to ¾ cup and add ¼ cup cocoa powder.
- Make it dairy-free: swap the butter for a block-style vegan butter and use oat milk in the cake and frosting.
- Use a different character theme: the same tiny canvas works for Naruto or Ghibli cakes with just a color change.
- If you’re short on time: skip piping and draw a simple Straw Hat outline with toothpicks in the frosting, then fill it with sprinkles for an instant pop.
Layered Coffee Caramel Cake is another reader favorite dessert worth making next.
How to Make a One Piece Bento Cake
Step 1: Bake the Cake Layers
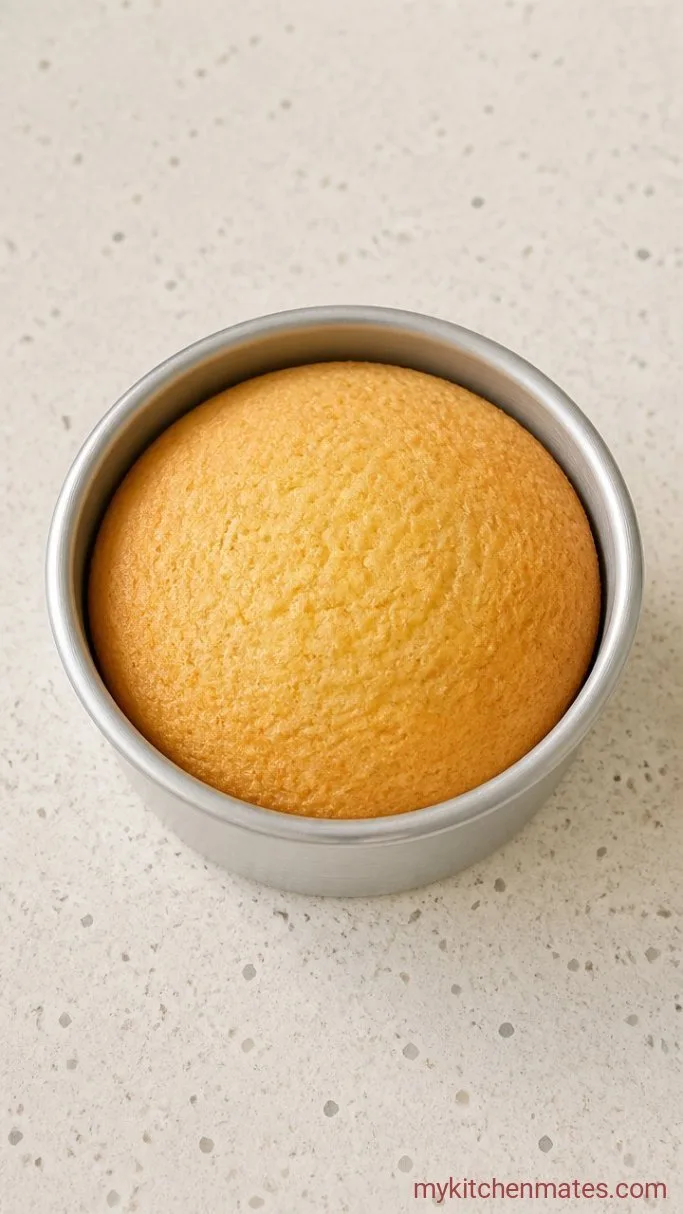
Preheat your oven to 350°F (175°C). Grease two 4-inch round cake pans and line the bottoms with parchment paper, then grease the paper lightly. In a medium bowl, whisk together the 1 cup flour, 1 tsp baking powder, and ¼ tsp salt until they’re one uniform color. In a larger bowl, beat the ½ cup softened butter and ½ cup sugar with a hand mixer on medium speed for a full 3 minutes, scraping the bowl once. The mixture should look noticeably lighter and fluffier, not just blended. Beat in the egg until it disappears, then mix in the 1½ tsp vanilla. Add half the flour mixture and all the ¼ cup milk, beat on low just until combined, then add the rest of the flour and mix until no dry streaks remain.
Divide the batter evenly between the two pans and smooth the tops. Bake on the middle rack for 20 to 25 minutes. The layers will pull away from the sides a little and the tops will spring back when you press them gently. A toothpick in the center should come out clean. Let the cakes cool in their pans on a rack for 10 minutes, then turn them out to cool completely on the rack before you touch the frosting—warm cake melts buttercream fast.
Step 2: Make the Buttercream

While the cake cools, beat the 1 cup softened butter in a large bowl on medium speed until it’s smooth and pale yellow, about 3 minutes. Sift in the 2½ cups powdered sugar in two additions, mixing on low after each until the sugar isn’t flying out of the bowl. Add the 2 tbsp milk and 1 tsp vanilla, then beat on medium-high for 3 full minutes. Stop and scrape the bowl once, then beat one more minute. You want a frosting that’s spreadable but holds a stiff peak when you pull the beater out—too soft and the piping will slide.
Take out about one-third of the buttercream and divide it into three small bowls. Tint one bowl deep red, one black, and one yellow using a toothpick’s dip of gel color at a time. The red should be bold, almost burgundy, because it lightens a little as the cake sits. Cover all the colored buttercream with a damp paper towel until you’re ready to decorate.
Step 3: Level and Fill the Layers

Use a long serrated knife to slice any domed top off each cooled layer so they sit flat. Place one layer onto a small cake board or plate and spread a generous scoop of the untinted white buttercream over it—about ¼ cup. Set the second layer on top, cut side down, and press gently to center it.
Now take a step back. The cake should look straight and even, no wobble. If it tilts, wiggle the top layer now before the filler sets. A level cake at this stage saves frantic scraping later.
Step 4: Crumb Coat and Chill

Scrape a big dollop of white buttercream onto the top of the cake and push it across the surface and down the sides with an offset spatula. Don’t worry about smoothness yet. This first thin coat is just to trap crumbs, so it’ll look messy. Scrape off any excess, then pop the cake into the fridge for 25 minutes. The buttercream will firm up until it feels cool and dry to the touch.
This cold rest is the secret to a sharp final finish. Never skip it, especially on a tiny cake where every smear shows.
Step 5: Decorate with One Piece Art

Apply a final thicker layer of white buttercream all over the chilled cake, smoothing the sides and top with a bench scraper for a clean canvas. Fit a small piping bag with a tiny round tip and fill it with black buttercream. Pipe a simple outlined Straw Hat Jolly Roger on the top of the cake—a round skull, crossed bones behind it, and a circle of shorts strokes along the hat brim. Fill the hat band with yellow and the rest of the hat with red, using a small spoon or a toothpick to nudge the color into the lines. If you prefer, draw a single favorite character silhouette or a tiny Going Merry instead. The key is to work with just a few clean colors.
Once you’re happy with the design, step back and enjoy the moment. Serve the cake right away or keep it chilled until party time. Every bite is soft vanilla and buttercream that tastes even better because you drew that little flag yourself.
A Few Notes Before You Start
- Chill the cake between frosting stages. Even 15 minutes in the freezer tightens everything up so the colors don’t bleed.
- Use the toothpick-and-monochromatic sketch trick if you’re nervous about piping: lightly scratch the design into the frosted top with a toothpick, then fill the lines with sprinkles or colored frosting.
- A 4-inch cake pan makes this feel truly bento-sized, but you can also bake a thin sheet cake and punch out 4-inch rounds with a cookie cutter.
- For the cleanest black buttercream, start with a chocolate buttercream base (add 1 tbsp cocoa powder to the uncolored buttercream before dividing) so you need less black gel to achieve a deep shade.
Bake times by pan size:
| Pan Size | Layers | Bake Time |
|---|---|---|
| 4-inch round | 2 | 20 to 25 mins |
| 6-inch round | 2 | 25 to 30 mins |
| 9×13-inch sheet | 1 | 18 to 22 mins |
Storing Your Bento Cake
- Refrigerate: Cover loosely with plastic wrap or a cake keeper and store in the fridge for up to 3 days. The buttercream keeps the cake moist.
- Reheating: This cake is served cold or at room temperature, so no reheating needed. Just let it sit out for 15 minutes before serving to take the chill off.
Frequently Asked Questions
Can I make this without a 4-inch cake pan?
Yes. Bake the batter in a single 6-inch round or a small sheet pan and use a 4-inch cutter or a knife to punch out your layers. The yield will be the same.
How do I transfer a design onto the cake without freehanding?
Print a simple black outline of the Jolly Roger, place it under a piece of parchment paper, and pipe the design in reverse. Freeze the piped shape, then lift it onto the cake and gently press it into the smooth buttercream—like a buttercream transfer.
What’s the easiest One Piece symbol to start with?
The plain Straw Hat silhouette, just a rounded triangle with a brim and a couple of lines for the band, is the most beginner-friendly. It reads instantly even if your lines aren’t perfect.
Can I use fondant instead?
Sure. Roll out a small piece of white fondant, cut the shapes with a craft knife, and attach them with a dab of buttercream. It gives a crisp look but the cake tastes less cohesive than all-buttercream.
One Piece Bento Cake Recipe
Ingredients
Method
- Preheat oven to 350°F (175°C). Grease and line two 4-inch round pans. Whisk flour, baking powder, and salt. Cream butter and sugar, then beat in egg and vanilla. Alternate adding flour mixture and milk until smooth. Divide batter and bake 20-25 minutes until a toothpick comes out clean. Cool completely.
- Beat butter for frosting until pale, then sift in powdered sugar in two additions. Add milk and vanilla and beat until stiff peaks form. Divide a third and tint red, black, and yellow.
- Level cake layers, fill with white buttercream, and stack.
- Apply a thin crumb coat of white buttercream and chill 25 minutes.
- Frost with a final thick white layer. Pipe or outline the One Piece Jolly Roger on top with black, then fill with red and yellow. Serve or keep chilled.
Notes
