
Classic Italian Rainbow Cookies (Just Like the Bakery)

Italian rainbow cookies are those tri-color almond sponge squares you spot behind every bakery counter, stacked with jam and finished with a dark chocolate top. They look fussy but the process is mostly just spreading and layering, and the payoff is a whole tray of soft, jewel-toned bars.

The almond paste gives them a tender, tight crumb that stays damp for days, and the thin layer of melted chocolate on top cracks exactly where you bite. A smear of apricot or raspberry keeps the three layers glued together and adds a gentle tartness that cuts the richness.
Why These Cookies Are Worth Every Step
The texture is what keeps me coming back. Dense but not heavy, with an almost marzipan-like chew from the almond paste. The chocolate top is just thick enough to snap cleanly without flopping over the sides.
You get a little hit of fruit from the jam, a little nuttiness from the almond, and a lot of satisfaction when you slice them into neat little bars. They hold beautifully in the fridge and even improve after a day.
Ingredients
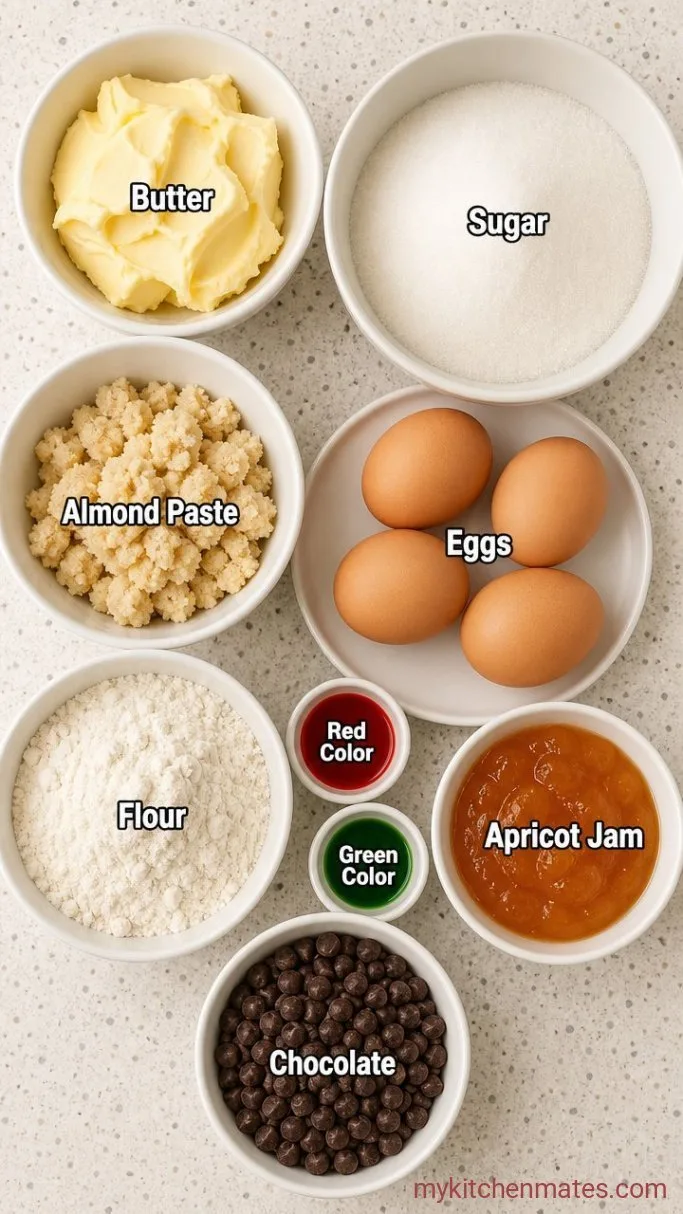
- 1 cup (226g) unsalted butter, softened: let it sit at room temp for 30 minutes so it creams easily.
- 1 cup (200g) granulated sugar: this isn’t an overly sweet dough, the jam and chocolate bring balance.
- 8 oz almond paste: use the canned or tube variety, not marzipan. Almond paste is less sweet and more finely ground.
- 4 large eggs: cold from the fridge is fine.
- 2 tsp almond extract: pure extract gives that unmistakable cookie-shop scent.
- 2 cups (240g) all-purpose flour: spoon and level it, don’t scoop.
- ½ tsp salt: just enough to round out the sweetness.
- Red food coloring: liquid or gel, enough to tint one third of the batter a deep pinkish red.
- Green food coloring: go for a true green, not pastel, so the layers pop.
- ½ cup (160g) apricot preserves: seedless and smooth, or press it through a strainer if you see chunks.
- 12 oz semisweet chocolate: chopped bars or chips work, whichever melts smoothly.
- 1 tbsp neutral oil: canola or vegetable oil gives the glaze a little shine.
Variations / Substitutions
- Raspberry jam: swap in seedless raspberry for a brighter, tarter layer; it pairs just as well with almond and chocolate.
- Dark chocolate: use 70% cacao if you want a less sweet finish, just add an extra teaspoon of oil so it spreads.
- Almond extract alternative: vanilla extract or lemon extract works in a pinch, though the flavor will shift away from classic bakery taste.
- Dairy-free: a plant-based butter stick will give you a near match for the sponge, just confirm your almond paste is dairy-free.
Tiramisu Baked Oats make a great breakfast to go with these cookies.
How to Make Italian Rainbow Cookies
Step 1: Cream the Butter and Almond Paste
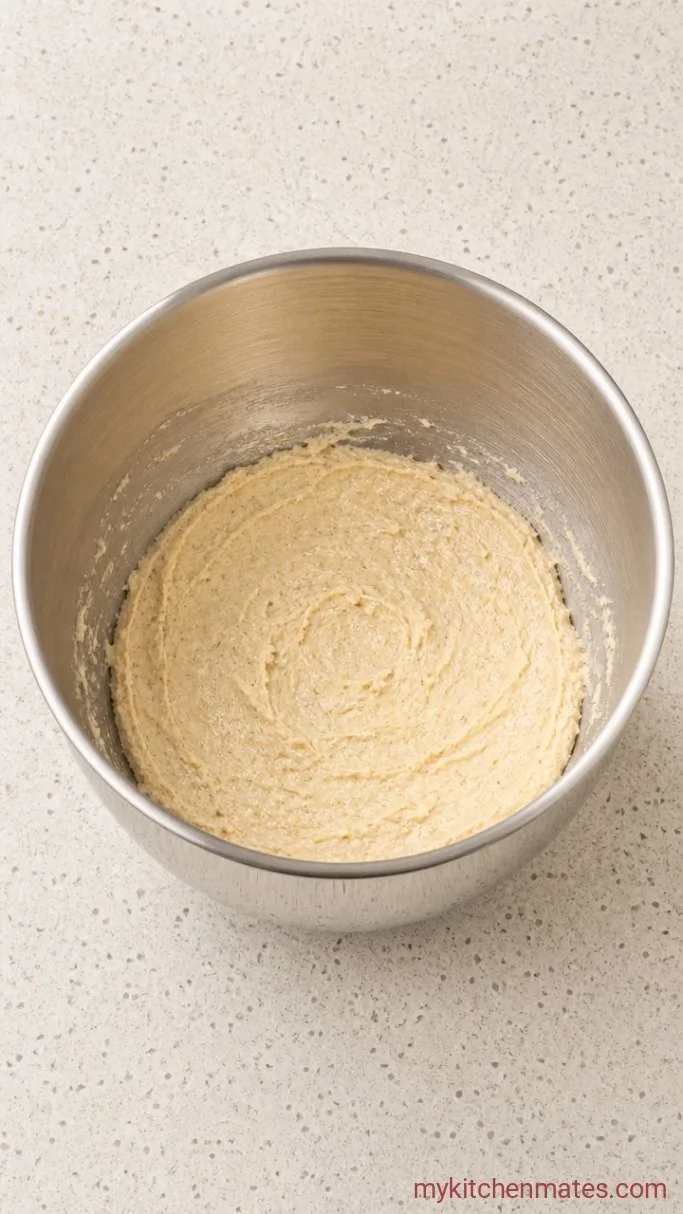
Beat the 1 cup butter, 1 cup sugar, and 8 oz almond paste in a stand mixer with the paddle attachment on medium speed until the mixture looks pale and almost fluffy, about 3 minutes. Scrape down the bowl, then add the 4 eggs one at a time, beating well after each. Pour in the 2 teaspoons almond extract and mix again.
The batter will look slightly curdled at first, but that’s normal. Once you add the flour, it will come together into a smooth, thick batter. Stop the mixer as soon as you no longer see dry streaks. Overbeating builds gluten and can make the layers tough instead of tender.
You want a batter that falls off the spatula in a ribbon and holds its shape for a moment before sinking back. This texture helps you spread it thinly and evenly in the next step.
Step 2: Bake the Colored Layers
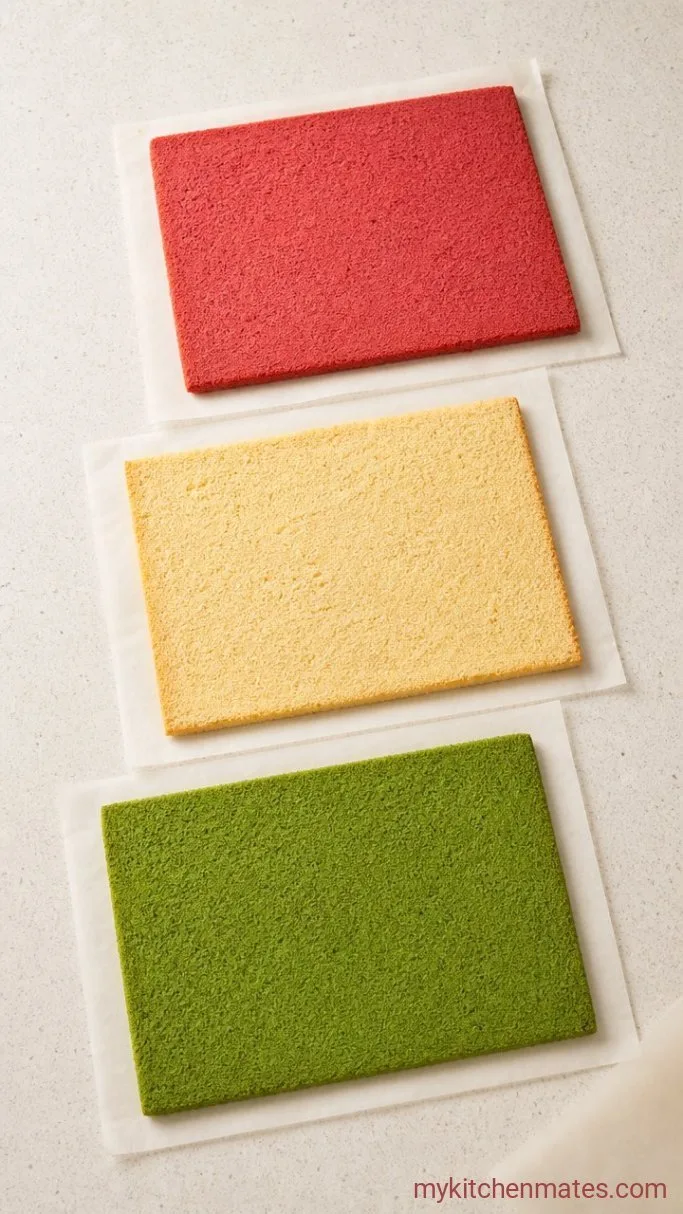
Preheat your oven to 350°F (175°C). Line three 9×13-inch quarter sheet pans with parchment paper, leaving a little overhang on two sides so you can lift the cakes out later. Stir together the 2 cups flour and ½ teaspoon salt, then mix them into the wet ingredients just until combined.
Divide the batter equally among three bowls. Tint one bowl with green food coloring until it’s a deep, vivid green, and another with red until you get a bold pinkish-red. Leave the third bowl plain. The plain layer will bake up pale yellow. Spread each portion into its own prepared pan. Use an offset spatula or the back of a spoon to push the batter to the edges; the layer will be very thin, about ¼ inch or less.
Bake for 10 to 12 minutes, rotating the pans halfway. The cakes are done when the tops look set and dry, and the edges just barely start to pull from the sides. There should be no browning. If you overbake, the layers get dry and crumbly, and they won’t absorb the jam as nicely. Cool the cakes completely in their pans on wire racks.
Step 3: Build the Cake with Jam
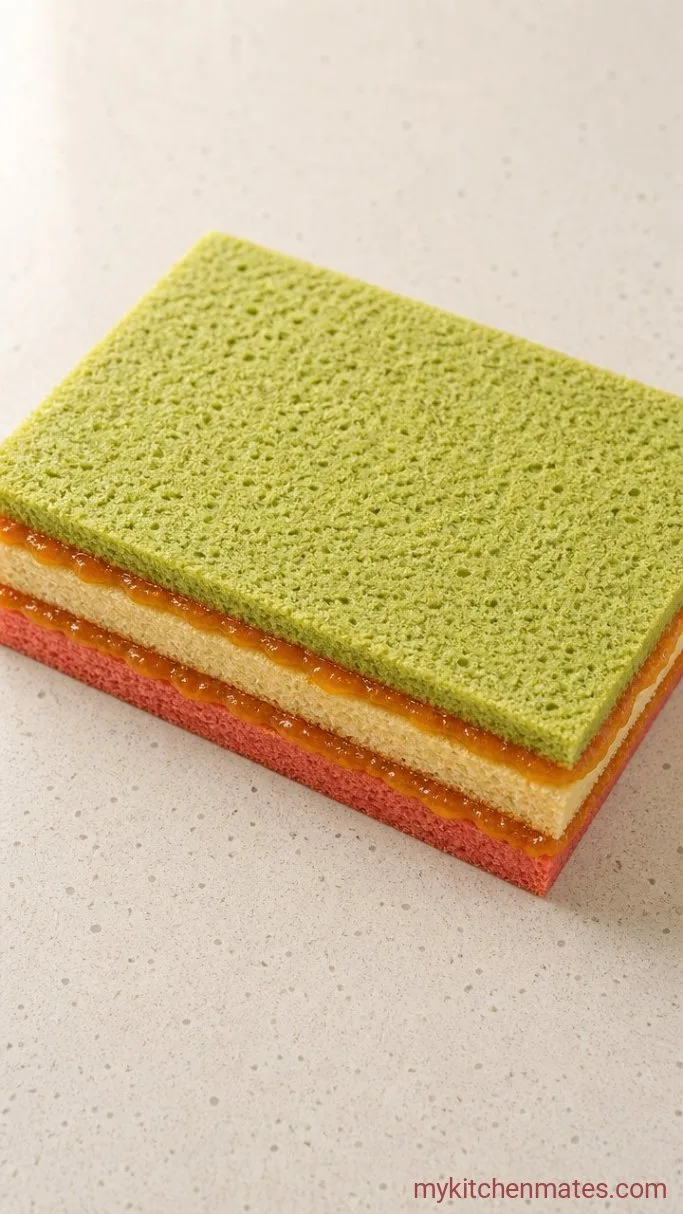
Lay a sheet of wax paper on a cutting board. Lift the green layer out of its pan using the parchment and flip it upside down onto the wax paper so the baked top faces down. Peel off the parchment. Stir the ½ cup apricot preserves until it’s spreadable, then use a small offset spatula to spread half of it over the green layer, going right to the edges.
Unmold the plain white layer and set it directly on top of the jam, pressing gently so it sticks. Spread the remaining preserves over the white layer, then unmold the red layer and place it top-side up on the stack. You now have red on top, white in the middle, and green on the bottom, all stuck together with apricot jam.
Step 4: Press and Chill the Stack
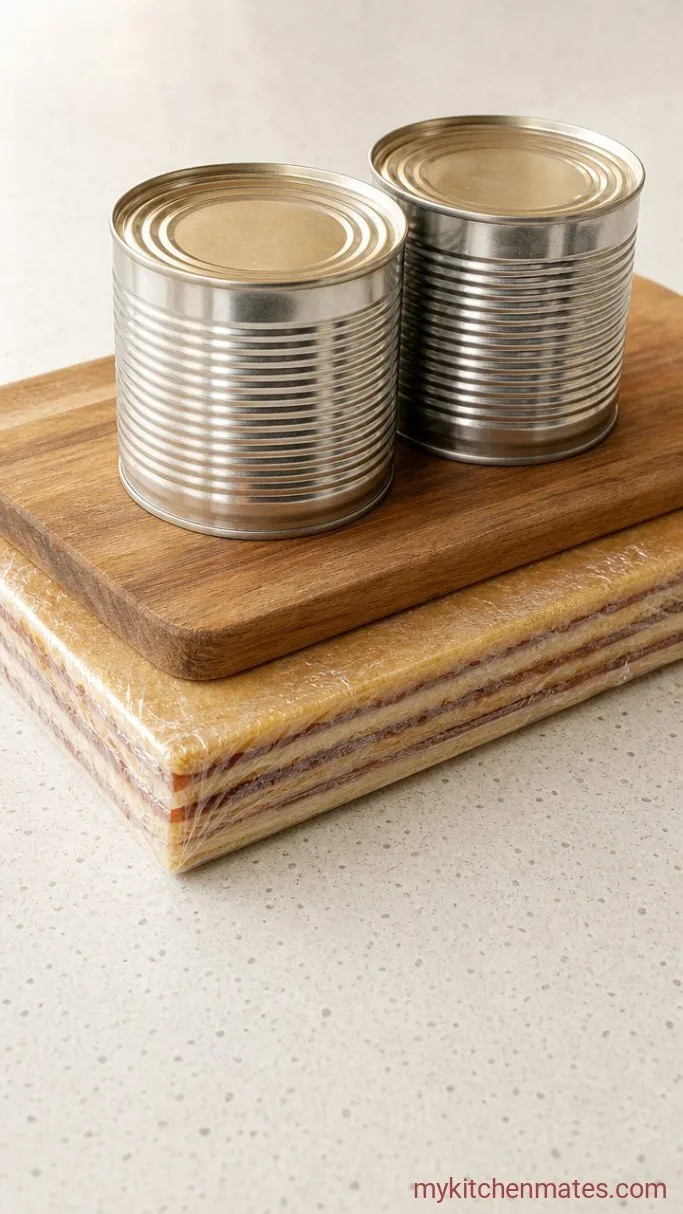
Wrap the whole block tightly in plastic wrap, then place another cutting board or a flat tray on top. Set a few heavy cans or a cast-iron skillet on the board to gently weigh it down, and transfer the whole setup to the fridge. Chill for at least 8 hours, overnight is even better.
This step compresses the layers so they bond into one solid slab. Without the weight, the jam acts more like a slip layer and your cookies will separate when you cut them. The chill firms up the butter and makes glazing and slicing far cleaner.
I know it’s hard to wait, but a well-pressed block is what gives you those sharp, bakery-style slices with no gaps.
Step 5: Glaze with Chocolate
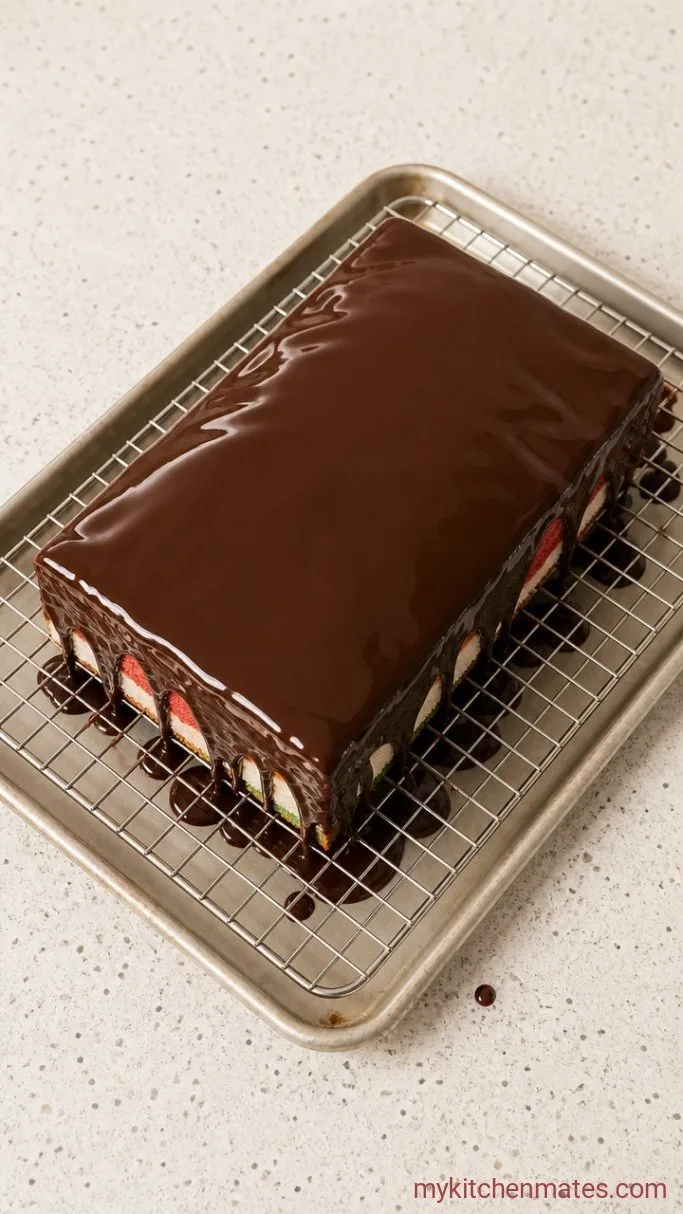
Take the chilled block from the fridge and unwrap it. Place it on a wire rack set over a sheet pan to catch drips. Melt the 12 oz semisweet chocolate with the 1 tbsp neutral oil in a heatproof bowl over a pot of barely simmering water, stirring until smooth. Let it cool for about 3 minutes so it’s fluid but not hot.
Pour the chocolate over the top of the red layer and use an offset spatula to spread it in an even layer, nudging it just over the edges so it drips a little down the sides. Work quickly to smooth it, then leave the block at room temperature for 5 minutes before moving it to the fridge so the chocolate sets without blooming. Chill until the top is firm, about 30 minutes.
A thin, shiny chocolate top that cracks when you bite is the goal. Too thick and it overpowers the almond. Too thin and you lose that snap.
Step 6: Trim and Slice the Cookies
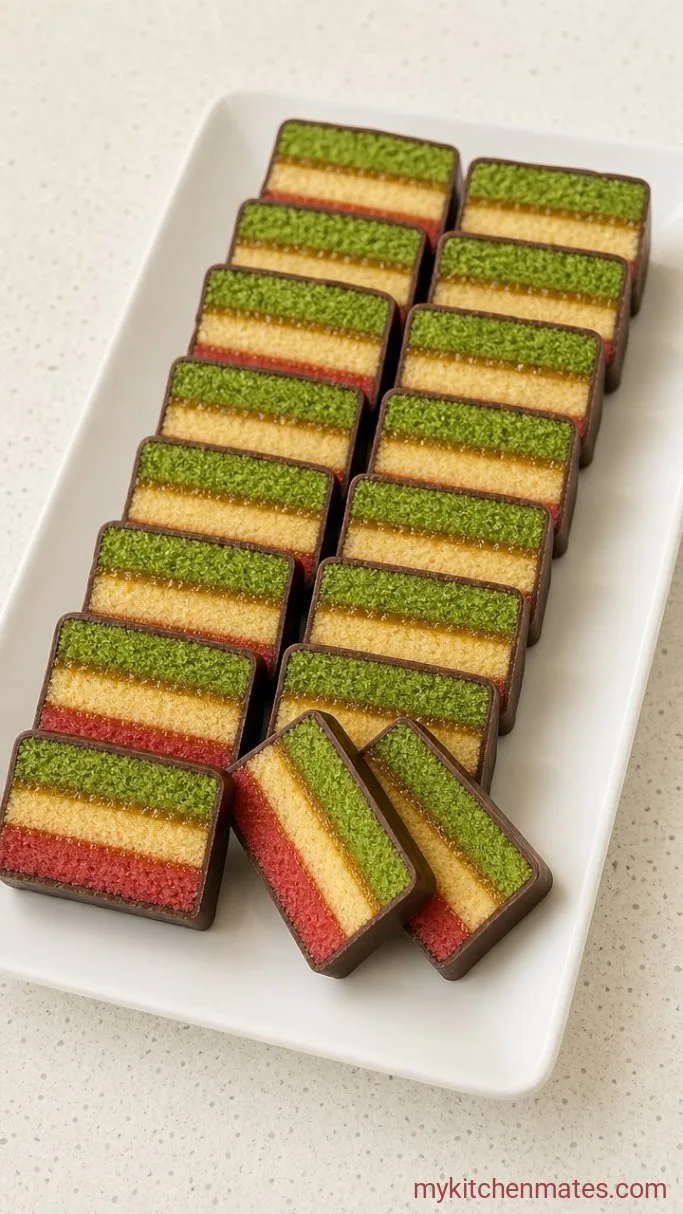
Lift the glazed block onto a cutting board. Use a sharp chef’s knife to trim about ¼ inch off all four sides, revealing the clean layers. Slice the block lengthwise into 1-inch wide strips, then cut those strips crosswise into 1½-inch bars. Wipe the knife between cuts with a damp paper towel for the cleanest slices.
The cross section shows a neat stack of pink, white, and green with dark chocolate on top and a thin line of jam between each layer. Arrange the cookies on a platter and serve right away, or layer them between sheets of wax paper in an airtight tin.
A Few Tips Before You Start
- Use real almond paste.: Marzipan is too sweet and coarse; it will make the crumb gummy and the flavor cloying.
- Weigh the stack overnight, no shortcuts.: Even 4 hours isn’t enough to get the layers to fuse. Plan ahead.
- Warm your knife.: Running the blade under hot water and drying it between slices stops the chocolate from cracking and the layers from smearing.
- Smooth jam only.: Bits of fruit will make the stack bumpy and prevent clean slices. Strain if needed.
Storing Leftover Rainbow Cookies
- Refrigerate:: The cookies keep in an airtight container in the fridge for up to 1 week. Their texture actually gets softer and more melded after a day or two.
- Freeze (unglazed):: You can freeze the pressed, unglazed slab for up to 3 months. Wrap it tightly, thaw in the fridge overnight, then glaze and slice.
- Serve cold:: These are best straight from the fridge or after sitting out for just 10 minutes.
Frequently Asked Questions
Can I make these without food coloring?
Yes. The taste stays the same and you’ll have three pale yellow layers. A dusting of cocoa between layers won’t mimic the color but can add a visual twist.
Why are my layers separating when I cut them?
Likely the stack wasn’t pressed with enough weight or not chilled long enough. The jam also needs to be thin enough to stick.
Can I use raspberry jam instead of apricot?
Absolutely. Seedless raspberry is a classic swap. Its sharper acidity pairs well with the sweet almond and chocolate.
What’s the easiest way to spread the batter thinly?
Use a small offset spatula dipped in water to keep the batter from sticking. Work fast and don’t fret about perfect edges; you’ll trim them later.
Can I make them gluten-free?
Yes. Use a 1-to-1 gluten-free flour blend that contains xanthan gum. The texture will be a touch more crumbly but still good.
Italian Rainbow Cookies Recipe
Ingredients
Method
- Cream butter, sugar, and almond paste until pale; add eggs one at a time, then almond extract. Mix flour and salt, then stir in just until combined.
- Divide batter into three bowls. Color one green, one red, and leave the third plain. Spread each into a parchment-lined 9×13-inch pan. Bake at 350°F for 10 to 12 minutes until set. Cool completely.
- Invert the green layer onto wax paper and spread with half the preserves. Top with the plain layer, spread with remaining preserves, then add the red layer on top.
- Wrap the stack in plastic, place a cutting board on top, and weight with heavy cans. Chill 8 hours or overnight.
- Melt chocolate with oil and spread over the top of the chilled block. Let cool at room temperature 5 minutes, then refrigerate until the chocolate is firm.
- Trim the edges and cut into bars. Wipe the knife between slices for clean lines.
Notes
