
Hello Kitty Birthday Cake with Buttercream Face Tutorial

This Hello Kitty birthday cake is a three-layer vanilla cake covered in pink Swiss meringue buttercream, with a piped face that anyone can manage using a printed template. It tastes like a classic celebration cake, tender and moist, with a silky frosting that isn’t cloyingly sweet.
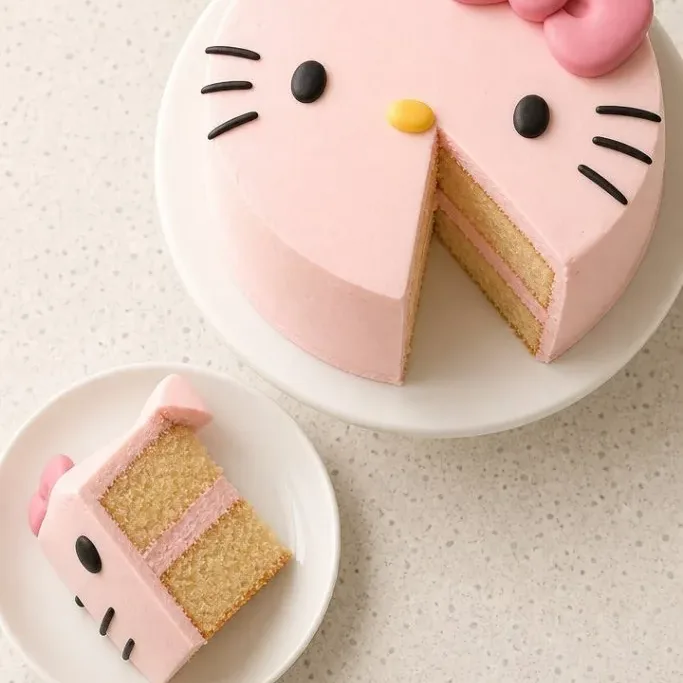
Even if you have never piped a character before, the method is forgiving because you can scrape off and retry the white face shape, and the bow hides any little wobbles.
What Makes This Hello Kitty Cake So Adorable (and Doable)
The vanilla cake layers have a fine, soft crumb from the reverse-creaming method, and the Swiss meringue buttercream is lighter than American buttercream while still holding sharp details. The whole cake stays moist for days in the fridge.
The decoration relies on a simple template you can print, and the piping steps build up in a logical order so the face slowly comes together. It’s the kind of cake that gets gasps when you walk it to the table, but it won’t leave you stressed in the kitchen.
Ingredients
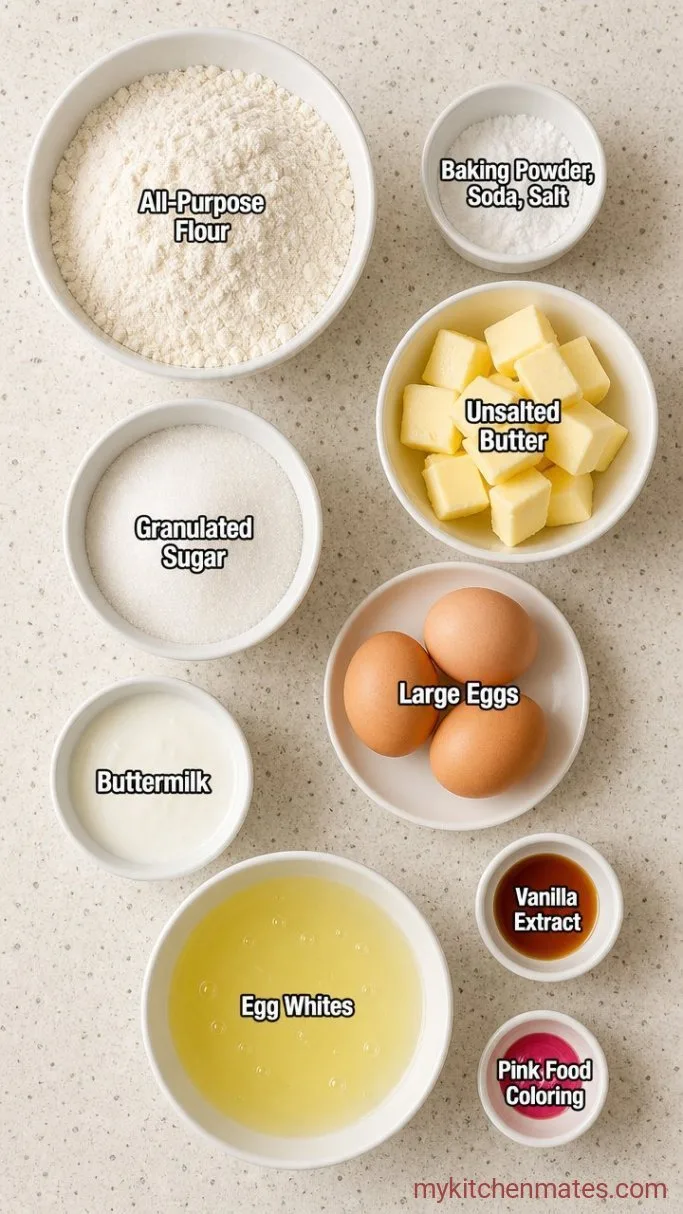
- 2 cups all-purpose flour: spooned and leveled, plus more for dusting pans
- 1 1/2 teaspoons baking powder: helps the layers rise evenly
- 1/2 teaspoon baking soda: reacts with the buttermilk for tenderness
- 1/2 teaspoon fine sea salt: enhances the vanilla flavor
- 3/4 cup unsalted butter, softened: use a good butter with 82% fat if possible
- 1 1/4 cups granulated sugar: keeps the crumb tight and not too sweet
- 3 large eggs, room temperature: cold eggs will seize the batter
- 1 cup buttermilk, room temperature: or whole milk with 1 tablespoon lemon juice
- 2 teaspoons vanilla extract: pure extract gives the best warmth
- 5 large egg whites: for Swiss meringue buttercream; you can use pasteurized carton whites
- 1 1/4 cups granulated sugar: dissolves into the egg whites over heat
- Pinch of fine sea salt
- 2 cups unsalted butter, softened but still cool and cubed: take it out of the fridge about 30 minutes before making the buttercream
- 1 tablespoon vanilla extract: adds depth to the frosting
- Pink gel food coloring: a tiny dab for the coat; extra for the bow
- Black buttercream or black edible marker: for the eyes and whiskers
- A small amount of yellow buttercream: for the nose
Variations / Substitutions
- Cream cheese frosting: swap the Swiss meringue for a 1:1 mix of cream cheese and butter beaten with powdered sugar; it will be tangier but less stable for piping details, so chill the cake well before serving.
- Sheet cake version: bake the batter in a buttered 9×13 inch pan for 30 to 35 minutes, then frost the top and pipe the face on the flat surface.
- Color change: tint the buttercream pale lavender or light blue instead of pink for a different party theme; use corresponding gel colors.
- Dairy-free: replace butter with a high-quality vegan butter stick and buttermilk with oat milk plus 1 tablespoon vinegar; the Swiss meringue won’t work, so use a vegan buttercream recipe.
Y2K Funfetti Birthday Cake is another dessert you’d probably love if you enjoy this cake.
How to Make Hello Kitty Birthday Cake
Step 1: Bake the Vanilla Cake Layers
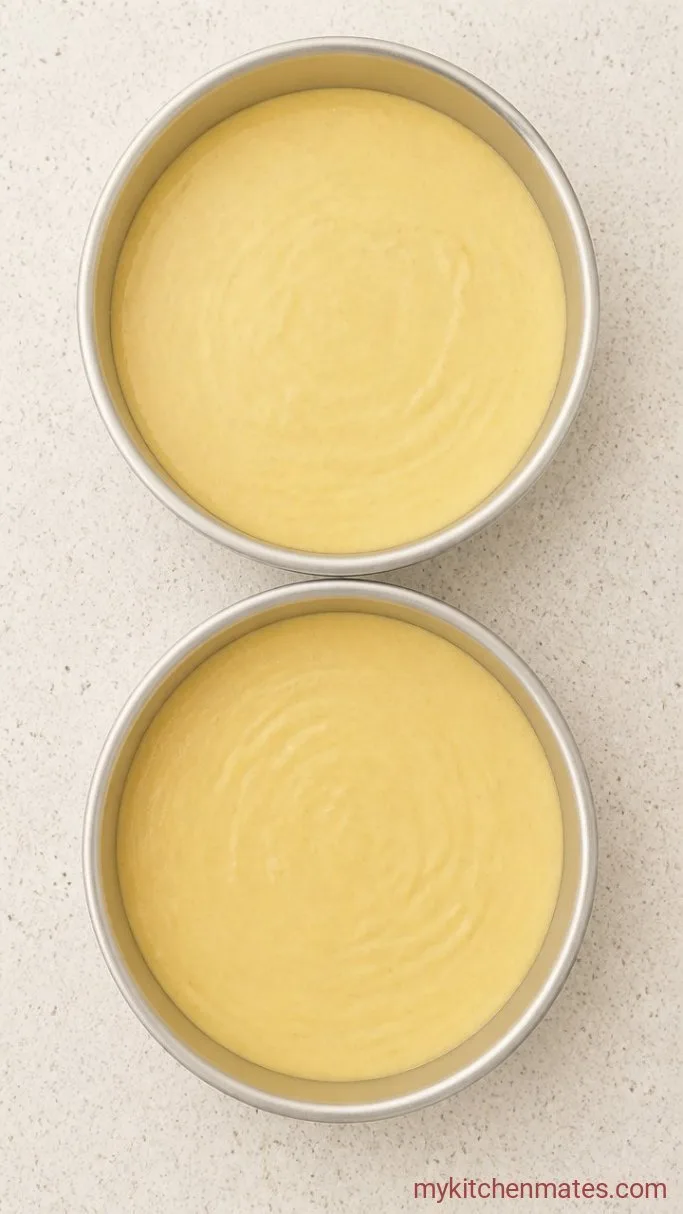
Preheat your oven to 350°F (175°C). Butter three 6-inch round cake pans, line the bottoms with parchment circles, then butter the paper and dust lightly with flour, tapping out any extra. In a medium bowl, whisk together the 2 cups flour, 1 1/2 teaspoons baking powder, 1/2 teaspoon baking soda, and 1/2 teaspoon salt. In the bowl of a stand mixer, combine the 3/4 cup softened butter and 1 1/4 cups sugar, beating on medium speed until the mixture looks sandy and just clumps when pressed, about 2 minutes. Add the 3 eggs one at a time, mixing well after each, then beat in the 2 teaspoons vanilla. With the mixer on low, add the dry ingredients in three additions alternating with the 1 cup buttermilk, starting and ending with the dry; stop as soon as the streaks of flour disappear.
The batter will be thick and slightly lumpy, which is fine. Divide it equally among the prepared pans and smooth the tops. Bake for 25 to 28 minutes, until the tops are pale golden, the edges pull away from the pan sides, and a toothpick inserted in the center comes out with a few moist crumbs.
Let the layers cool in the pans on a wire rack for 10 minutes, then turn them out onto the rack to cool completely. Even a hint of warmth will melt your buttercream, so don’t rush this step. If you bake the layers a day ahead, wrap them tightly and keep at room temperature; the cake is actually easier to level and handle when it’s no longer fresh from the oven.
Step 2: Make the Swiss Meringue Buttercream
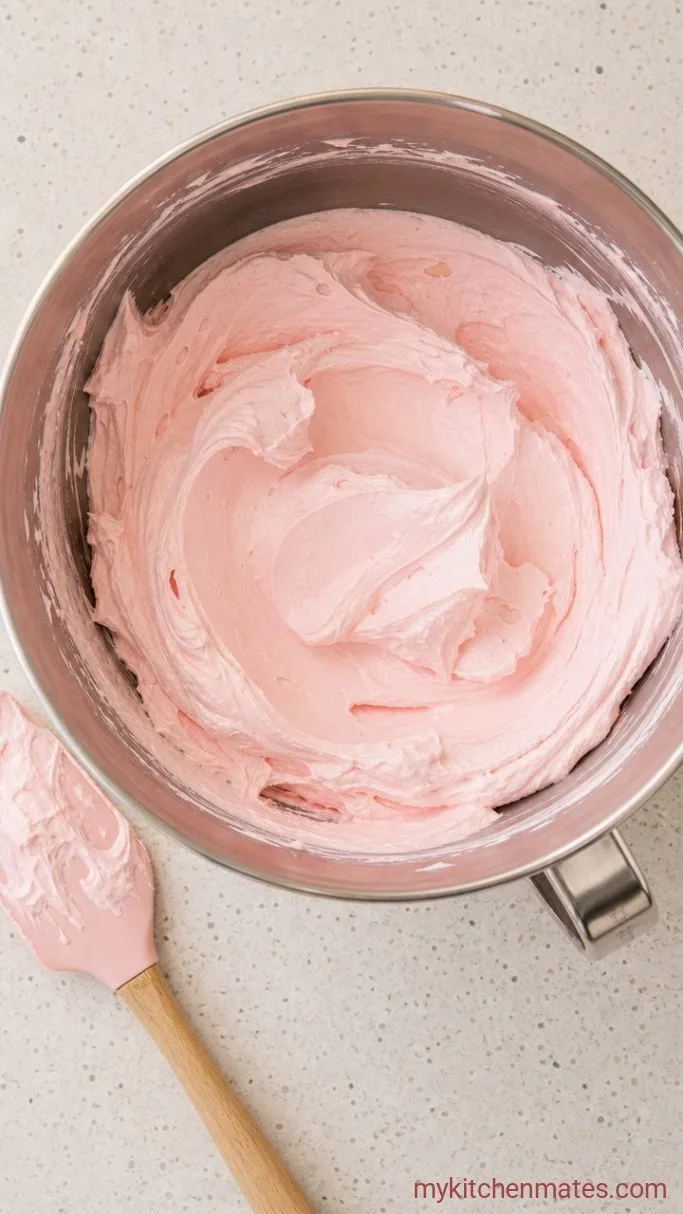
Place the 5 egg whites, 1 1/4 cups sugar, and a pinch of salt in the heatproof bowl of a stand mixer set over a pan of simmering water. Whisk constantly until the mixture reaches 160°F (70°C) on a digital thermometer and the sugar dissolves completely when rubbed between your fingers. Attach the bowl to the mixer and whip with the whisk attachment on high speed until stiff, glossy peaks form and the outside of the bowl feels just warm, about 6 to 8 minutes. Swap to the paddle attachment, and with the mixer running on medium, add the 2 cups cubed butter a few pieces at a time, waiting until each addition incorporates before adding more. Once all the butter is in, add the 1 tablespoon vanilla and beat on medium-high until the buttercream is smooth.
The buttercream will likely look curdled and soupy halfway through adding the butter. Keep beating, and it will suddenly come together into a silky, spreadable mass. This can take 5 to 7 minutes; if your bowl still feels warm, pop it in the fridge for 10 minutes, then whip again until light and billowy.
Swiss meringue buttercream pipes crisp lines and doesn’t form a crust, so you can take your time with the decoration. Stir in a tiny dab of pink gel food coloring until you get a soft pastel pink; it will deepen slightly as it sits. Cover and set aside a small portion of white buttercream for the face and another tiny amount for the bow if you’ll color it brighter pink.
Step 3: Level and Fill the Cake
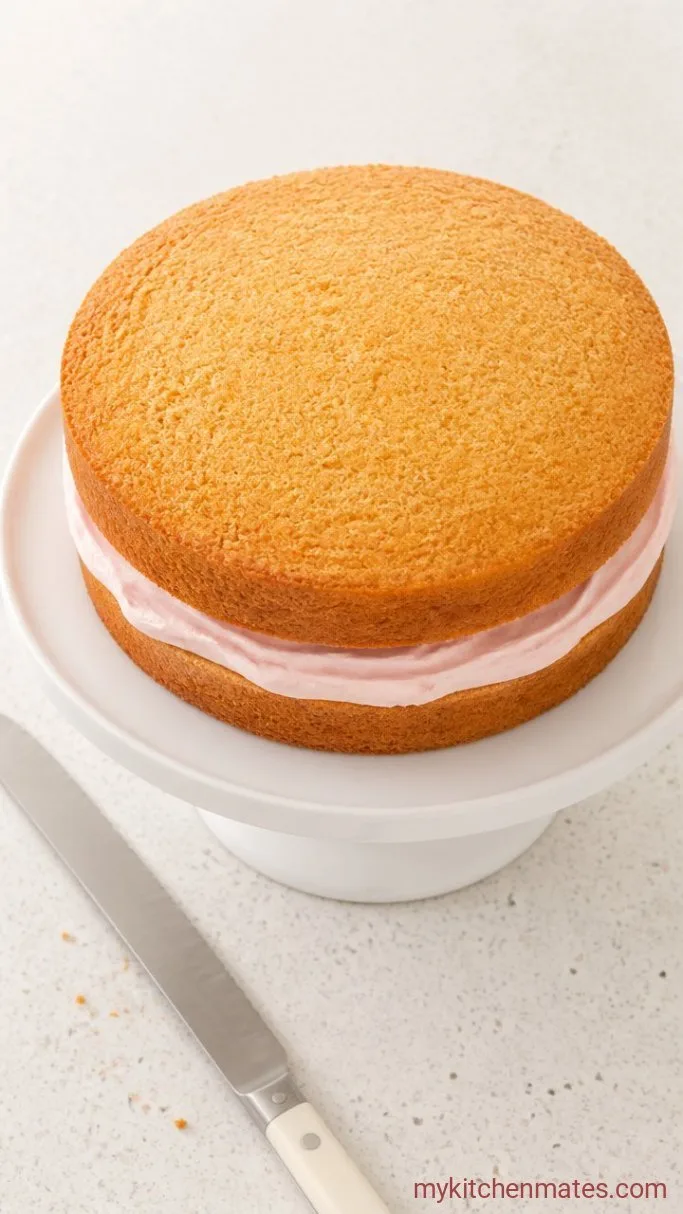
Use a long serrated knife to gently saw off any domed tops from the cooled cake layers so they are flat and even. Place the first layer on a cake board or serving plate with a smear of buttercream underneath to anchor it. Spread about 1/2 cup of the pink buttercream over the top, keeping it just short of the edge. Set the second layer on top, repeat with another 1/2 cup of buttercream, then add the final layer upside down so the smooth bottom becomes the top.
You’ll have a tall, straight cake. Don’t worry about flawless leveling; a slight dip actually gives Hello Kitty’s face a softer, more rounded look that works for the character. If your layers feel wobbly, chill the stack for 15 minutes before you spread anything on the sides.
Step 4: Crumb Coat and Chill the Cake
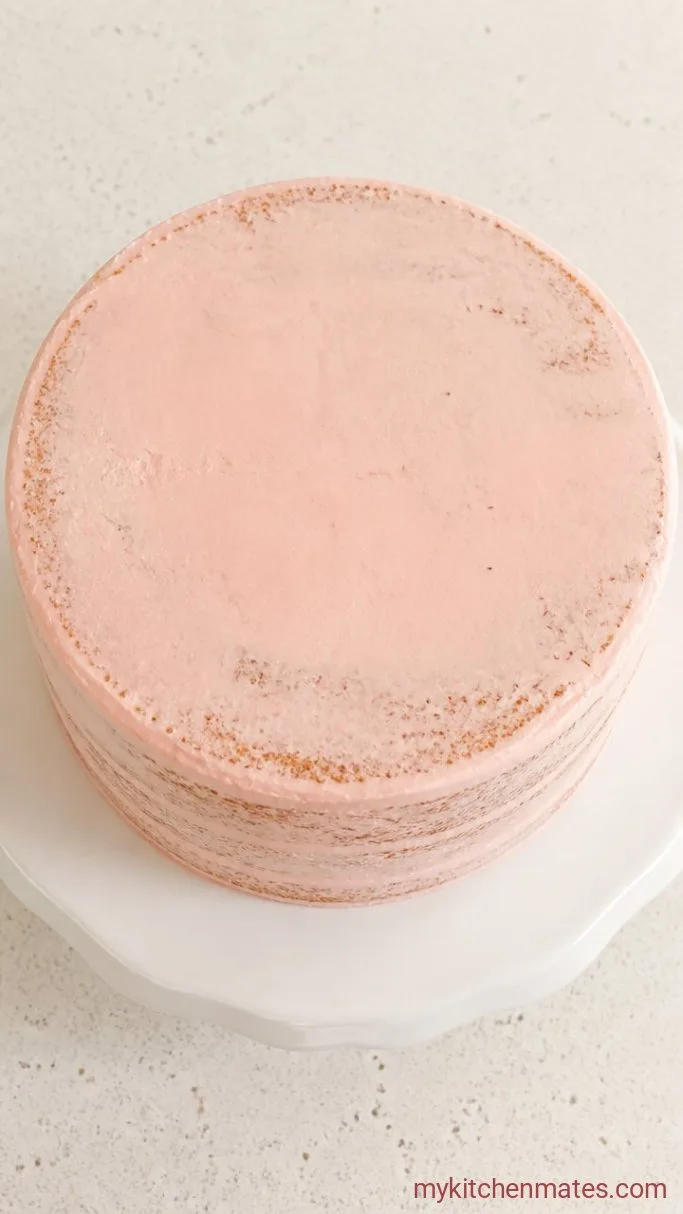
Scoop a generous dollop of pink buttercream onto the top of the cake and spread a very thin layer over the entire surface with an offset spatula, scraping it back until the cake layers show through in places. This is the crumb coat, meant to trap any loose crumbs. Smooth the top and sides as best you can, then refrigerate the cake for at least 30 minutes, until the buttercream is firm to the touch.
The crumb coat will look messy, and that’s exactly what you want. Once it’s chilled, you’ll have a solid, sealed canvas that won’t shed crumbs into the final coat. Don’t skip the chill; if you try to apply the final coat on unset buttercream, you risk dragging crumbs up through the frosting and ruining the smooth finish.
Step 5: Pipe the Hello Kitty Face
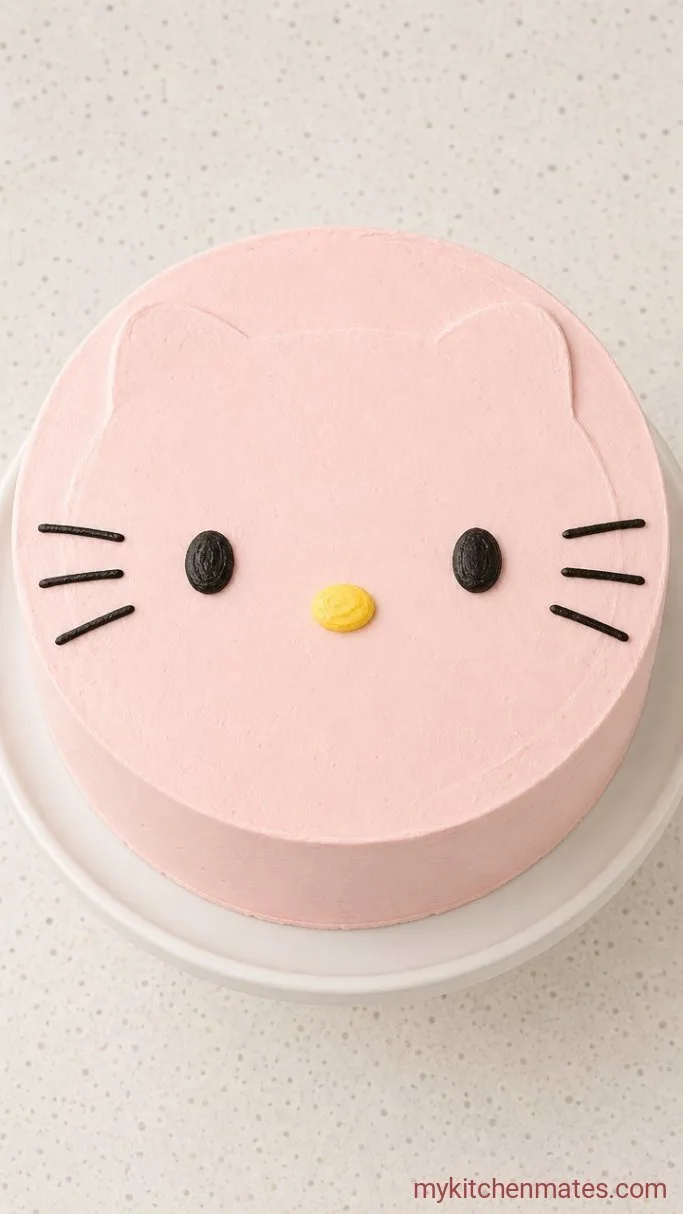
Print a simple line drawing of Hello Kitty’s face, sizing it about 1 inch smaller than your 6-inch cake top so there’s a pink border. Tape the template to a flat surface and cover it with parchment paper. Fill a piping bag fitted with a small round tip with the reserved white buttercream and trace the outline of the face shape on the parchment, then fill it in with small zigzags. Chill the parchment until the white piece is hard, about 15 minutes. Meanwhile, cover the chilled crumb-coated cake with a final, thick layer of pink buttercream and smooth it out. Carefully peel the frozen white face off the parchment and press it gently onto the center of the cake top; you can also trace the shape directly onto the cake with a toothpick and fill it in using a small star tip.
The face doesn’t need to be precise; Hello Kitty’s charm is in the slightly uneven proportions. If the white shape doesn’t look right, gently scrape it off with the offset spatula, re-smooth the pink, and try again. For the black details, use a small round tip or a toothpick dipped in black gel food coloring to pipe two oval eyes set wide apart and six whiskers, three on each side. Add the small yellow oval nose between the eyes, sitting just below them, using yellow buttercream in a piping bag or a clean toothpick.
Step 6: Add the Bow and Slice
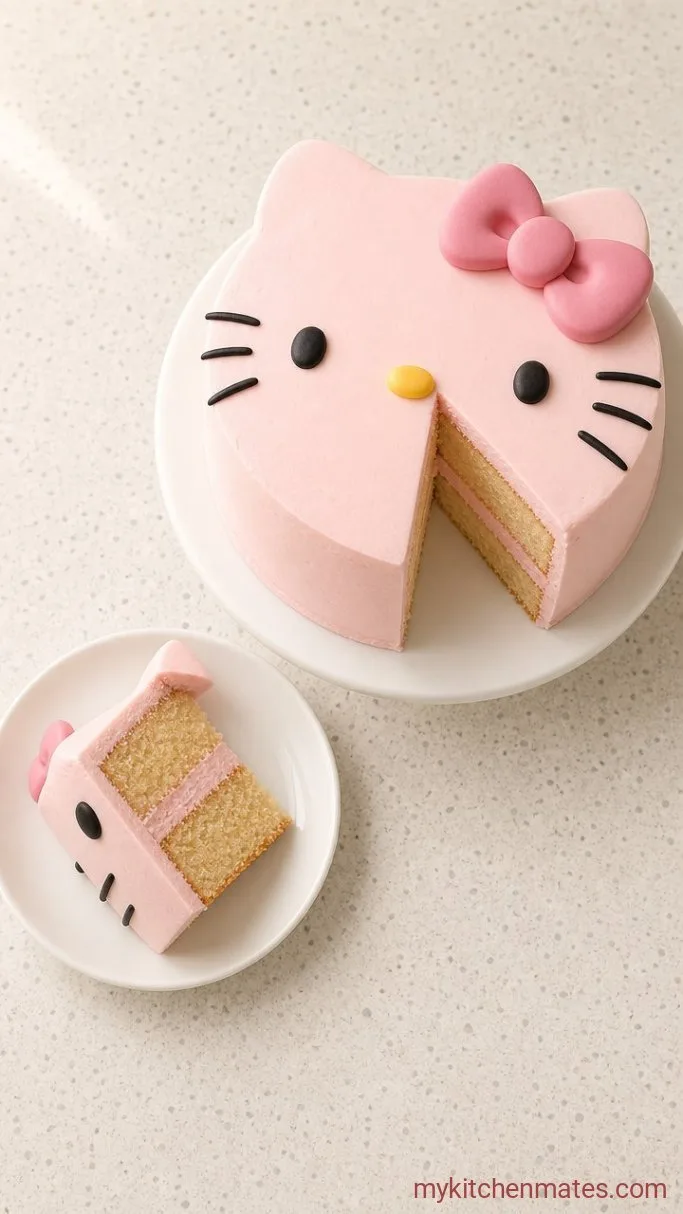
Tint the remaining small portion of buttercream a brighter pink and fill a piping bag fitted with a leaf tip or a small petal tip. At the right side of the white face (near where the ear would be), pipe two loops that cross in the center for the bow, then pipe a small knot in the middle. If you prefer, pipe two simple curved lines with a round tip to suggest a bow. Add tiny white buttercream dots around the cake’s border using a small round tip for a playful finish that also hides any bleeds between the pink and the board.
The bow pulls the whole face together and signals the birthday spirit instantly. You can also tuck a clean, unwaxed ribbon next to the cake board if piping feels fussy. Slice into the cake with a serrated knife; inside, the layers will be straight and the frosting margin thin. Serve at room temperature so the buttercream is creamy, and watch the smiles.
A Few Notes for a Hello Kitty Cake That Goes Smoothly
- Use room-temperature eggs and butter for the cake; cold ingredients can cause a dense, tough crumb.
- Print the face template about an inch smaller than your cake to leave a visible pink border, which frames the face.
- Make the Swiss meringue buttercream a day ahead, refrigerate it, then re-whip on the stand mixer; it actually pipes better after resting and saves you time on assembly day.
- If you only have two 6-inch pans, bake the third layer separately after the first two come out, or use two 8-inch pans and extend the bake time by 5 minutes; slice each cooled layer in half horizontally for four thin layers and a slightly wider face.
Adapt the cake for different pans:
| Pan Size | Layers | Bake Time (350°F) |
|---|---|---|
| 6-inch | 3 | 25-28 minutes |
| 8-inch | 2 (split into 4) | 28-33 minutes |
| 9×13-inch | 1 sheet | 30-35 minutes |
Keeping the Cake Fresh
- Refrigerate: covered loosely in a cake keeper or under a large overturned bowl for up to 4 days. Bring to room temperature before serving so the buttercream softens.
- The buttercream may sweat when moved from a cold fridge into a warm room; let the cake sit uncovered for 15 minutes, then gently blot any beads of moisture with a paper towel.
Frequently Asked Questions
Can I use a different frosting?
Yes. American buttercream made with butter, powdered sugar, and a little milk works well but will be sweeter and may not pipe as smoothly for the facial details. Adjust the pink color with a drop of gel.
Do I need a special Hello Kitty pan?
No. The cake uses standard round cake pans. The face is piped on top, not baked into a mold, so any round cake works.
What if I don’t have piping tips?
You can fill a zip-top bag and snip a small corner for the white outline and a larger corner for the face fill, though tips make the details crisper. For the bow, two curved lines piped with a round tip can do the job.
Hello Kitty Birthday Cake Recipe
Ingredients
Method
- Preheat oven to 350°F (175°C). Butter three 6-inch round cake pans, line with parchment, and butter the paper. Whisk flour, baking powder, baking soda, and salt. Beat butter and sugar until sandy; add eggs one at a time, then vanilla. Alternately add dry ingredients and buttermilk, beginning and ending with dry. Divide batter among pans and bake 25 to 28 minutes until a toothpick comes out with moist crumbs. Cool completely.
- Heat egg whites, 1 1/4 cups sugar, and a pinch of salt over simmering water to 160°F. Whip to stiff peaks, then beat in butter a few pieces at a time until smooth. Add vanilla and enough pink gel coloring to tint pastel. Reserve a small amount of white and a little extra for the bow.
- Level the cooled cake layers with a serrated knife. Stack on a cake board with about 1/2 cup pink buttercream between each layer. Place the final layer upside down. Chill 15 minutes if unstable.
- Spread a thin crumb coat of pink buttercream over the entire cake. Chill at least 30 minutes until firm.
- Print a Hello Kitty face template. Trace the white face outline on parchment with a small round tip of white buttercream, fill in, and chill until hard. Cover the cake with a final thick layer of pink buttercream, smooth it, then press the frozen white face on top. Pipe black eyes, whiskers, and a yellow nose.
- Tint remaining buttercream brighter pink. Pipe a bow at the side of the white face using a leaf or round tip. Add small white dots around the border. Slice and serve at room temperature.
Notes
