
11 Christmas Recipes For Kids That Make Cooking Together Actually Fun

The best kid friendly Christmas recipes lean on things children already love: rolling dough, pressing cutters, stacking layers, and sneaking tastes of frosting. Soft textures, bright colors, and treats they can hold in one hand all help, while simple assembly steps keep the kitchen moving before anyone gets bored. These versions split that same playful foundation into genuinely different directions, from no bake bites to pull apart loaves.
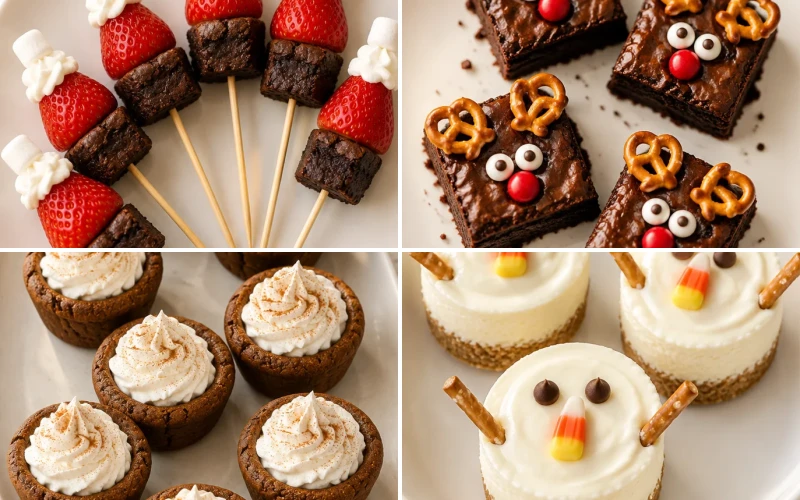
Start with the reindeer brownies if you want the easiest wow on a plate, go for the pretzel wreaths when you need something salty and sweet, try the snowman cheesecake cups for a wintry centerpiece, and there is a slow cooker cocoa that frees you up while it simmers.
Which Christmas Recipes For Kids Should You Make?
| Recipe | Flavor profile | Best for |
|---|---|---|
| Reindeer Brownie Bites | Fudgy, sweet, chocolatey | A fast party tray |
| Grinch Hot Cocoa Bombs | Minty, rich, creamy | A surprise mug moment |
| Snowman Cheesecake Cups | Tangy, sweet, creamy | A make ahead dessert |
| Pretzel Wreath Cookies | Salty, sweet, crunchy | Little hands to assemble |
| Christmas Tree Puff Pastry Pizzas | Cheesy, herby, buttery | A savory snack break |
| Candy Cane Rice Krispie Treats | Marshmallowy, minty, crisp | No bake and quick |
| Santa Hat Strawberry Brownie Skewers | Juicy, fudgy, fresh | A five minute build |
| Elf Pancake Stacks | Fluffy, syrupy, cheerful | Christmas morning |
| Gingerbread Cookie Cups With Cream | Spiced, creamy, soft | A cozy baking day |
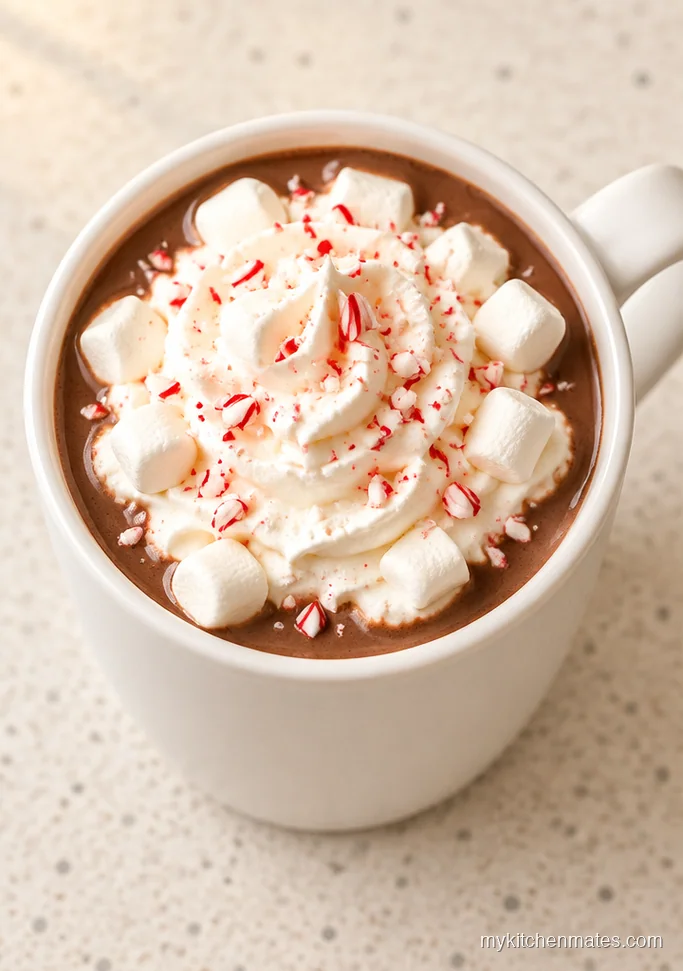
| Slow Cooker Peppermint Hot Chocolate | Warm, minty, velvety | A crowd after sledding |
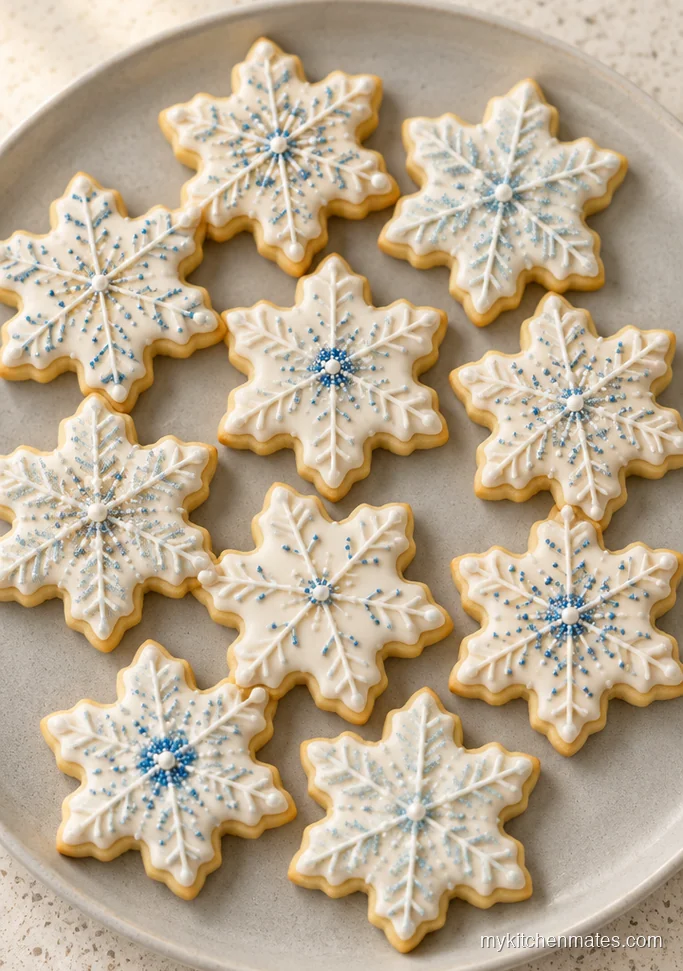
| Snowflake Sugar Cookie Cutouts | Buttery, crisp, bright | Decorating together |
Reindeer Brownie Bites
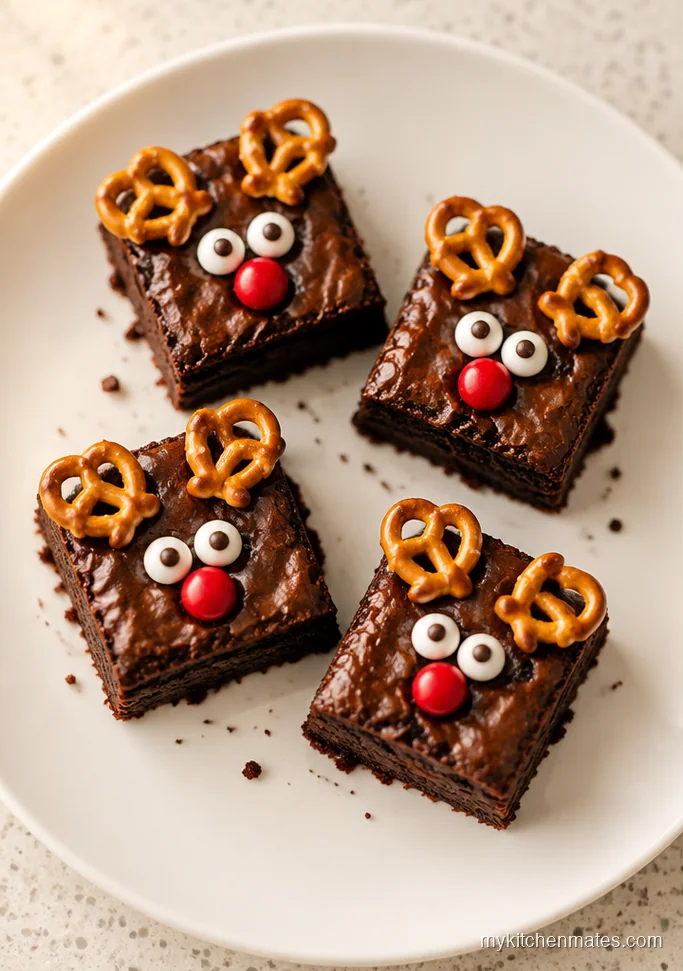
This is the one I reach for when a school party or neighbor plate needs to look festive without a whole afternoon of work. You bake one pan of brownies, cut them into squares, and let pretzels and candies do the decorating.
Ingredients (makes 16 bites)
- Unsalted butter: 170 g (3/4 cup)
- Semi sweet chocolate chips: 200 g (1 1/4 cups)
- Granulated sugar: 150 g (3/4 cup)
- Large eggs: 3
- All purpose flour: 95 g (3/4 cup)
- Cocoa powder: 30 g (1/3 cup)
- Salt: 1/2 tsp
- Mini pretzel twists: 32
- Candy eyes: 32
- Red chocolate candies: 16
Instructions
Step 1: Heat your oven to 350F (175C) and line an 8 inch square pan with parchment so the brownies lift out cleanly. Melt the 170 g butter and chocolate chips together in a heatproof bowl over a pan of barely simmering water, stirring until the mixture is smooth and glossy.
Step 2: Whisk the 150 g sugar into the warm chocolate, then add the 3 eggs one at a time and beat hard after each so the top gets that crackly shine. Fold in the 95 g flour, 30 g cocoa, and 1/2 tsp salt just until you see no dry streaks, because overmixing turns brownies tough.
Step 3: Scrape the batter into your lined pan and bake for 22 to 25 minutes. The center should feel set with a slight wobble, and a toothpick will come out with a few moist crumbs rather than wet batter.
Step 4: Cool the brownies in the pan for 10 minutes, then lift them out and rest on a rack until fully cool before slicing into 16 squares. Warm brownies crumble when you press decorations in.
Step 5: Press 2 pretzel twists into the top corners of each square for antlers, add 2 candy eyes below them, and set 1 red candy at the bottom for the nose. Arrange the finished reindeer on a tray and watch them disappear first.
Grinch Hot Cocoa Bombs
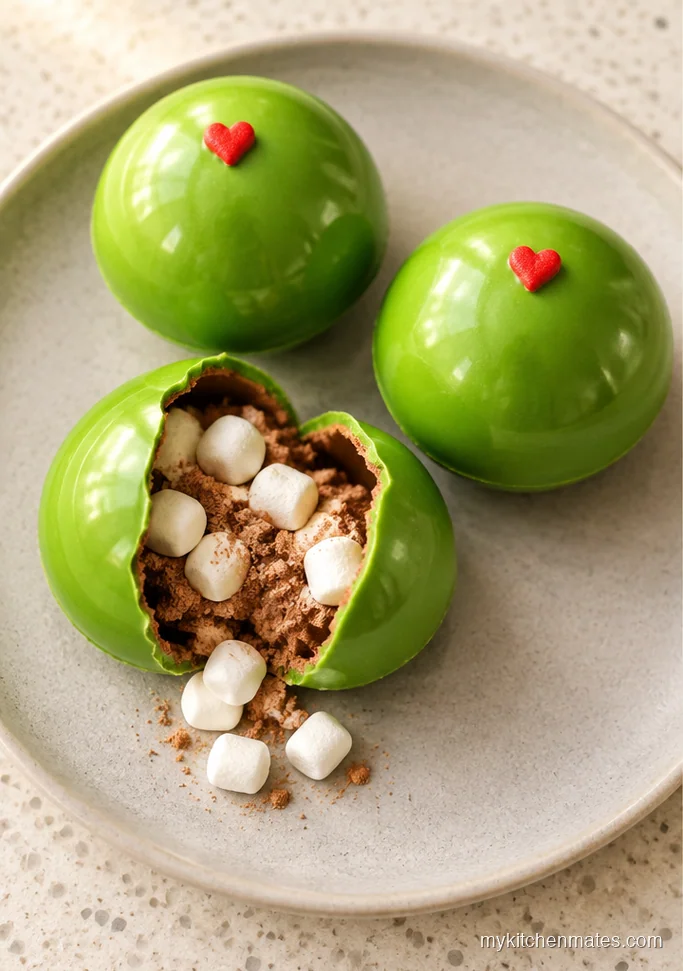
Your kids will talk about these long after the last mug is empty. The trick is working quickly while the chocolate is slightly tacky, so the two halves seal into a ball you crack open over hot milk.
Ingredients (makes 6 bombs)
- Bright green candy melts: 340 g (12 oz)
- Hot cocoa mix: 90 g (3/4 cup)
- Mini marshmallows: 40 g (1/2 cup)
- Peppermint extract: 1/2 tsp
- Red heart sprinkles: 6
Instructions
Step 1: Melt 300 g of the green candy melts in a bowl in 20 second microwave bursts, stirring between each until the coating runs off your spoon in a smooth ribbon. Spoon a heaping tablespoon into one cavity of a 6 well silicone half sphere mold and use the back of a small spoon to push the chocolate up the sides evenly.
Step 2: Chill the mold for 5 minutes, then add a second thin layer of green chocolate over any thin or shiny spots you can see. Chill another 5 minutes, then gently flex the mold to pop the 6 half spheres out onto a plate.
Step 3: Fill half the spheres with 1 tbsp cocoa mix, a few mini marshmallows, and a tiny drop of peppermint extract. Warm a small plate in the microwave for 30 seconds and press the rim of one empty half against it for 2 seconds, just enough to melt the edge.
Step 4: Set the filled half and the warmed empty half together and hold for 10 seconds so they seal into a full ball. Repeat with the remaining shells, then melt the last 40 g of green candy and drizzle it over each seam in a messy zigzag.
Step 5: Stick one red heart sprinkle onto the top of each bomb before the drizzle sets. To serve, drop a bomb into 250 ml (1 cup) of steaming hot milk and let your kids stir until it bursts open into a minty green swirl.
Snowman Cheesecake Cups
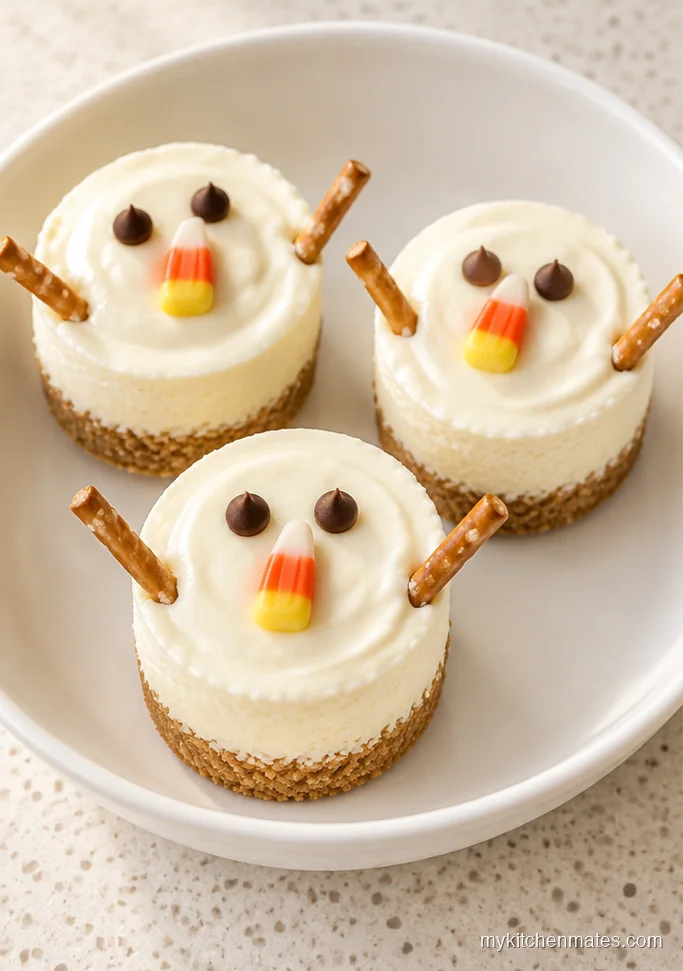
These little cups solve the biggest holiday dessert problem: you can build them hours ahead and pull them from the fridge right before the table gets loud. The filling sets soft enough to spoon but firm enough to hold a face.
Ingredients (makes 8 cups)
- Cream cheese, softened: 450 g (16 oz)
- Powdered sugar: 120 g (1 cup)
- Vanilla extract: 1 tsp
- Heavy cream, cold: 240 ml (1 cup)
- Graham cracker crumbs: 100 g (3/4 cup)
- Unsalted butter, melted: 45 g (3 tbsp)
- Mini chocolate chips: 40 g (1/4 cup)
- Candy corn: 8
- Mini pretzel sticks: 16
Instructions
Step 1: Stir the 100 g graham crumbs and 45 g melted butter together until every crumb looks damp, then press a spoonful into the bottom of each of 8 small clear cups. You want a thin, even layer so the cheesecake sits right on top.
Step 2: Beat the 450 g cream cheese and 120 g powdered sugar in a large bowl for 2 minutes, scraping down the sides halfway through, until it feels completely smooth with no lumps hiding under the surface. The cream cheese must be truly soft before you start or you will be chasing lumps all afternoon.
Step 3: Pour in the 240 ml cold cream and 1 tsp vanilla, then beat on medium speed for 3 minutes until the mixture fluffs up and holds soft peaks when you lift the beaters. Pipe or spoon the filling over the crumb bases and smooth the tops with the back of a spoon.
Step 4: Press 2 mini chocolate chips into the top of each cup for eyes, add 1 candy corn point side down for the nose, and snap 2 pretzel sticks into short arms on either side. Chill the cups for at least 1 hour so the filling sets around the decorations.
Step 5: Add a few more chocolate chips in a curved smile just before serving. Hand these out with small spoons and expect the snowman faces to be eaten first.
Pretzel Wreath Cookies
Salty pretzel, sweet white chocolate, and crunchy candy bits come together on a plate in about 20 minutes. I love that no two wreaths ever look the same, because the messier ones always look the most festive.

Ingredients (makes 10 wreaths)
- Mini pretzel twists: 80
- White chocolate chips: 340 g (2 cups)
- Green food coloring gel: 1/2 tsp
- Red and green sprinkles: 3 tbsp
- Small red cinnamon candies: 30
Instructions
Step 1: Line two baking sheets with parchment and arrange the 80 pretzels into 10 small circles, each circle using about 8 pretzels that touch at the edges. Make the circles slightly overlapping so the melted chocolate has something to hold onto.
Step 2: Melt the 340 g white chocolate chips in a bowl over barely simmering water, stirring until only a few small lumps remain. Take the bowl off the heat and stir in the green food coloring a little at a time until you get a bright wreath color, then let the chocolate cool for 1 minute so it thickens slightly.
Step 3: Spoon a spoonful of green chocolate over each pretzel circle where the pretzels touch, using the back of the spoon to nudge it into the gaps. You want the chocolate to act like glue at each joint, not completely coat every pretzel.
Step 4: Scatter the red and green sprinkles over the wet chocolate while it is still shiny, then press 3 red cinnamon candies into a cluster on each wreath for berries. If the chocolate sets too fast, rewarm it for 5 seconds and keep going.
Step 5: Let the wreaths sit at room temperature for 15 minutes until the chocolate snaps when you press it lightly. Slide a thin spatula under each one and transfer to a plate for the kids to pass around.
Christmas Tree Puff Pastry Pizzas
These bring a savory break to a day that is usually wall to wall sugar. The pastry puffs into golden branches while the pesto and cheese melt down into the center, and the whole tree pulls apart into little pizza bites.
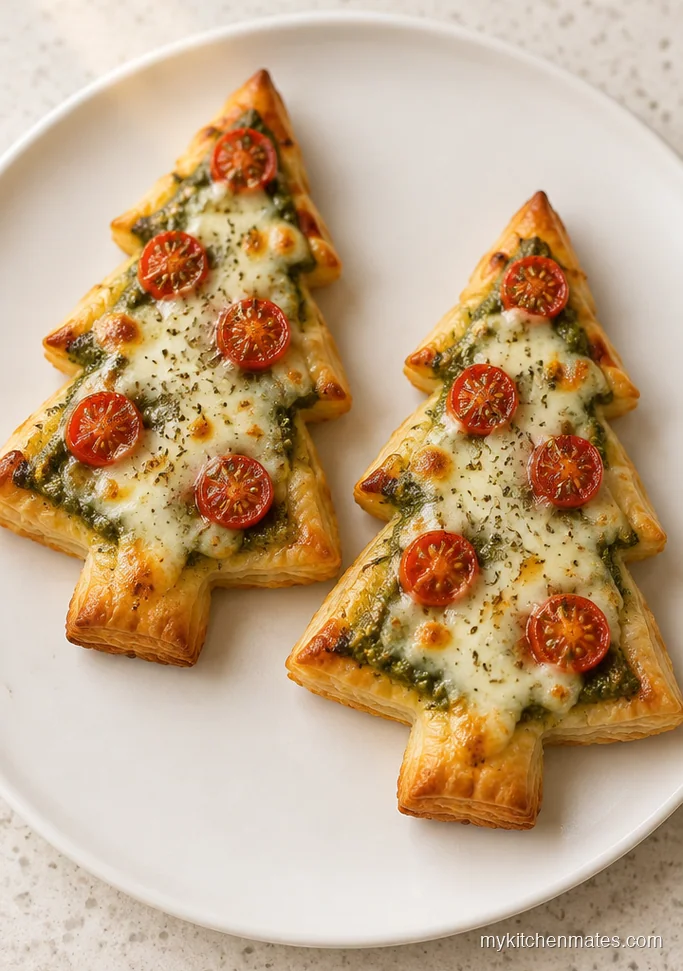
Ingredients (makes 2 trees, 4 servings each)
- Frozen puff pastry sheets, thawed: 2 sheets (about 500 g total)
- Basil pesto: 120 g (1/2 cup)
- Shredded mozzarella: 200 g (2 cups)
- Grated parmesan: 30 g (1/3 cup)
- Cherry tomatoes, halved: 12
- Large egg: 1
- Dried oregano: 1/2 tsp
Instructions
Step 1: Heat your oven to 400F (200C) and line two large baking sheets with parchment. Unroll the 2 puff pastry sheets and cut each into a triangle tree shape by slicing down from the top corners to a point at the bottom center, keeping the trimmings for another use.
Step 2: Spread 60 g pesto over each triangle, leaving a 2 cm (3/4 inch) border all the way around so the edges can puff up cleanly. Scatter the 200 g mozzarella over the pesto, then tuck the 12 cherry tomato halves among the cheese like ornaments.
Step 3: Fold the bottom 1 cm (1/2 inch) of each tree up to make a little trunk, then beat the egg with 1 tsp water and brush the bare pastry edges. Sprinkle the 30 g parmesan and 1/2 tsp oregano over the cheese.
Step 4: Bake for 18 to 20 minutes, rotating the pans halfway through, until the pastry is deeply golden on the bottom and the cheese has started to brown in spots. If the center puffs up too much, tap it down gently with a fork at the 12 minute mark.
Step 5: Let each tree rest for 5 minutes before sliding onto a cutting board. Cut the branches into strips with a sharp knife and hand them out while the cheese is still stretchy and warm.
Candy Cane Rice Krispie Treats
No oven, one pot, and a whole lot of crunch. You press the mixture into the pan before it fully cools, because cold marshmallow becomes impossible to shape.
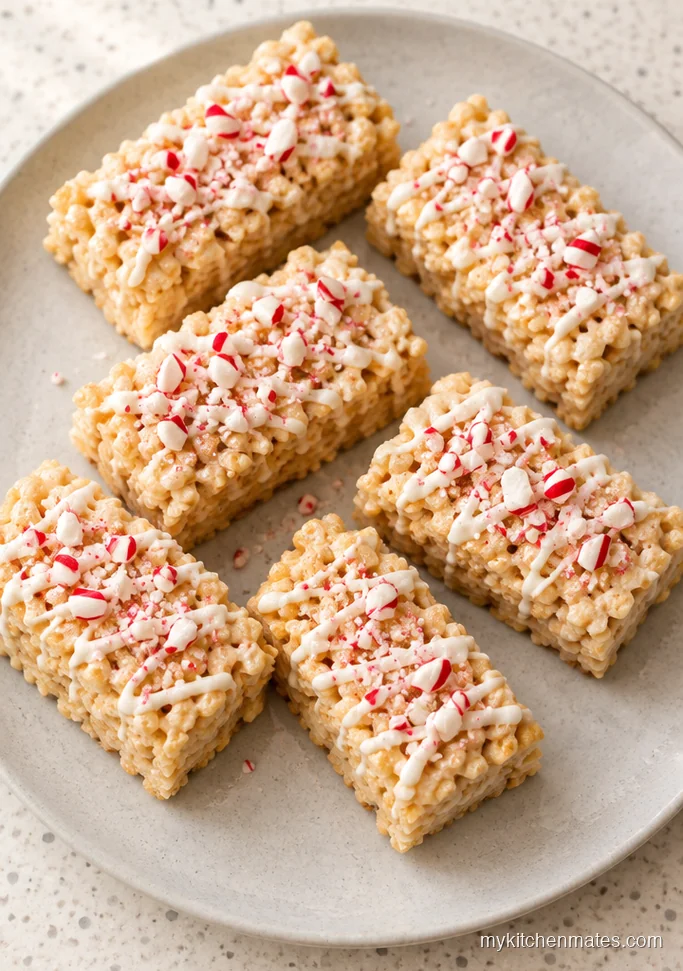
Ingredients (makes 12 squares)
- Unsalted butter: 85 g (6 tbsp)
- Mini marshmallows: 340 g (8 cups)
- Vanilla extract: 1 tsp
- Peppermint extract: 1/4 tsp
- Rice Krispies cereal: 180 g (6 cups)
- Crushed candy canes: 75 g (1/2 cup)
- White chocolate chips: 120 g (3/4 cup)
Instructions
Step 1: Grease a 9 by 13 inch pan and line it with parchment so the treats lift out in one piece. Melt the 85 g butter in a large pot over medium low heat until it foams, then tip in the 340 g marshmallows and stir constantly while they melt into a smooth white puddle.
Step 2: Kill the heat and stir in the 1 tsp vanilla and 1/4 tsp peppermint, then quickly fold in the 180 g cereal and 50 g of the crushed candy canes. Work fast here, because the mixture starts to stiffen the second it leaves the heat and you want every flake coated.
Step 3: Scrape the sticky mass into your lined pan and press it into an even layer with buttered hands or a piece of wax paper. Press firmly but not so hard that you crush the cereal into dust.
Step 4: Melt the 120 g white chocolate chips in 15 second microwave bursts, stirring until smooth, then drizzle it over the top in thin lines. Sprinkle the remaining 25 g candy cane over the wet chocolate and press it down lightly so it sticks.
Step 5: Let the pan sit at room temperature for 30 minutes until the chocolate sets, then lift the block out and cut it into 12 squares with a sharp knife. The cleanest cuts happen when you wipe the knife after every slice.
Santa Hat Strawberry Brownie Skewers
These come together in the time it takes a pot of coffee to brew. You buy the brownies, pipe the cream, and let the strawberries do the heavy lifting on looks.
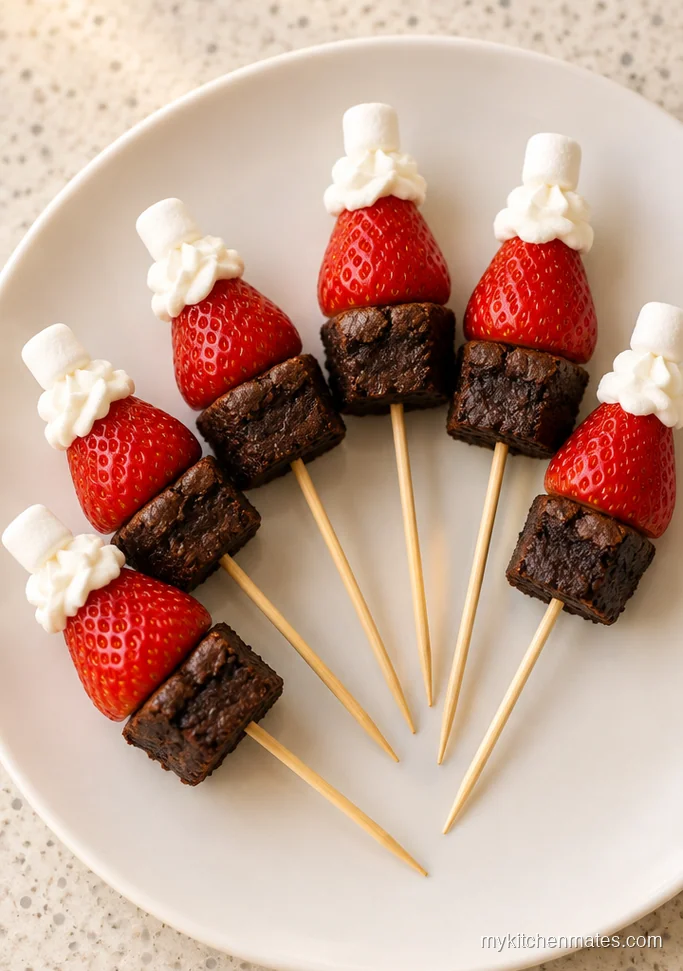
Ingredients (makes 12 skewers)
- Store bought brownie bites: 12
- Fresh strawberries, large: 12
- Heavy cream, cold: 120 ml (1/2 cup)
- Powdered sugar: 15 g (2 tbsp)
- Vanilla extract: 1/2 tsp
- Mini marshmallows: 12
- Wooden skewers: 12
Instructions
Step 1: Rinse the 12 strawberries and slice the leafy tops off so each one has a flat base wide enough to sit on a brownie. Pat them completely dry, because wet berries make the cream slide right off.
Step 2: Beat the 120 ml cold cream, 15 g powdered sugar, and 1/2 tsp vanilla in a medium bowl on high speed for 2 to 3 minutes, until the cream holds a stiff peak and does not flop when you tilt the bowl. Stick one brownie bite onto each wooden skewer, pushing it down to the bottom.
Step 3: Pipe or spoon a generous swirl of whipped cream on top of each brownie, then press a strawberry over the cream so it looks like a red Santa hat with the point facing up. The cream should peek out around the base like a fluffy white brim.
Step 4: Pipe one small dot of cream on the tip of each strawberry for the pom, then press a mini marshmallow onto the dot to hold it in place. A tiny smear of cream on the marshmallow helps it stick.
Step 5: Stand the finished skewers in a jar or tall glass and refrigerate for up to 2 hours before serving. Hand them out straight from the jar and let everyone pull the berries off first.
Elf Pancake Stacks
Christmas morning calls for something that feels like a party but eats like breakfast. These little green pancakes stack into towers with syrup and sprinkles, and the whole pan cooks in under ten minutes once it is hot.
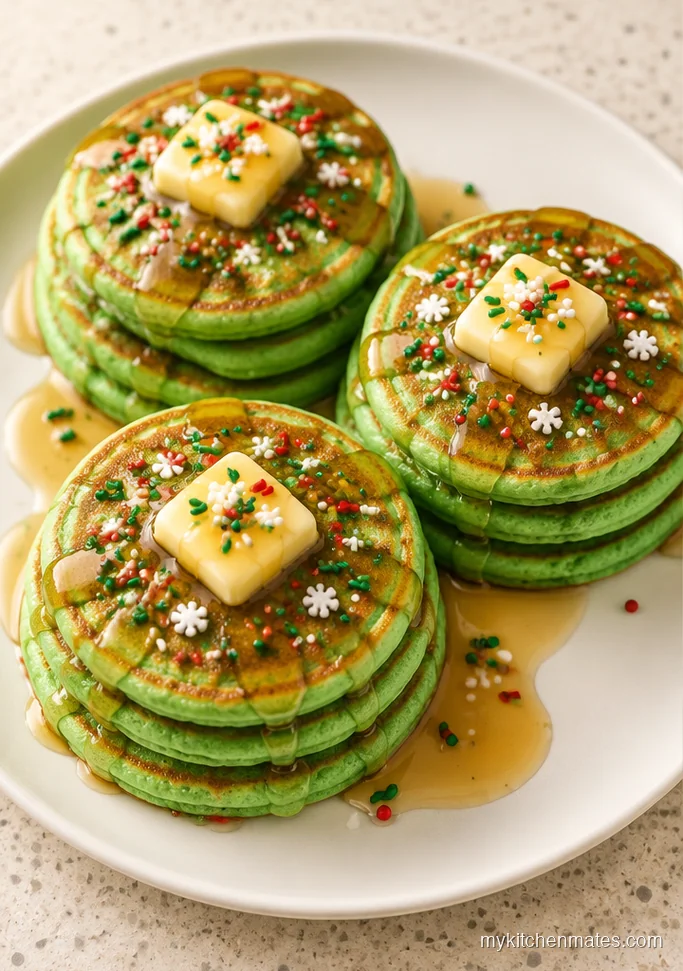
Ingredients (makes 4 stacks, 2 pancakes each)
- All purpose flour: 190 g (1 1/2 cups)
- Baking powder: 2 tsp
- Granulated sugar: 25 g (2 tbsp)
- Salt: 1/4 tsp
- Large egg: 1
- Whole milk: 240 ml (1 cup)
- Unsalted butter, melted: 30 g (2 tbsp)
- Green food coloring gel: 1/4 tsp
- Maple syrup: for serving
- Christmas sprinkles: 2 tbsp
Instructions
Step 1: Whisk the 190 g flour, 2 tsp baking powder, 25 g sugar, and 1/4 tsp salt together in a large bowl so the leavening spreads evenly through every scoop. In a second bowl, whisk the egg, 240 ml milk, 30 g melted butter, and green food coloring until the color is uniform.
Step 2: Pour the wet mixture into the dry and stir just until the flour disappears, even if a few small lumps remain, because stirring until smooth makes flat, chewy pancakes. Let the batter rest for 5 minutes while you heat a griddle over medium heat.
Step 3: Grease the griddle lightly and drop 60 ml (1/4 cup) of batter per pancake, spacing them so you have room to flip. Cook for about 2 minutes, until the tops show bubbles and the edges look set, then flip and cook another minute on the second side.
Step 4: Transfer the pancakes to plates as they finish and stack 2 per person with a small pat of butter between them. The green color deepens slightly as they sit, so do not worry if the batter looks pale in the bowl.
Step 5: Pour maple syrup over each stack and scatter the 2 tbsp sprinkles across the tops while the pancakes are still warm. Serve right away and let everyone add their own extra syrup.
Gingerbread Cookie Cups With Cream
This recipe turns classic gingerbread into an edible cup that holds a swirl of spiced cream. The dough needs a proper chill so the cups keep their shape in the oven instead of spreading into flat discs.

Ingredients (makes 18 cups)
- All purpose flour: 250 g (2 cups)
- Ground ginger: 2 tsp
- Ground cinnamon: 1 tsp
- Baking soda: 1/2 tsp
- Salt: 1/4 tsp
- Unsalted butter, softened: 115 g (1/2 cup)
- Dark brown sugar: 100 g (1/2 cup)
- Molasses: 80 ml (1/3 cup)
- Large egg: 1
- Heavy cream, cold: 180 ml (3/4 cup)
- Powdered sugar: 30 g (1/4 cup)
- Ground cinnamon for cream: 1/2 tsp
Instructions
Step 1: Whisk the 250 g flour, 2 tsp ginger, 1 tsp cinnamon, 1/2 tsp baking soda, and 1/4 tsp salt in a medium bowl. Cream the 115 g butter and 100 g brown sugar for 2 minutes until light, then beat in the 80 ml molasses and the egg until the mixture looks like thick caramel.
Step 2: Stir the dry ingredients into the butter mixture in two additions, mixing only until the dough comes together in a soft ball. Flatten it into a disc, wrap it, and chill for at least 1 hour, because cold dough holds the cup shape far better.
Step 3: Heat your oven to 350F (175C) and grease a mini muffin tin well. Roll the chilled dough into 18 balls about the size of a whole walnut, press one into each cup, and use your thumb to make a deep well in the center so the sides climb up the tin.
Step 4: Bake for 10 to 12 minutes, until the edges feel firm and the centers have puffed slightly. As soon as they come out, press the wells down again with the back of a small spoon, working fast while the cookies are soft enough to reshape.
Step 5: Beat the 180 ml cold cream, 30 g powdered sugar, and 1/2 tsp cinnamon until stiff peaks form, then pipe a swirl into each cooled cup. Dust the tops with a little extra cinnamon and serve within a few hours while the cups stay crisp.
Slow Cooker Peppermint Hot Chocolate
You start this before the sledding crew heads out and come back to a pot of hot chocolate that tastes like melted candy canes. The slow cooker keeps it warm for hours without scorching the bottom.
Ingredients (makes 8 servings)
- Whole milk: 1.2 litres (5 cups)
- Heavy cream: 480 ml (2 cups)
- Sweetened condensed milk: 1 can (400 g / 14 oz)
- Bittersweet chocolate chips: 340 g (2 cups)
- Cocoa powder: 30 g (1/3 cup)
- Peppermint extract: 1/2 tsp
- Crushed candy canes: 60 g (1/2 cup)
- Whipped cream: for serving
- Mini marshmallows: for serving
Instructions
Step 1: Pour the 1.2 litres milk, 480 ml cream, and the can of sweetened condensed milk into a slow cooker and whisk until the condensed milk dissolves completely into the liquid. If you skip the whisking, it settles in a sticky layer on the bottom.
Step 2: Add the 340 g chocolate chips, 30 g cocoa powder, and 1/2 tsp peppermint extract, then cover and cook on low for 2 hours. Stir the mixture at the 1 hour mark so the chocolate melts evenly and the cocoa stops floating on top.
Step 3: Whisk the hot chocolate well after 2 hours, scraping the bottom and sides, until it looks silky with no streaks of unmelted chocolate. Taste a spoonful and add a few extra drops of peppermint if your crew likes it stronger, remembering that the flavor deepens as it sits.
Step 4: Switch the slow cooker to the warm setting and stir in 40 g of the crushed candy canes just before serving, so they melt into the drink without turning grainy. Keep the rest for sprinkling on top.
Step 5: Ladle the hot chocolate into mugs and top each one with a swirl of whipped cream, a few mini marshmallows, and a pinch of the remaining candy cane. Set the slow cooker back on warm and let everyone come back for seconds at their own pace.
Snowflake Sugar Cookie Cutouts
These are the cookies your kids actually want to decorate, because the dough rolls smooth, holds its shape in the oven, and never spreads into blobs. You can make the dough a day ahead and pull it out when the decorating table is ready.
Ingredients (makes about 24 cookies)
- All purpose flour: 375 g (3 cups)
- Baking powder: 1 tsp
- Salt: 1/2 tsp
- Unsalted butter, softened: 225 g (1 cup)
- Granulated sugar: 200 g (1 cup)
- Large egg: 1
- Vanilla extract: 2 tsp
- Powdered sugar: 240 g (2 cups)
- Whole milk: 45 ml (3 tbsp)
- Light corn syrup: 1 tbsp
- White and blue sprinkles: 3 tbsp
Instructions
Step 1: Whisk the 375 g flour, 1 tsp baking powder, and 1/2 tsp salt in a bowl and set it aside. Beat the 225 g butter and 200 g sugar together for 3 full minutes, until the mixture turns pale and fluffy, then add the egg and 2 tsp vanilla and beat until combined.
Step 2: Stir the dry mixture into the butter mixture in three parts, mixing just until the dough comes away from the sides of the bowl and forms a soft mass. Divide it into two discs, wrap them, and chill for at least 1 hour so the butter firms back up.
Step 3: Heat your oven to 350F (175C) and line two baking sheets with parchment. Roll one disc of dough on a floured surface to about 6 mm (1/4 inch) thick, then press snowflake cutters into it and lift the shapes onto the sheets with a thin spatula.
Step 4: Bake for 8 to 10 minutes, until the edges turn just barely golden, then cool the cookies on the sheets for 5 minutes before moving them to a rack. The centers should feel dry and set, with no dark brown spots.
Step 5: Stir the 240 g powdered sugar, 45 ml milk, and 1 tbsp corn syrup into a smooth glaze that runs off a spoon in a thick ribbon. Spread it over the cooled cookies, scatter the 3 tbsp sprinkles on top while the glaze is wet, and let everything set for 30 minutes before stacking.
Good cookies start with butter that is soft but still cool, so pull it from the fridge about 45 minutes before you bake rather than melting it in the microwave. That single choice changes the dough more than any other step: too warm and the cookies spread, too cold and the sugar will not cream properly. Get the butter right and every version here gets easier.
Pick the one that matches your energy level tonight, put a kid in charge of the sprinkles, and let the kitchen get a little messy. That is the whole point.
