
Foolproof Chocolate Drip Cake with Creamy Ganache Drip

A rich, moist chocolate layer cake wrapped in fluffy chocolate buttercream and finished with a glossy ganache drip that sets beautifully. It looks dramatic but every step is broken down so you get a clean, impressive cake your first time.

This is the chocolate cake I bring out when I want something that feels special without a lot of fussy decorating. The drip does all the work while the cake underneath stays tender and deeply chocolatey.
What Makes This Chocolate Drip Cake Work
The cake layers are made with buttermilk and hot coffee, which gives them a deep cocoa flavor and an almost fudgy crumb that stays moist for days. The buttercream is whipped until it is light and airy so it spreads like a dream and never turns gritty.
The ganache drip is just two ingredients and takes about five minutes to put together. You control the look by letting it cool until it is slightly thicker than heavy cream, then the drips flow in slow, even ribbons instead of racing to the bottom.
A chilled, smoothly frosted cake is the real secret here. When the surface is cold and firm, the ganache behaves exactly how you want it to and you end up with those crisp, staggered drips you see in bakery windows.
Ingredients

- 2 cups all-purpose flour: spooned and leveled, not scooped
- 1 ¾ cups granulated sugar: keeps the cake soft and sweet
- ¾ cup unsweetened cocoa powder: natural cocoa works, Dutch-process gives a darker color
- 1 ½ teaspoons baking powder
- 1 ½ teaspoons baking soda
- 1 teaspoon fine sea salt
- 2 large eggs, at room temperature: cold eggs can curdle the batter
- 1 cup buttermilk, at room temperature: if you do not have buttermilk, add 1 tablespoon lemon juice to whole milk and let it sit 10 minutes
- ½ cup vegetable oil: keeps the cake moist longer than butter alone
- 2 teaspoons vanilla extract
- 1 cup hot brewed coffee: enhances the chocolate without tasting like coffee
For the chocolate buttercream
- 1 ½ cups unsalted butter, softened: it must be truly soft, not just slightly pliable
- 4 cups powdered sugar, sifted: removes any lumps that would show in the frosting
- ¾ cup unsweetened cocoa powder
- ½ teaspoon fine sea salt
- 2 teaspoons vanilla extract
- 4-5 tablespoons heavy cream or whole milk: adjust for spreadable consistency
For the ganache drip
- 6 oz semi-sweet chocolate, finely chopped: bars work better than chips because they melt more smoothly
- ½ cup heavy cream
Variations / Substitutions
- Swap the frosting: cream cheese frosting works well if you want a slight tang, just add a pinch of salt to balance the sweetness.
- Dairy-free: use plant-based butter sticks, coconut cream in the ganache, and a non-dairy milk with a teaspoon of vinegar in place of buttermilk.
- White chocolate drip: replace the semi-sweet chocolate with white chocolate and use the same amount of cream, but warm it more gently because white chocolate scorches easily.
- Add espresso: reduce the coffee to ¾ cup and stir in a shot of espresso for a deeper mocha note.
Rich Chocolate Bar Cake is another reader favorite dessert worth making next.
How to Make Chocolate Drip Cake
Step 1: Bake the Chocolate Layers
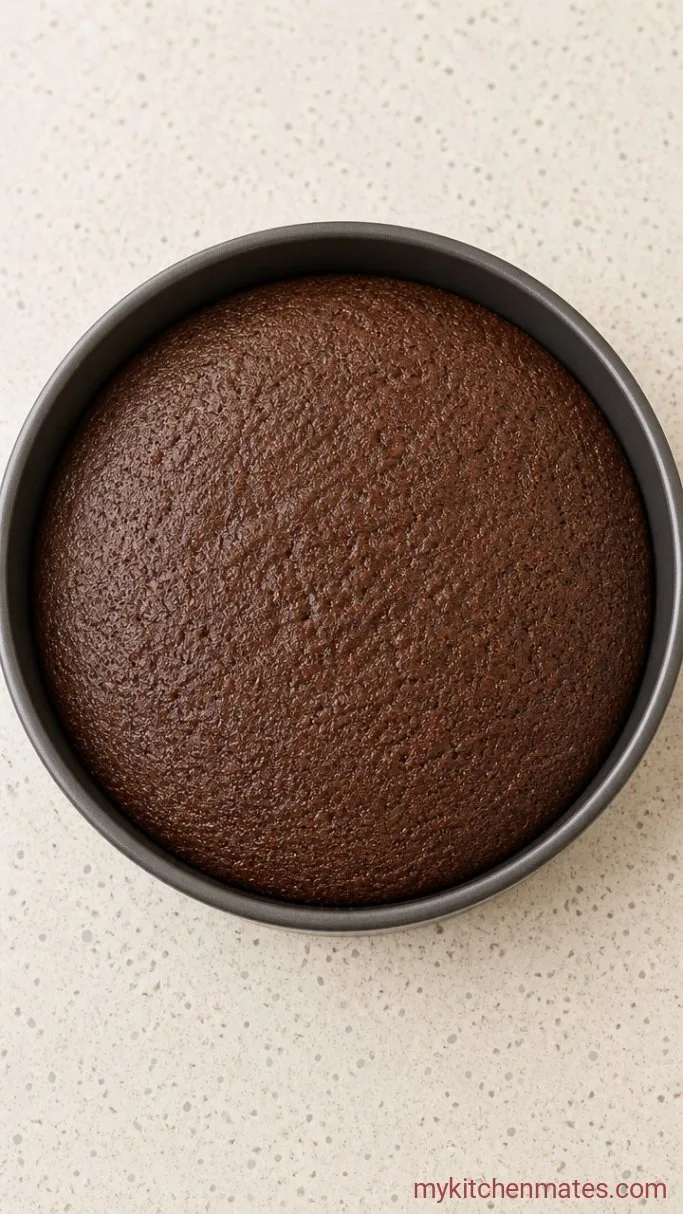
Preheat the oven to 350°F (175°C) and grease two 8-inch round cake pans, lining the bottoms with parchment paper. In a large bowl, whisk together the 2 cups flour, 1 ¾ cups sugar, ¾ cup cocoa, 1 ½ teaspoons baking powder, 1 ½ teaspoons baking soda, and 1 teaspoon salt until there are no clumps of cocoa.
Add the 2 eggs, 1 cup buttermilk, ½ cup oil, and 2 teaspoons vanilla to the dry ingredients and mix with a hand mixer on medium speed for about 2 minutes, until the batter is thick and glossy. Slowly pour in the 1 cup hot coffee while mixing on low, and keep going just until the batter smooths out. It will be very thin, which is exactly what you want.
Divide the batter evenly between the prepared pans and bake on the middle rack for 30 to 35 minutes. The cakes are done when a toothpick inserted in the center comes out with a few moist crumbs attached and the tops spring back lightly when pressed. Let the layers cool in the pans for 10 minutes, then turn them out onto a rack to cool completely.
Step 2: Whip the Buttercream

While the cakes cool, place the 1 ½ cups softened butter in a large bowl and beat it with a mixer on high for a full 3 to 4 minutes, scraping down the sides once. The butter should look pale and almost fluffy.
With the mixer on low, gradually add the 4 cups sifted powdered sugar and ¾ cup cocoa, then the ½ teaspoon salt and 2 teaspoons vanilla. Once everything is incorporated, drizzle in 4 tablespoons of heavy cream and beat on high for another 2 minutes. If the frosting seems too stiff, add the remaining tablespoon of cream a little at a time. You want a consistency that holds peaks but spreads easily without tearing the cake.
Step 3: Stack the Layers
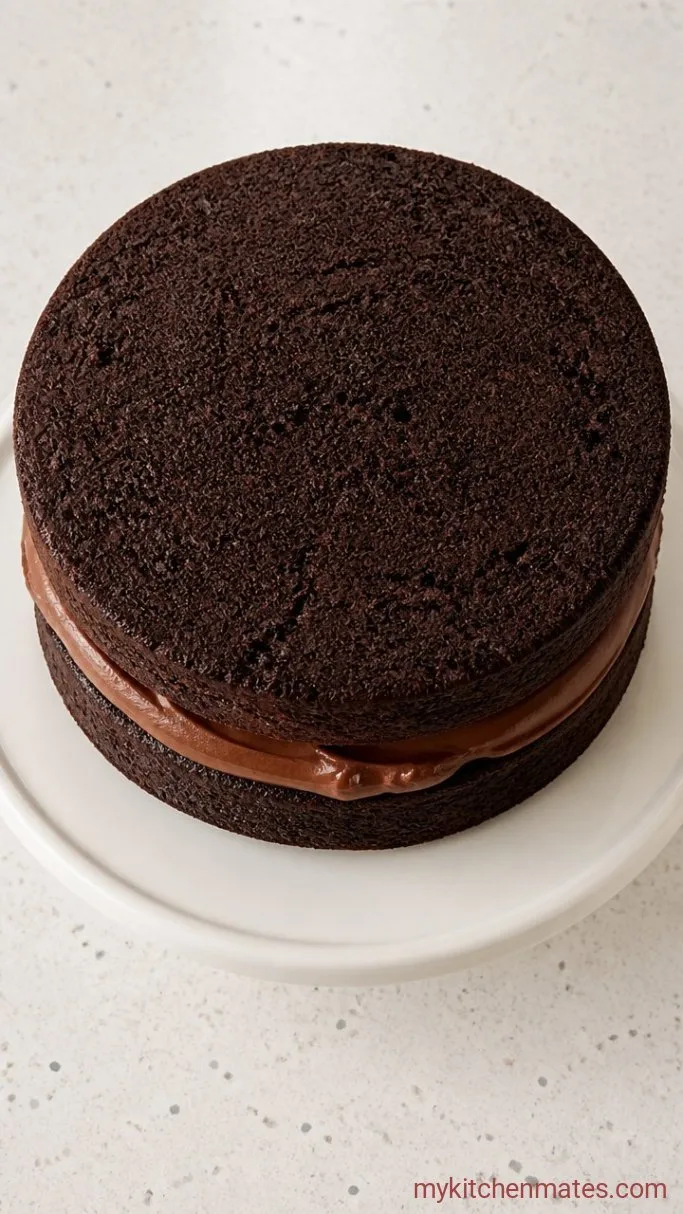
Place one completely cooled cake layer on a serving plate or cake board with the flat side up. Spread about 1 cup of buttercream on top with an offset spatula, pushing it out just to the edge. The layer of frosting should be about half an inch thick.
Set the second cake layer on top, flat side down this time, so the smooth bottom becomes the top of your cake. Press very gently to help it settle and check that the layers are level. If the top layer feels wobbly, give it a light twist to even out the filling underneath.
Step 4: Crumb Coat and Chill

Scoop a generous amount of buttercream onto the top of the cake and spread it across the surface and down the sides, working it into a thin, almost sheer layer. This is your crumb coat, so some crumbs will show through and that is fine. Smooth it as evenly as you can with a bench scraper or spatula.
Transfer the cake to the refrigerator and chill for at least 30 minutes, until the crumb coat is firm to the touch. This step locks in the crumbs and gives you a stable, cold surface for the final frosting layer, so do not skip it.
Step 5: Smooth Out the Frosting

Take the chilled cake out and pile the remaining buttercream on top. Spread it across the top first, then work it down the sides, adding more as needed. Use a bench scraper held vertically against the side of the cake and spin the turntable or plate slowly to create a smooth, even wall.
Once the sides are covered, smooth the top edge by pulling the excess frosting from the outer rim inward with your spatula. If any air bubbles appear, go back over the area with the scraper. Return the cake to the fridge for another 15 minutes so the surface is cold and set before you add the drip.
Step 6: Create the Chocolate Drip and Serve

Place the 6 oz chopped chocolate in a medium heatproof bowl. Heat the ½ cup cream in a small saucepan over medium heat just until small bubbles appear around the edges, about 2 to 3 minutes, then pour it over the chocolate. Let it sit untouched for 2 minutes, then whisk slowly from the center outward until the ganache is glossy and completely smooth.
Let the ganache cool at room temperature for about 10 minutes, stirring occasionally, until it coats the back of a spoon and drips off in slow, heavy ribbons. If it is too warm, the drips will slide straight to the plate. Spoon some ganache over the edge of the cold cake in one spot and watch how it falls. Once you are happy with the speed, work your way around the cake, alternating short and long drips for a natural look. Fill in the center with the remaining ganache and shake the plate gently to level it.
Let the ganache set for about 20 minutes at room temperature, then slice the cake with a warm knife. Serve it right away or let it stand another hour so the flavors deepen.
Tips for Cake Layers That Stay Level
- Weigh the batter: split the batter by weight between the two pans for layers that bake to the same height and bake evenly. A kitchen scale makes this quick and guarantees no domed cakes.
- Cool the layers upside down: flatten the rounded top by inverting the cakes onto a parchment-lined rack while they are still warm from the oven. This helps you avoid trimming later.
- Chill between steps: a cold cake is your best friend when frosting and dripping. Every time the cake begins to feel soft under the spatula, return it to the fridge for 10 minutes.
- Test the ganache: drip a small spoonful down the side of a glass to see how far it runs before you touch the cake. This tiny test saves you from a messy finish.
Bake times by pan:
| Pan size | Material | Approximate bake time |
|---|---|---|
| 8-inch round | Light metal | 30–35 minutes |
| 9-inch round | Light metal | 25–30 minutes |
| 9×13 sheet pan | Metal | 28–33 minutes |
Storing Leftover Cake
- Refrigerate: cover the cake loosely and keep it in the fridge for up to 5 days. The cold air can dry the cut edges a little, so press a piece of plastic wrap right against the exposed cake surface after slicing.
- Reheating: individual slices come back to almost fresh texture with 15 to 20 seconds in the microwave just until the buttercream softens.
- Serve cold: this cake tastes great straight from the fridge, where the frosting stays firm and the chocolate flavor feels more intense.
What to Serve with Chocolate Drip Cake
Fresh raspberries or sliced strawberries cut through the richness with a bright, tart edge that makes each bite feel less heavy. A scoop of good vanilla ice cream melts into the warm ganache and softens the chocolate buttercream in a way that feels indulgent without any extra effort. For a more grown-up finish, a small glass of bourbon or a dark coffee brings out the roasted notes in the cocoa.
Frequently Asked Questions
Can I use a box cake mix instead?
Yes, a standard chocolate cake mix works if you swap the oil for melted butter and add 1 cup of hot coffee instead of water. The drip and frosting are made from scratch and will still give you that homemade look.
Why did my drips run all the way to the plate?
The ganache was probably too warm. Let it cool until it thickens enough to fall in controlled ribbons rather than a thin stream, and always drip onto a well-chilled cake.
How far ahead can I make this cake?
You can bake the layers a day in advance and wrap them tightly in plastic wrap at room temperature. Fully frost and drip the cake the day you plan to serve it for the best presentation.
My buttercream looks curdled or separated, what happened?
The butter and cream were likely different temperatures. Warm the bowl gently over a pan of barely simmering water while mixing, and it will come back together in about a minute.
Chocolate Drip Cake Recipe
Ingredients
Method
- Preheat oven to 350°F (175°C), grease two 8-inch round pans and line with parchment. Whisk flour, sugar, ¾ cup cocoa, baking powder, baking soda, and salt. Add eggs, buttermilk, oil, and 2 tsp vanilla and mix for 2 minutes. Slowly mix in hot coffee until batter is thin and smooth. Divide between pans and bake 30-35 minutes until a toothpick comes out with moist crumbs. Cool in pans 10 minutes, then turn out to cool completely.
- Beat 1 ½ cups softened butter on high for 3-4 minutes until pale. On low, gradually add sifted powdered sugar, ¾ cup cocoa, ½ tsp salt, and 2 tsp vanilla. Drizzle in 4 tbsp cream, beat on high 2 minutes, adding more cream if needed for a spreadable consistency.
- Place one cooled cake layer flat side up on a serving plate. Spread about 1 cup buttercream evenly over the top. Place second layer flat side down on top and press gently.
- Spread a thin layer of buttercream over the entire cake as a crumb coat. Chill at least 30 minutes until firm.
- Pile remaining buttercream on top of the cold cake. Smooth over the top and down the sides with a bench scraper until even. Chill another 15 minutes.
- Place 6 oz chopped chocolate in a heatproof bowl. Heat ½ cup cream until bubbles appear, then pour over chocolate and let sit 2 minutes. Whisk until glossy. Cool 10 minutes, stirring occasionally, until it drips in heavy ribbons. Spoon ganache over the edge of the cold cake to create drips, then fill in the top. Let set 20 minutes before serving.
Notes
