
Baked Chicken Kiev with Garlic Herb Butter

Baked chicken Kiev is the kind of dish that feels special but comes together with a few simple steps. Each chicken breast gets wrapped around a cold round of garlic herb butter, coated in crunchy panko crumbs, and baked until golden.
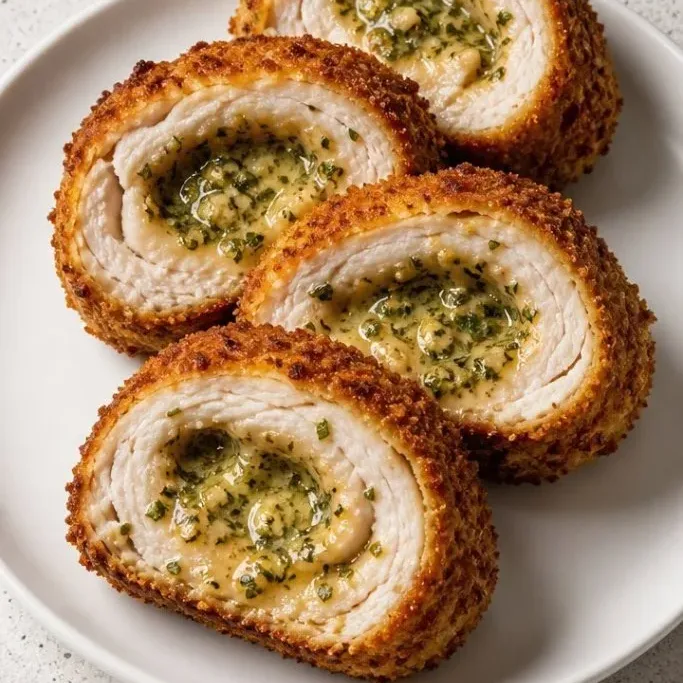
The butter melts inside the chicken as it cooks, turning into a warm, herby sauce. Slice into it and that glossy, green-flecked butter runs right out onto the plate.
Why This Chicken Kiev Works
The herb butter stays cold while you roll and bread the chicken, then melts into the meat during baking. That keeps the chicken moist and gives you a burst of garlic, parsley, and chives in every bite.
Panko breadcrumbs and a light spray of oil create a crisp, golden crust without deep frying. The oven does all the heavy work while you set the table.
Ingredients
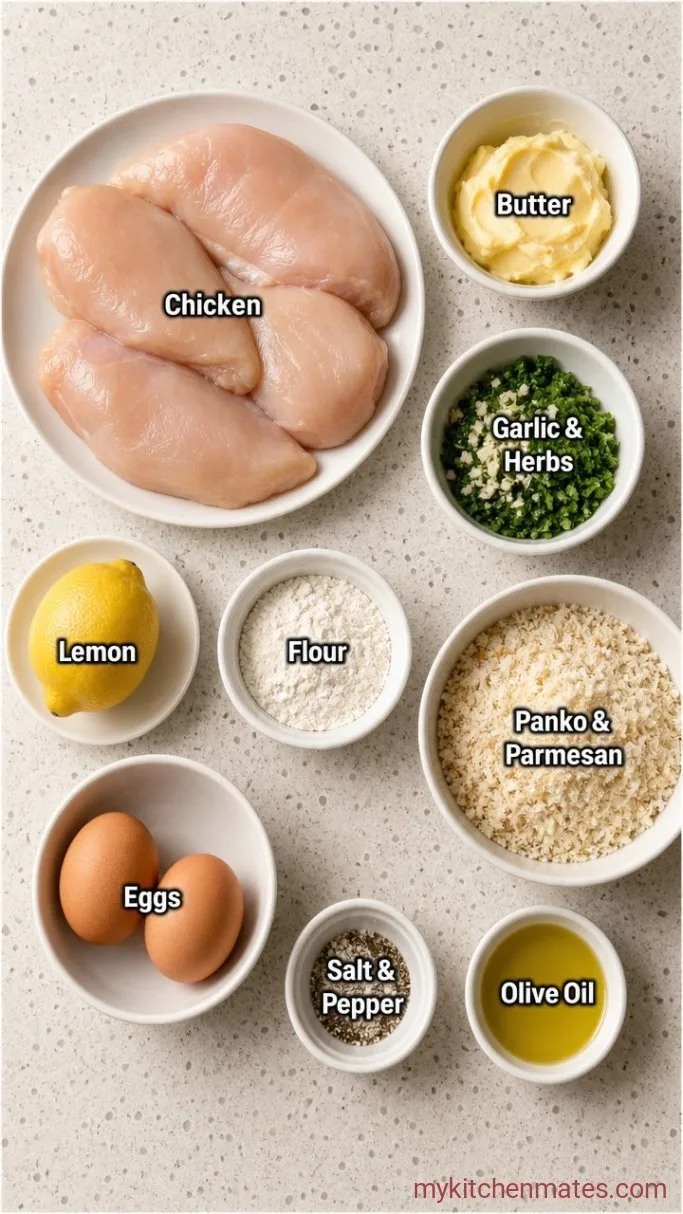
- 4 boneless, skinless chicken breasts (about 6 to 8 oz each): try to pick pieces that are similar in size so they cook evenly.
- ½ cup unsalted butter, softened: the butter must be very soft but not melted for easy mixing.
- 3 garlic cloves, minced: fresh garlic gives the best flavor.
- 2 tbsp finely chopped fresh parsley: flat-leaf parsley works well here.
- 1 tbsp chopped fresh chives: adds a mild oniony note.
- 1 tsp lemon zest: brightens the butter and cuts the richness.
- ½ tsp salt, plus more for seasoning: kosher salt preferred.
- ¼ tsp black pepper, plus more for seasoning
- ½ cup all-purpose flour
- 2 large eggs
- 1 cup panko breadcrumbs: panko gives the crispiest coating; regular breadcrumbs will be softer.
- ¼ cup grated Parmesan cheese: adds savory depth and helps the crust brown.
- Olive oil spray or a drizzle of olive oil: for crisping the outside.
Variations / Substitutions
- Swap chicken breasts for boneless thighs: pound them to an even thickness and roll the same way; they’ll be juicier but need a few extra minutes.
- Use a mix of herbs: dill, tarragon, or basil each bring a different twist; keep the total fresh herb amount the same.
- Make it gluten-free: replace the flour with a gluten-free blend and the panko with gluten-free panko.
- Dairy-free butter: a good quality plant-based butter stick works for the filling; the texture will be slightly different.
- No Parmesan: leave it out or use nutritional yeast for a dairy-free version; the coating will still crisp up.
Butter Bean Salad makes a bright, easy side salad for this chicken.
How to Make Baked Chicken Kiev
Step 1: Mix the Herb Butter
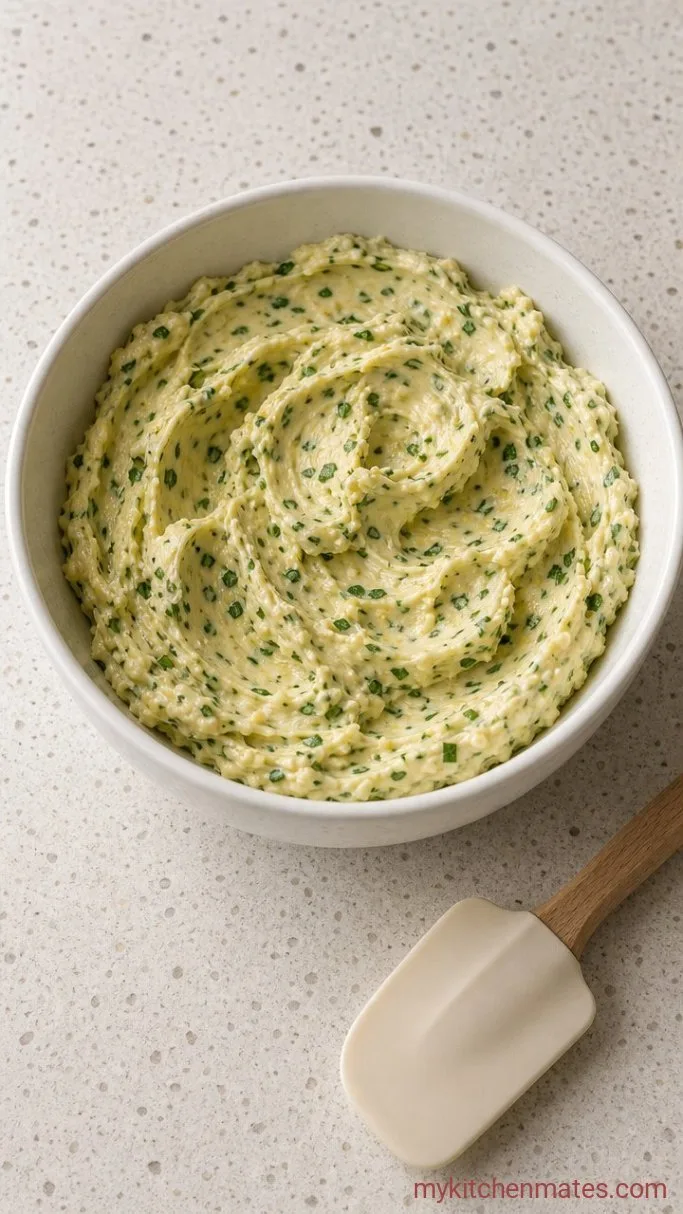
In a small bowl, mix the ½ cup softened butter, minced garlic, chopped parsley, chives, lemon zest, ½ tsp salt, and ¼ tsp pepper until everything is evenly blended. Spoon the mixture onto a piece of plastic wrap and shape it into a log about 4 inches long, then wrap tightly and chill for at least 20 minutes, or until firm.
The butter should be flecked with green and smell wonderfully fragrant. Chilling it solid is key because you need the butter to stay in one piece as you roll the chicken later.
Step 2: Pound the Chicken
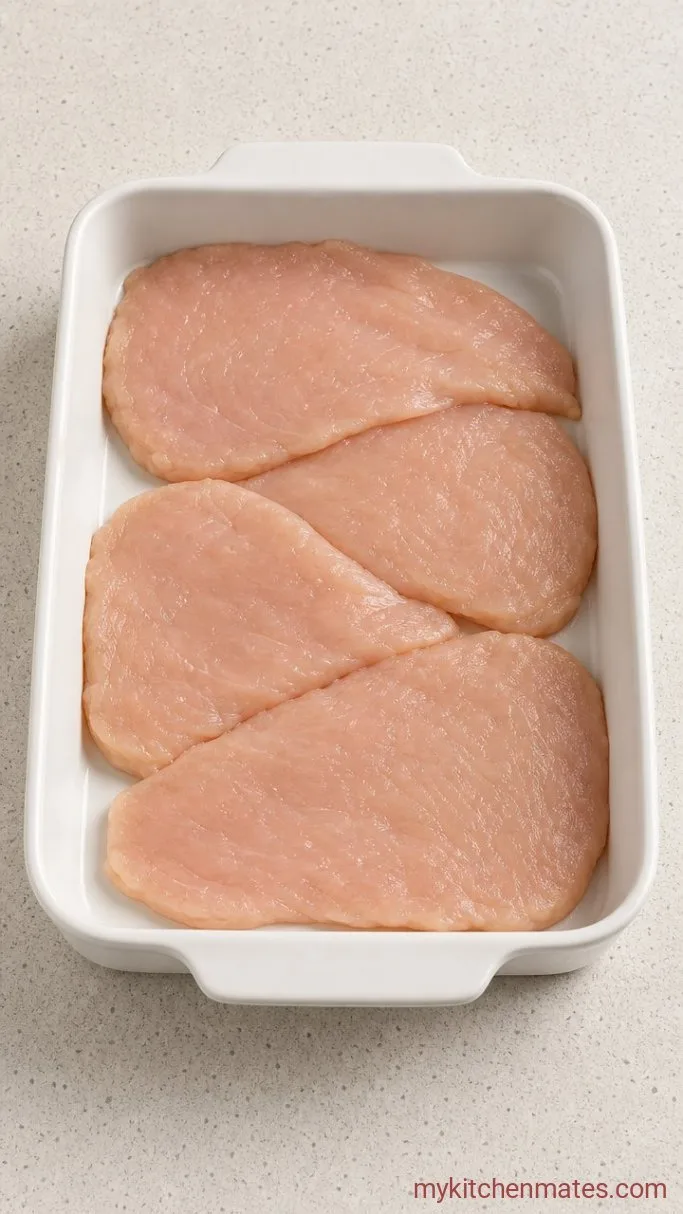
Place one chicken breast between two sheets of plastic wrap. Using a meat mallet or the bottom of a heavy skillet, pound it to an even ¼-inch thickness, working from the center out. Repeat with the remaining breasts. If a piece is extra thick, butterfly it first by slicing horizontally almost all the way through, then open it like a book before pounding.
The chicken should be thin and pliable, with no tears. Pounding it evenly means the chicken will cook through at the same rate and the butter will be fully enclosed.
Step 3: Stuff and Roll the Chicken
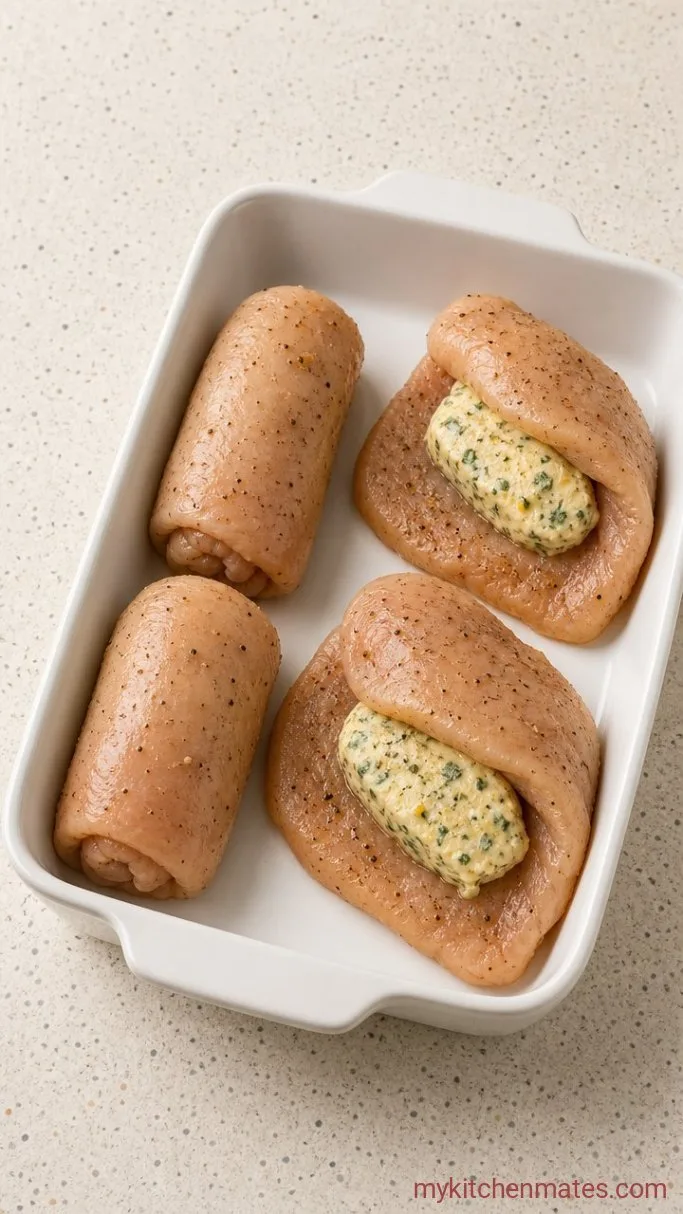
Slice the chilled butter log into 4 even rounds. Place one round in the center of a pounded chicken breast. Fold the shorter sides over the butter first, then roll the chicken up from the bottom like a burrito, making sure the butter is completely sealed inside. Secure the seam and ends with toothpicks.
The bundle should feel tight and compact. If there are any gaps, the butter can leak out during baking, so take an extra moment to tuck the edges and use a toothpick wherever it feels loose.
Step 4: Coat the Chicken
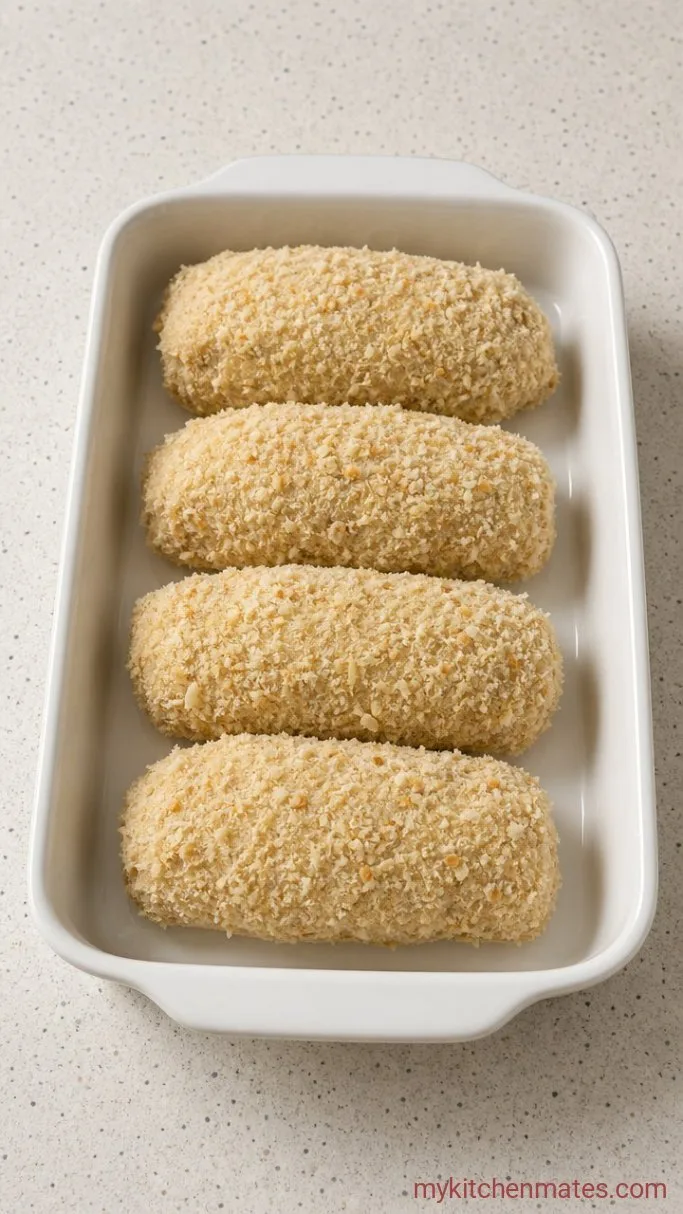
Set up a breading station: put the ½ cup flour in a shallow dish, beat the 2 large eggs in a second dish, and mix the 1 cup panko, ¼ cup Parmesan, and a pinch of salt and pepper in a third. Dredge each chicken bundle in the flour, shaking off the excess, then dip in the egg, letting any extra drip off. Press it firmly into the panko mixture to coat all sides.
The coating should be thick and even, with no wet spots. Pressing the panko on well gives you that shaggy, crunchy crust once baked.
Step 5: Bake the Chicken Kiev
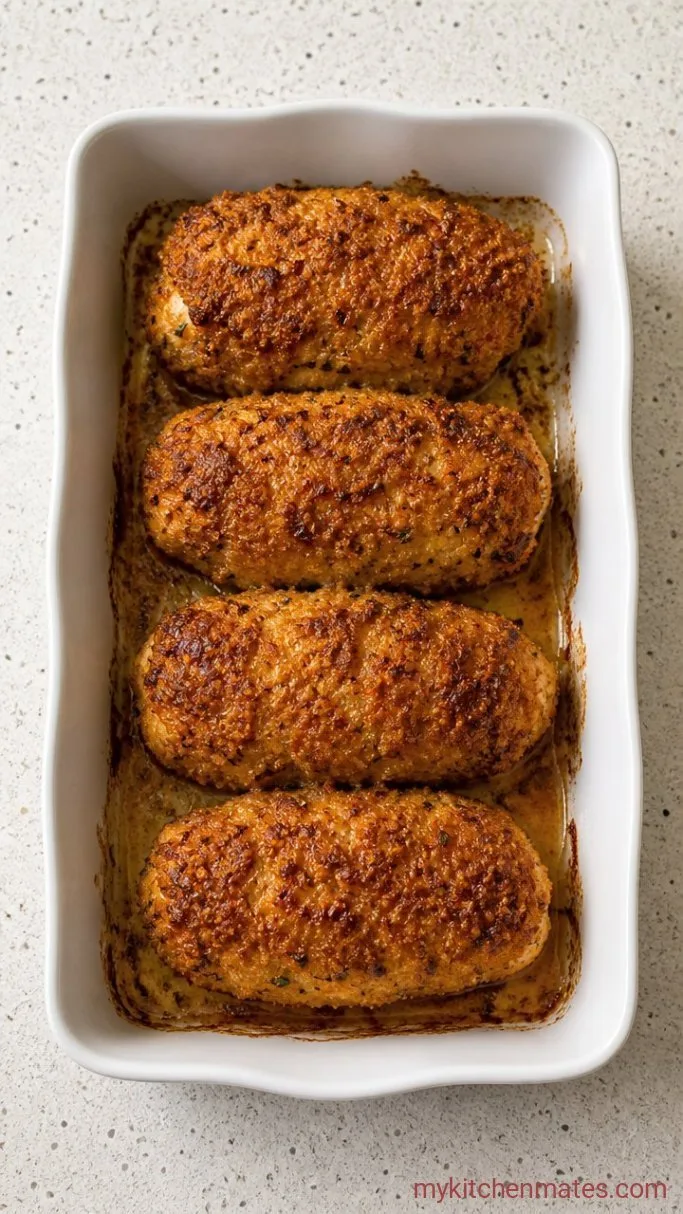
Preheat the oven to 400°F (200°C). Place a wire rack on a baking sheet and arrange the breaded chicken bundles on the rack. Spray them generously all over with olive oil spray. Bake for 20 to 25 minutes, until the coating is deep golden brown and the internal temperature of the chicken reaches 165°F (74°C) on an instant-read thermometer.
You’ll hear a faint sizzle from the butter inside, and the kitchen will smell like garlic and toasting breadcrumbs. The wire rack lets hot air circulate so the bottoms stay crisp instead of steaming.
Step 6: Slice and Serve the Kiev
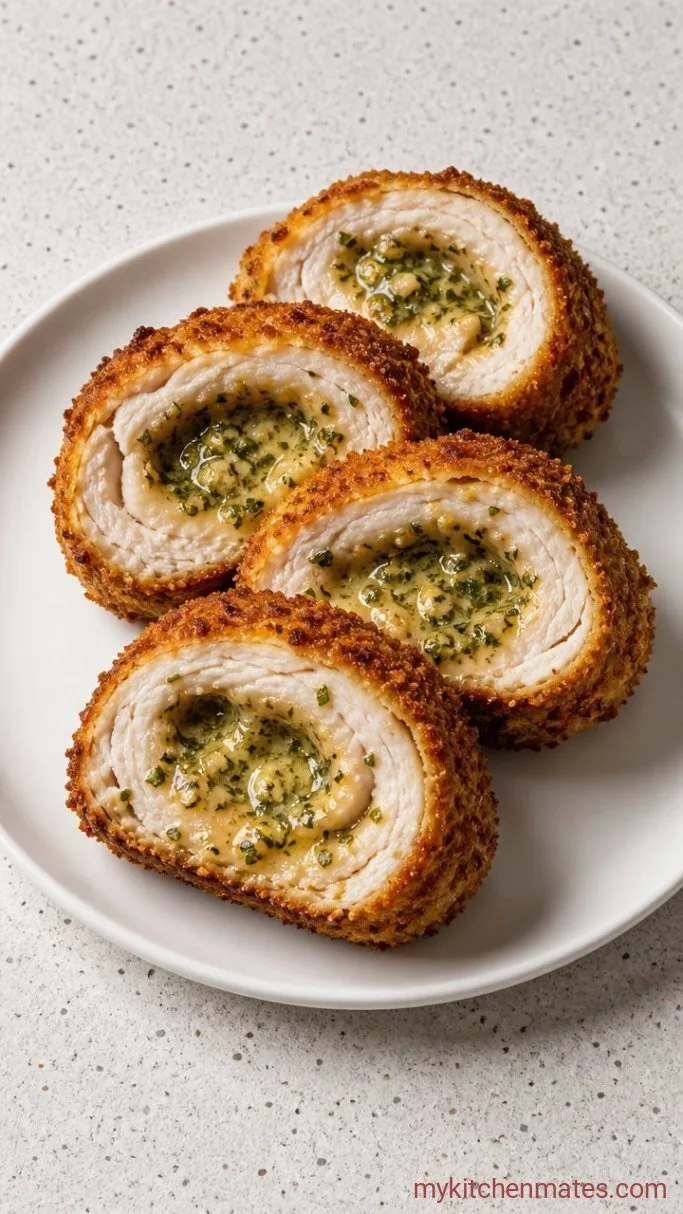
Let the baked chicken rest on the rack for about 5 minutes, then carefully remove the toothpicks. Set each breast on a cutting board and slice diagonally into thick pieces. The herb butter will spill out, glossy and green-flecked.
Serve right away with lemon wedges and whatever you like for sopping up the sauce. That first cut, when the butter runs onto the plate, is the whole point.
Tips for the Best Baked Chicken Kiev
- Chill the breaded bundles for 15 minutes before baking so the coating sets and the butter stays very cold.
- If you don’t have toothpicks, tie each bundle with kitchen twine; just snip and remove before slicing.
- For extra insurance against leaks, double-wrap the chicken: after rolling, wrap it tightly in plastic wrap and refrigerate for 10 minutes before breading.
- If your butter does crack through the coating during baking, spoon any melted butter from the baking sheet over the slices.
Bake times can vary depending on how thick you pounded the chicken:
| Chicken Thickness (after pounding) | Bake Time at 400°F |
|---|---|
| ¾ inch | 20 to 22 minutes |
| 1 inch | 23 to 25 minutes |
| 1¼ inches | 26 to 28 minutes |
Storing Leftover Chicken Kiev
Refrigerate: keep leftovers in an airtight container for up to 3 days. Reheat: place on a baking sheet in a 350°F oven for 10 to 15 minutes until warmed through and the coating crisps up again. Avoid the microwave, which makes the breading soft.
What to Serve with Baked Chicken Kiev
Creamy mashed potatoes are perfect for catching the herb butter. A simple arugula salad with lemon vinaigrette cuts the richness, and roasted asparagus or green beans round out the plate.
Frequently Asked Questions
Can I prepare chicken Kiev ahead of time?
Yes, assemble and bread the bundles, then refrigerate them on the rack-covered sheet for up to 4 hours. Bake straight from the fridge, adding a couple of minutes to the bake time.
Can I freeze unbaked chicken Kiev?
Yes. Place the breaded bundles on a parchment-lined tray and freeze until solid, then transfer to a zip-top bag. Bake from frozen at 400°F for 30 to 35 minutes, checking that the internal temperature reaches 165°F.
Why did my butter leak out during baking?
The most common reasons are not sealing the chicken tightly enough or the butter starting to melt before it went into the oven. Make sure the chicken wraps completely around the butter and chill the bundle well before baking.
Can I use chicken thighs instead of breasts?
Yes, boneless skinless thighs work. Pound them to an even ¼-inch thickness and roll them the same way. They may need a few extra minutes of bake time.
Do I have to use toothpicks?
They’re the easiest way to keep the seam closed, but you can also tie kitchen twine around each bundle. Just remember to remove them before serving.
Baked Chicken Kiev with Garlic Herb Butter Recipe
Ingredients
Method
- Mix the softened butter, garlic, parsley, chives, lemon zest, ½ tsp salt, and ¼ tsp pepper until blended. Shape into a 4-inch log on plastic wrap, wrap tightly, and chill at least 20 minutes.
- Pound each chicken breast between plastic wrap to an even ¼-inch thickness.
- Slice the butter log into 4 rounds. Place one in the center of each chicken breast. Fold in the sides, roll the chicken up tightly, and secure with toothpicks.
- Set up three shallow dishes: flour, beaten eggs, and panko mixed with Parmesan and a pinch of salt and pepper. Dredge each bundle in flour, then egg, then press into the panko to coat all sides.
- Preheat the oven to 400°F (200°C). Place the bundles on a wire rack set over a baking sheet, spray with olive oil, and bake 20 to 25 minutes until golden and the chicken reaches 165°F.
- Rest for 5 minutes, remove toothpicks, then slice diagonally and serve right away with lemon wedges.
Notes
