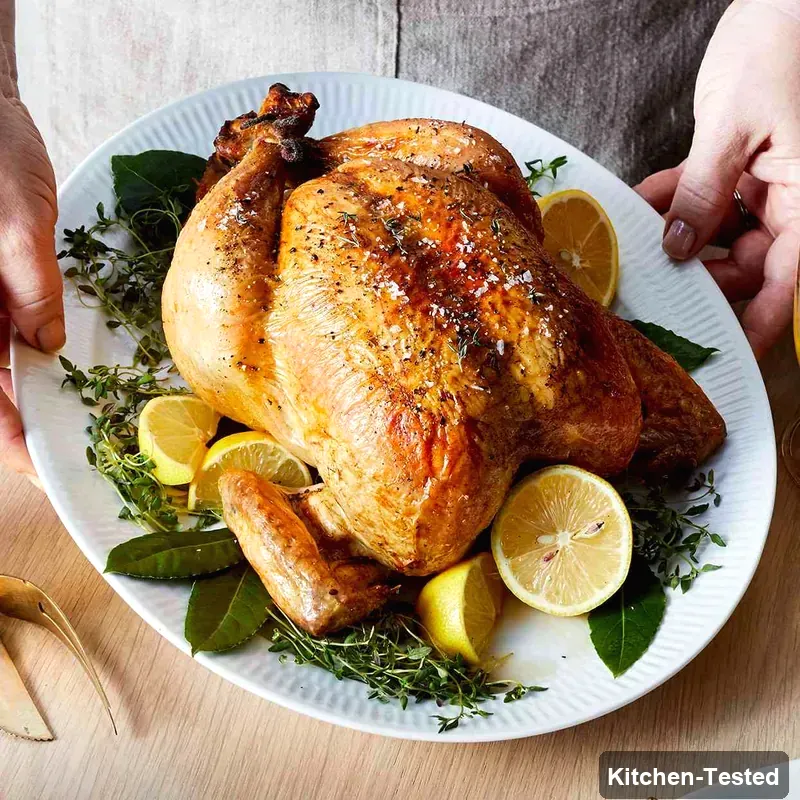
Perfect Oven-Roasted Whole Chicken
Nothing beats the amazing smell of a perfectly roasted chicken filling your kitchen! Your whole family will absolutely love this juicy, flavorful chicken that’s way easier to make than you might think. The best part is you’ll get crispy golden skin and tender meat that falls right off the bone.

Recipe Details
Timing & Servings: Prep Time: 30 minutes, Additional Time: 9 hours 45 minutes, Total Time: 10 hours 15 minutes, Serves: 6 people, Yield: 1 whole chicken.
Nutrition Profile: Low-Carb, Nut-Free, Dairy-Free, Healthy Aging, Healthy Immunity, Soy-Free, Egg-Free, Gluten-Free, Low-Calorie.
Nutrition Facts (per serving): 204 Calories, 9g Fat, 1g Carbs, 28g Protein.
Ingredients You’ll Need
Water: You’ll need 2 cups of regular water for making the brine. This helps create the perfect salty bath that makes your chicken super juicy and flavorful.
Kosher Salt: Use 2 tablespoons plus 1/2 teaspoon, divided. The kosher salt works better than table salt because it dissolves easier and gives you better flavor control.
Granulated Sugar: Just 2 tablespoons helps balance out the saltiness in the brine. It also helps create that beautiful golden color when the chicken roasts.
Black Peppercorns: One tablespoon of whole black peppercorns adds a gentle spicy warmth. Don’t worry about grinding them – they’ll flavor the brine perfectly as whole pieces.
Fennel Seeds: You’ll need 1½ teaspoons of these little flavor gems. They add a subtle licorice taste that makes this chicken taste restaurant-fancy.
Fresh Lemons: Two medium lemons total – quarter one for the brine and save the other for zesting and juicing later. Fresh lemons make all the difference in brightness and flavor.
Garlic: Three cloves, crushed, bring that wonderful savory depth. Just smash them with the flat side of your knife – no need to chop perfectly.
Fresh Thyme: You’ll use 6 sprigs for the brine plus 1 teaspoon of leaves for the rub. Fresh thyme smells incredible and adds that perfect herby flavor.
Bay Leaves: Two fresh medium bay leaves go in the brine for that classic roasted chicken aroma. If you only have dried ones, those work too.
Ice: Six cups of ice helps cool down your hot brine quickly and safely. This step is super important for food safety.
Whole Chicken: One 4 to 5 pound whole chicken is perfect for feeding six people. Pick one that looks plump and fresh from your grocery store.
Extra-Virgin Olive Oil: Just 2 teaspoons mixed into the herb paste helps everything stick to the skin beautifully. It also helps create that gorgeous golden color.
Ground Black Pepper: One teaspoon of freshly ground pepper adds the perfect finishing touch to your herb rub.
How to Make Perfect Oven-Roasted Whole Chicken

Step 1: Grab a small saucepan and combine water, 2 tablespoons salt, sugar, peppercorns, fennel seeds, lemon wedges, garlic, thyme sprigs, and bay leaves. Bring everything to a boil over medium-high heat. Stir until the salt completely dissolves, about 2 minutes, then remove from heat.
Step 2: Put your ice in a big 5-quart bowl or pot. Pour the hot brine right over the ice and let it cool for about 5 minutes, stirring now and then. Add your chicken and make sure it’s completely covered with brine. If you need to, add more cold water and use a plate to keep the chicken under the liquid. Pop it in the fridge overnight or up to 24 hours.
Step 3: When you’re ready to roast, preheat your oven to 375 degrees F. Line a rimmed baking sheet with foil and place a wire rack on top. Give the rack a good spray with cooking spray so nothing sticks.
Step 4: Take the chicken out of the brine and place it on your prepared rack. Pat it completely dry with paper towels – this step is super important for crispy skin.
Step 5: Zest your remaining lemon and juice it to get 2 teaspoons of fresh juice. Mix the zest and juice with olive oil, pepper, and the remaining 1 teaspoon thyme and 1/2 teaspoon salt. Use your fingers to gently loosen the skin from the breast and legs, then rub this amazing paste under and over the skin. Truss your chicken with kitchen string to help it cook evenly.
Step 6: Roast the chicken for 1 hour, then rotate the pan and bump the heat up to 400 degrees F. Keep cooking until an instant-read thermometer reads 160 degrees F in the thickest part of the breast, about 25 to 30 minutes more. Let your beautiful chicken rest for 10 minutes before carving – this keeps all those juices locked in.
Easy and Quick Roasted Chicken Version
Want to skip the overnight brining? You totally can! Just pat your chicken dry and rub it all over with 2 teaspoons salt, 1 teaspoon pepper, and 2 tablespoons olive oil mixed with that lemon zest, juice, and thyme. Let it sit at room temperature for 30 minutes, then roast using the same temperature and timing. You’ll still get a delicious chicken, just without that extra-deep flavor from brining.
Serving Ideas
This gorgeous roasted chicken is basically a complete meal all by itself! Serve it with some buttery mashed potatoes and roasted vegetables like carrots, Brussels sprouts, or green beans. A simple side salad with lemon vinaigrette pairs beautifully too. Don’t forget to save those pan drippings – they make incredible gravy.
Storage
Store your leftover chicken in the fridge for up to 4 days in a covered container. To reheat, pop pieces in a 350°F oven for about 10-15 minutes until warmed through. You can also use the leftover meat for sandwiches, salads, or soup – it stays tender and flavorful.
Substitutions
No fennel seeds? Try using dried oregano or rosemary instead. If you don’t have fresh thyme, use 1 teaspoon dried thyme. Lemon can be swapped for lime or orange if that’s what you have. Regular salt works fine instead of kosher salt – just use a bit less since it’s more concentrated.
Pro Tips
For Extra Crispy Skin: After brining and drying, let the chicken sit uncovered in the fridge for up to 24 hours. This dries out the skin even more for maximum crispiness.
Trussing Made Easy: Tie the legs together with kitchen string, then flip the wings under and tie them in place. This helps everything cook evenly and look professional.
Temperature is Key: Always use a meat thermometer – it’s the only way to know your chicken is perfectly cooked and safe to eat.
Don’t Skip the Rest: Letting the chicken rest for 10 minutes keeps all those delicious juices from running out when you carve it.
FAQs
Can I brine the chicken for longer than 24 hours?
You bet! You can safely brine your chicken for up to 24 hours, but don’t go much longer or the texture might get a bit mushy. The sweet spot is really between 8-24 hours for the best flavor and texture.
What if I don’t have kitchen string for trussing?
No worries! You can totally skip the trussing if you don’t have string. Your chicken will still taste amazing, it just might cook a tiny bit less evenly. You can also use toothpicks to hold the legs together in a pinch.
How do I know when the chicken is done without a thermometer?
While a thermometer is really the best way, you can check by wiggling the leg – it should move easily. Also, when you pierce the thigh with a knife, the juices should run clear, not pink. But honestly, a cheap instant-read thermometer is such a game-changer for perfect chicken every time!
Can I stuff the chicken with anything?
Sure! You can add some lemon halves, fresh herbs, or even chopped onion and celery to the cavity for extra flavor. Just remember that stuffed chickens take a bit longer to cook, so keep checking that internal temperature.
I hope you love this recipe as much as my family does! It’s become our go-to Sunday dinner, and I know it’ll become a favorite at your house too. Let me know how it turns out – I love hearing about your cooking adventures!