If you’re experiencing a situation where your GE dishwasher has no power and no lights, don’t worry. There are several potential solutions to this common issue.
In this blog post, we will explore the possible causes and guide you through the troubleshooting process.
Troubleshooting Steps for a GE Dishwasher with No Power or Lights
1. Check Power Supply
Start by verifying that the dishwasher is properly connected to a working power source.
Ensure the power cord is securely plugged into a functional electrical outlet.
If you’re using an extension cord, make sure it’s in good condition and rated for the dishwasher’s power requirements.
If the outlet is controlled by a wall switch, ensure the switch is in the “ON” position.
2. Check the Circuit Breaker
A tripped circuit breaker can cut off power to the dishwasher.
Locate the circuit breaker panel in your home and check if the breaker corresponding to the dishwasher’s circuit has tripped.
If you find a tripped breaker, reset it by switching it back to the “ON” position. If the breaker trips again, it might indicate an electrical issue that requires professional attention.
3. Inspect the Door Latch
The dishwasher won’t start if the door is not latched properly.
Close the dishwasher door firmly and listen for an audible click, indicating that the latch is engaged.
If you don’t hear a click or notice the door not closing securely, examine the door latch and the strike plate (located on the dishwasher’s tub) for any obstructions, debris, or damage.
Clean the latch and strike plate if needed, and ensure they align properly for a tight closure.
4. Check the Control Lock
Some GE dishwashers have a control lock feature to prevent accidental button presses.
If the control lock is enabled, the dishwasher won’t respond to any commands.
Look for the control lock symbol on the control panel, usually labeled “Control Lock” or “Lock Controls.”
To disable the control lock, press and hold the designated button (usually for 3-5 seconds) until the lock indicator turns off.
5. Examine the Control Panel
Inspect the control panel for any visible damage, wear, or buttons that appear stuck.
Moisture or spills can sometimes cause the control panel to malfunction.
If you notice any issues, gently clean the control panel with a soft, damp cloth. Avoid using excessive water or cleaning agents that could damage the electronics.
6. Check the Power Cord
A defective power cord can prevent the dishwasher from receiving power.
Examine the power cord for any visible damage, such as frayed wires or broken plugs.
If you find any issues, replace the power cord with a compatible one to restore power to the dishwasher.
7. Verify the Water Supply
The dishwasher requires a sufficient water supply to operate.
Ensure that the water supply valve connected to the dishwasher’s inlet hose is open and allows water to flow freely.
If the water supply is restricted or turned off, the dishwasher won’t start.
8. Tripped Overheat Thermostat
The dishwasher’s overheat thermostat is a safety device that cuts off power if the dishwasher’s internal temperature becomes too high.
This can happen due to a malfunctioning heating element or other factors.
If the overheat thermostat has tripped, you’ll need to diagnose the cause of the overheating issue and address it before resetting the thermostat to restore power.
Understanding the Power System of a GE Dishwasher
Power Source: Understanding the Electrical Connection
To power up your GE dishwasher, it needs a reliable electrical connection.
The dishwasher is designed to run on a standard household power supply of 120 volts AC.
This means you’ll need to plug it into a working power outlet with the correct voltage.
Look for an outlet near the dishwasher’s location, and ensure it’s not loose or damaged.
If you find any issues with the power cord, like fraying or cuts, do not use the dishwasher until it’s repaired or replaced to avoid electrical hazards.
Before connecting the dishwasher, you can test the outlet’s power by plugging in another device like a lamp.
If the lamp doesn’t work, the outlet might be faulty, and you should consult an electrician to fix it. Remember, safety first!
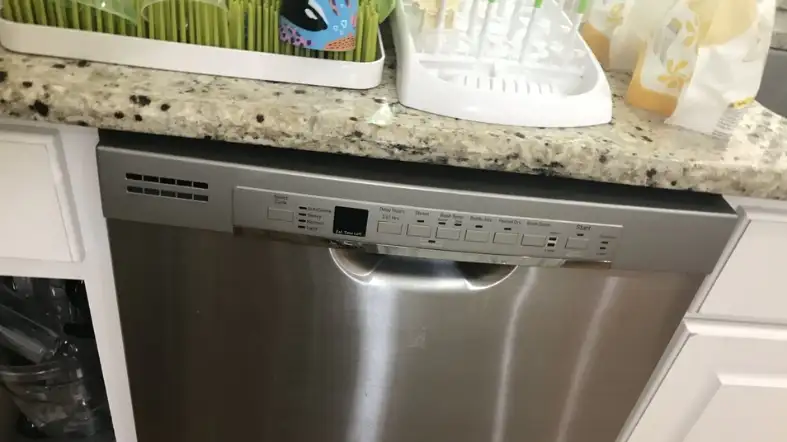
Control Panel: Navigating the User Interface
The control panel of your GE dishwasher serves as its command center.
It’s where you select the wash cycle, adjust settings, and start the cleaning process.
When you open the dishwasher door, you’ll find the control panel on the front or top edge of the tub.
Each button and setting has a specific function. For example, to start the dishwasher, press the “Start” button, and to choose a wash cycle, use the “Cycle Select” button.
Some GE dishwashers have a digital display that shows the cycle status and remaining time.
Understanding how to operate the control panel properly ensures you get the most out of your dishwasher’s features and options.
Electronic Control Board: The Brain Behind the Operation
Inside your GE dishwasher, there’s a crucial component called the electronic control board.
This sophisticated circuit board acts as the dishwasher’s brain, receiving signals from the control panel and directing the various functions.
When you select a wash cycle and make adjustments on the control panel, the electronic control board interprets your choices and sends commands to other parts of the dishwasher, such as the wash pump, water inlet valve, and heating element.
Without this control board, the dishwasher wouldn’t know what to do!
If you encounter issues with the dishwasher not responding to commands, it’s possible that the electronic control board needs troubleshooting or replacement by a professional technician.
Water Inlet Valve: Supplying Water for Cleaning
The water inlet valve is responsible for allowing water to enter the dishwasher during the wash cycle.
When you start a wash program, the electronic control board signals the water inlet valve to open, letting water flow into the dishwasher.
It’s essential to ensure that the water supply valve connected to the dishwasher is fully open, as any obstruction or partial closure could result in inadequate water flow.
If the water inlet valve is faulty or not working correctly, your dishwasher won’t have enough water to clean your dishes effectively.
Regularly check the water inlet valve for any signs of leaks or damage and have it repaired promptly to maintain optimal dishwasher performance.
Wash Pump/Motor: Creating the Cleaning Action
The wash pump, operated by an electric motor, is a crucial part of your GE dishwasher’s cleaning system.
Once the dishwasher is filled with water, the wash pump kicks into action, sending water through spray arms to clean your dishes.
The spray arms rotate, evenly distributing water and detergent over the dishes, ensuring a thorough and efficient cleaning process.
If you notice a decrease in cleaning performance or hear unusual noises during the wash cycle, the wash pump or motor might be malfunctioning.
In such cases, it’s best to seek professional help to diagnose and repair the issue.
Heating Element: Warming Up for a Better Clean
The heating element in your GE dishwasher plays a significant role in ensuring your dishes come out sparkling clean and sanitized.
During the wash and rinse cycles, the heating element warms up the water to high temperatures.
Hot water not only helps dissolve detergent effectively but also aids in removing stubborn grease and bacteria from your dishes.
Additionally, the hot water contributes to the drying process at the end of the cycle, reducing the need for towel-drying.
If you find that your dishes are not drying properly or are still wet after the cycle, it’s possible that the heating element is not functioning correctly.
A malfunctioning heating element can be replaced by a qualified technician to restore optimal performance.
Drain Pump: Removing Used Water
Once the wash and rinse cycles are complete, your GE dishwasher needs to get rid of the used water from the tub.
This is where the drain pump comes in. The drain pump, another electric motor, expels the dirty water through a drain hose connected to the dishwasher’s drain outlet.
To ensure efficient drainage, it’s essential to keep the drain hose free from kinks or blockages.
Regularly inspect the hose and clean it if necessary. If you notice water pooling at the bottom of your dishwasher after a cycle, there might be an issue with the drain pump or hose that requires professional attention.
Safety Features: Door Latch and Overheat Thermostat
Safety is paramount in any appliance, and your GE dishwasher is equipped with a couple of crucial safety features.
The door latch ensures that the dishwasher’s power is cut off when the door is open. This prevents accidental injury or damage to the dishwasher’s components.
Always make sure the door is securely closed and latched before starting a cycle.
Additionally, the dishwasher is equipped with an overheat thermostat as an extra safety measure.
If the dishwasher’s temperature rises above safe levels, the thermostat will trip, cutting off power to avoid any potential hazards.
If your dishwasher stops mid-cycle and refuses to turn on, it might be due to the overheat thermostat triggering.
In such cases, let the dishwasher cool down and check if the thermostat needs to be reset or replaced.
Maintaining Your GE Dishwasher for Optimal Performance
Regular Cleaning for a Sparkling Dishwasher
Regular cleaning is essential to ensure your GE dishwasher performs at its best. Begin by cleaning the exterior with a soft, damp cloth and mild detergent.
To keep the control panel shining, avoid using abrasive cleaners or harsh chemicals.
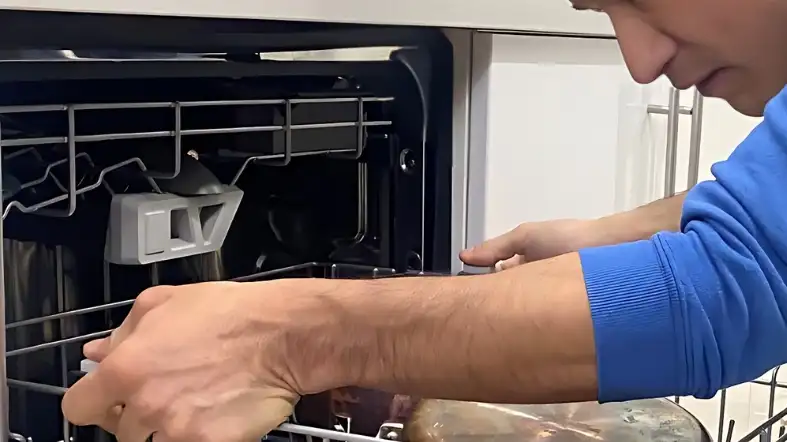
When it comes to the interior, remove the lower rack and inspect the filter. Clean the filter under warm running water to remove debris and food particles.
Next, inspect the spray arms for clogs or blockages. Use a toothpick or a small brush to gently clear any obstructions in the spray arm holes.
Run an empty cycle with a dishwasher cleaner to remove buildup from the dishwasher interior.
Repeat this process at least once every two months to maintain a sparkling and odor-free dishwasher.
Loading the Dishwasher Like a Pro
Properly loading your dishwasher can significantly impact its performance. Start by scraping off excess food from the dishes before loading them.
Load the dishes with the soiled side facing the spray arm to ensure effective cleaning.
Place larger items, such as pots and pans, on the lower rack and position them at an angle to allow water to reach all surfaces.
Glasses and cups should be placed on the upper rack, upside down, to prevent water from pooling inside.
Make sure that the spray arms can rotate freely without any obstructions from the dishes.
Avoid overcrowding the dishwasher, as this can hinder water circulation and lead to less effective cleaning.
By loading your dishwasher correctly, you’ll achieve spotless results while maximizing the dishwasher’s capacity.
Using Rinse Aid for Enhanced Drying
Rinse aid is a valuable ally in achieving spot-free and thoroughly dried dishes.
This liquid additive helps to reduce water spots and assists in drying during the final rinse cycle.
To use rinse aid effectively, adjust the dispenser setting according to the water hardness in your area.
The dispenser is typically located near the detergent compartment. It’s best to start with the lowest setting and increase it gradually if needed.
Make sure to refill the rinse aid dispenser regularly to maintain optimal performance.
Remember, using rinse aid not only enhances the drying process but also improves overall dishwasher efficiency by ensuring water sheets off dishes, leaving them sparkling and streak-free.
Ensuring Proper Water Temperature
The water temperature plays a crucial role in the cleaning performance of your GE dishwasher.
For the best results, the water entering the dishwasher should be at least 120°F (49°C).
Hotter water helps dissolve detergent efficiently and aids in removing tough stains and grease.
To verify the water temperature, run hot water at the sink closest to the dishwasher for a few moments before starting a wash cycle.
This ensures that cold water doesn’t fill the dishwasher during the initial cycle, which could lead to less effective cleaning.
Additionally, it’s essential to check your water heater’s temperature settings to ensure it’s set appropriately.
Remember, maintaining the right water temperature is key to achieving spotless and hygienic dishes.
Addressing Common Issues
Even with proper maintenance, you may encounter some common issues with your GE dishwasher.
Clogged spray arms can lead to dishes not being cleaned properly. If you notice reduced cleaning performance, inspect the spray arms and remove any debris or obstructions.
Another issue is a malfunctioning detergent dispenser. If you find detergent residue or the compartment doesn’t open during the cycle, check for blockages and ensure it’s not overfilled.
A leaking dishwasher may be caused by a damaged door gasket or loose connections.
Inspect the gasket for any signs of wear and tighten any loose connections.
Addressing these issues promptly will help maintain your dishwasher’s optimal performance and extend its lifespan.
Conclusion
Congratulations on uncovering the secrets to reviving your GE dishwasher with no power and no lights!
Now, armed with your newfound knowledge, you can confidently tackle any dishwasher troubleshooting.
Remember, when facing this issue, check the power supply, inspect the control board, and look out for tripped circuit breakers.
You’re now equipped to be the hero of your kitchen, rescuing your dishwasher and keeping your dishes gleaming. Happy dishwashing, superhero!
