15 Elegant Desserts That Are Surprisingly Simple to Make
Creating impressive desserts doesn’t require culinary school training or hours in the kitchen. These stunning treats look like they came from a fancy bakery but use simple techniques and accessible ingredients.

From chocolate-dipped strawberries to elegant tarts, each recipe delivers maximum visual impact with minimal effort, perfect for special occasions or whenever you want to impress.
01. Elegant Strawberry Ladyfinger Torte
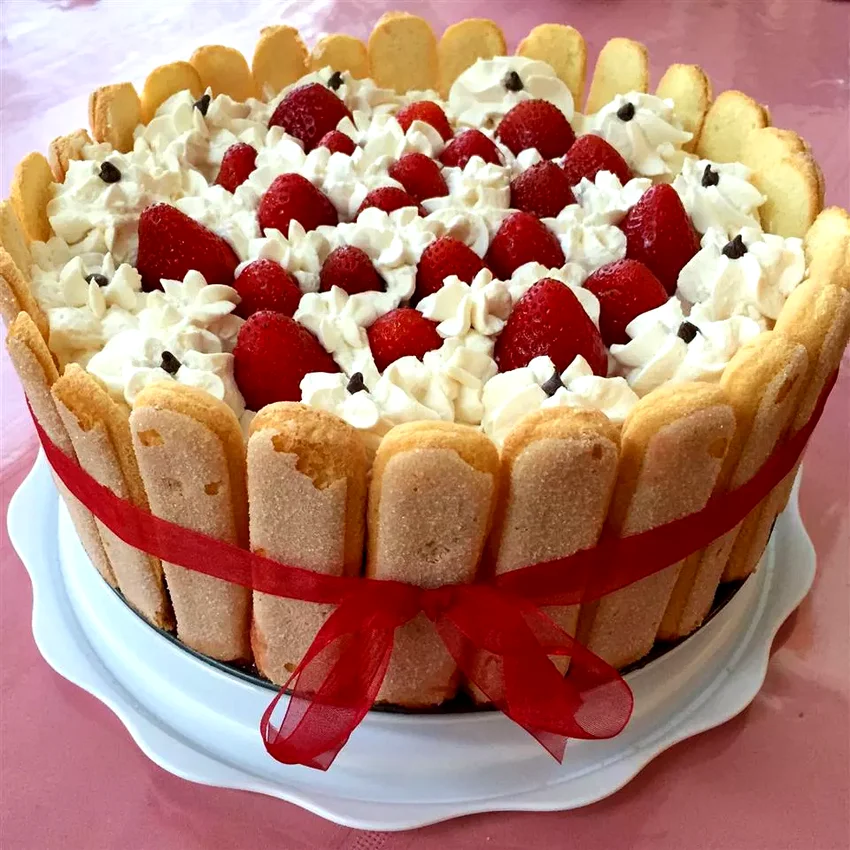
This sophisticated torte features creamy mousse surrounded by delicate ladyfingers and topped with glossy strawberry sauce. The impressive presentation belies its surprisingly simple preparation using store-bought components.
Ingredients: 24 store-bought ladyfingers, 2 cups heavy cream, 8 oz cream cheese (softened), ½ cup powdered sugar, 1 tsp vanilla extract, 2 cups frozen strawberries (thawed), ¼ cup granulated sugar, 2 tbsp cornstarch, fresh strawberries for garnish.
How To Make Elegant Strawberry Ladyfinger Torte
1. Line the sides of a 9-inch springform pan with ladyfingers, standing them upright around the perimeter. The cookies should fit snugly against each other, creating an elegant border that will showcase beautifully when unmolded.
2. Beat cream cheese until smooth and fluffy, then gradually add powdered sugar and vanilla. In a separate bowl, whip heavy cream to stiff peaks, then gently fold into the cream cheese mixture until just combined for a light, airy mousse.
3. Pour the mousse into the prepared pan, spreading evenly and smoothing the top. The filling should reach about three-quarters up the ladyfingers, creating the perfect ratio of cake to cream.
4. Combine thawed strawberries, granulated sugar, and cornstarch in a saucepan. Cook over medium heat, stirring constantly, until the mixture thickens and becomes glossy, about 5-7 minutes. Let cool completely before using.
5. Spread the cooled strawberry sauce over the mousse layer and refrigerate for at least 4 hours. Before serving, carefully remove the springform pan sides and garnish with fresh strawberries and whipped cream rosettes.
02. No-Bake Chocolate Éclair Cake
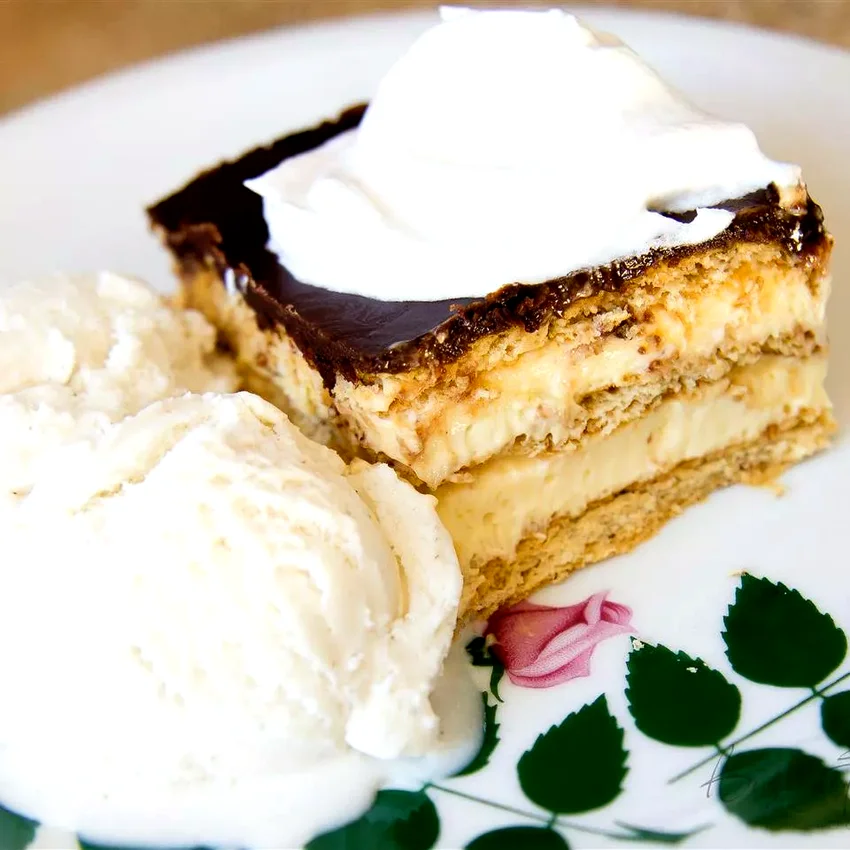
This decadent layered dessert mimics the flavors of classic éclairs without any pastry-making skills required. Graham crackers, instant pudding, and a glossy chocolate topping create an impressive result with minimal effort.
Ingredients: 2 boxes graham crackers, 2 boxes instant vanilla pudding mix, 3 cups cold milk, 8 oz frozen whipped topping (thawed), ⅓ cup cocoa powder, 1½ cups powdered sugar, 3 tbsp butter (melted), 3 tbsp milk.
How To Make No-Bake Chocolate Éclair Cake
1. Whisk pudding mix with cold milk for 2 minutes until thickened, then gently fold in the thawed whipped topping. This creates a light, creamy filling that perfectly mimics traditional éclair pastry cream.
2. Line the bottom of a 9×13 pan with a single layer of graham crackers, breaking them as needed to fit. The crackers will soften as the cake chills, creating tender cake-like layers.
3. Spread half the pudding mixture over the crackers, then add another layer of graham crackers. Top with remaining pudding mixture, then finish with a final layer of crackers.
4. For the chocolate glaze, whisk together cocoa powder, powdered sugar, melted butter, and milk until smooth and glossy. The consistency should coat the back of a spoon but still be pourable.
5. Pour the chocolate glaze evenly over the top layer, spreading gently to cover completely. Refrigerate overnight to allow the layers to set and the crackers to soften into cake-like texture.
03. Quick Chocolate Mousse with Cocoa
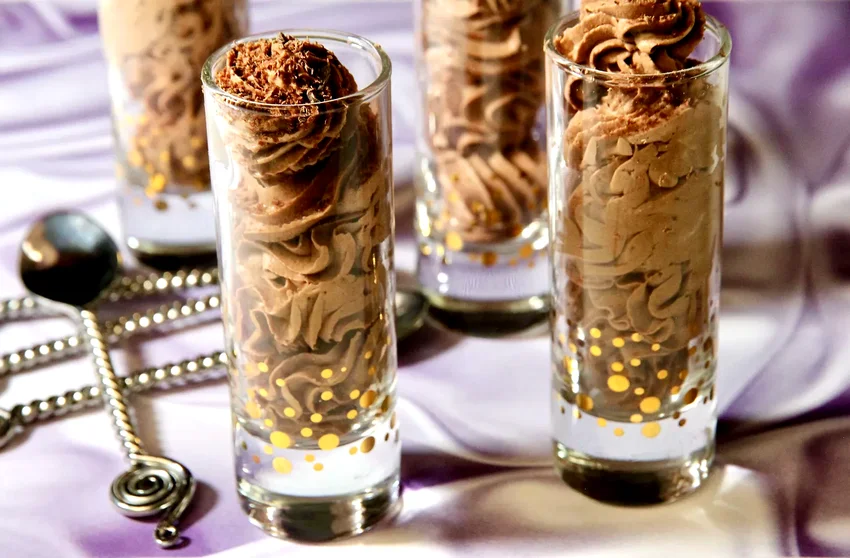
Rich, airy chocolate mousse comes together in just 20 minutes using simple ingredients and no cooking required. This elegant dessert looks restaurant-quality when piped into individual glasses.
Ingredients: 2 cups heavy cream, ¼ cup cocoa powder, ⅓ cup powdered sugar, 1 tsp vanilla extract, pinch of salt, chocolate shavings for garnish.
How To Make Quick Chocolate Mousse with Cocoa
1. Chill your mixing bowl and beaters in the freezer for 15 minutes before starting. This crucial step ensures the cream whips properly and creates the light, airy texture that makes mousse so special.
2. Sift cocoa powder and powdered sugar together to eliminate any lumps that could create a grainy texture. Add the salt to enhance the chocolate flavor and balance the sweetness perfectly.
3. Pour cold heavy cream into the chilled bowl and begin whipping on medium speed. Gradually add the cocoa mixture and vanilla, increasing speed to high once the ingredients are incorporated.
4. Continue whipping until soft peaks form, then beat just until stiff peaks hold their shape. Be careful not to overbeat, as this can cause the mousse to become grainy or separate.
5. Transfer mousse to a piping bag and pipe into individual glasses or ramekins. Chill for at least 2 hours before serving, then garnish with chocolate shavings for an elegant presentation.
04. Hasselback Pear Tart
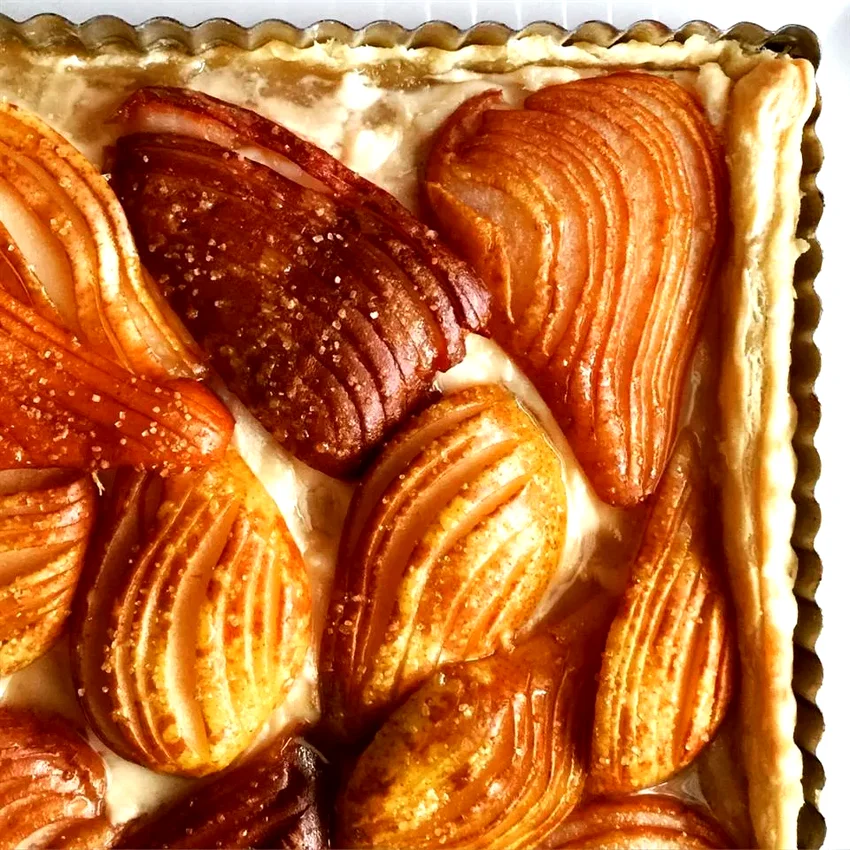
Thinly sliced pears arranged in an eye-catching fan pattern over sweetened cream cheese create this stunning tart. The impressive presentation uses a simple knife technique borrowed from Hasselback potatoes.
Ingredients: 1 sheet frozen puff pastry (thawed), 4 oz cream cheese (softened), 3 tbsp sugar, 1 egg yolk, 4 ripe pears, 2 tbsp honey, 1 tsp cinnamon, 2 tbsp butter (melted).
How To Make Hasselback Pear Tart
1. Roll thawed puff pastry into a 12×8 rectangle on a parchment-lined baking sheet. Score a 1-inch border around the edges without cutting through completely, creating a natural rim that will puff up during baking.
2. Mix softened cream cheese, 2 tablespoons sugar, and egg yolk until smooth. Spread this mixture evenly within the scored border, creating a creamy base that will complement the sweet pears beautifully.
3. Cut pears in half lengthwise and remove cores. Place each half cut-side down and make thin parallel cuts every ⅛-inch, stopping ½-inch from the top so the pear stays intact but fans out when gently pressed.
4. Arrange the fanned pear halves over the cream cheese mixture, gently pressing to spread the slices. Brush with melted butter and sprinkle with remaining sugar and cinnamon for a golden, aromatic finish.
5. Bake at 400°F for 25-30 minutes until the pastry is golden brown and pears are tender. Drizzle with honey while still warm and let cool for 10 minutes before slicing and serving.
05. Cast Iron Skillet Apple Pie
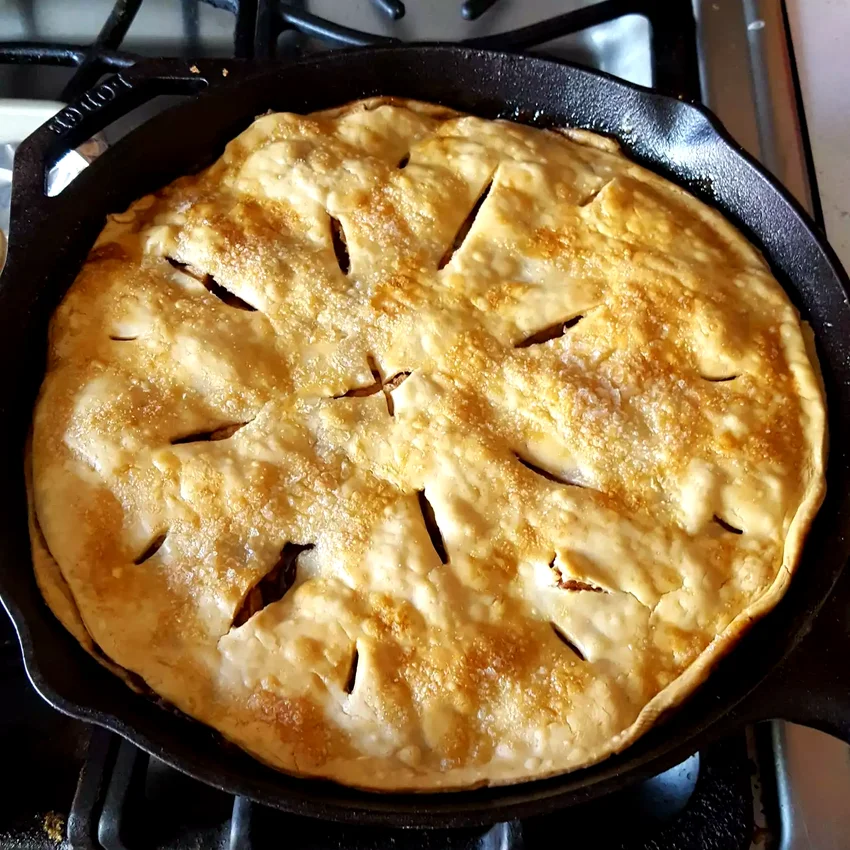
This dramatic multi-layered apple pie baked in a cast iron skillet creates an impressive rustic presentation. Ready-made pie crusts and simple cinnamon sugar make this showstopper surprisingly achievable.
Ingredients: 3 refrigerated pie crusts, 8 large apples (peeled and sliced), 1 cup sugar, 2 tsp cinnamon, ¼ cup flour, 4 tbsp butter, 1 egg (beaten), 2 tbsp coarse sugar.
How To Make Cast Iron Skillet Apple Pie
1. Preheat oven to 425°F and generously butter a 12-inch cast iron skillet. The seasoned surface of the skillet creates an incredibly flaky, golden crust that’s impossible to achieve with regular pie pans.
2. Toss sliced apples with sugar, cinnamon, and flour until evenly coated. This mixture will create its own syrupy sauce as it bakes, keeping the apples tender and flavorful throughout.
3. Press one pie crust into the bottom and up the sides of the skillet. Layer half the apple mixture, then place the second crust over the apples. Add remaining apples, then top with the final crust.
4. Crimp the edges decoratively and cut several steam vents in the top crust. Brush with beaten egg and sprinkle with coarse sugar for a bakery-style golden finish that adds delightful texture.
5. Bake for 15 minutes, then reduce heat to 350°F and continue baking 35-40 minutes until the crust is deep golden brown. Let cool in the skillet for 30 minutes before serving directly from the pan.
06. Ultimate Death By Chocolate Dessert
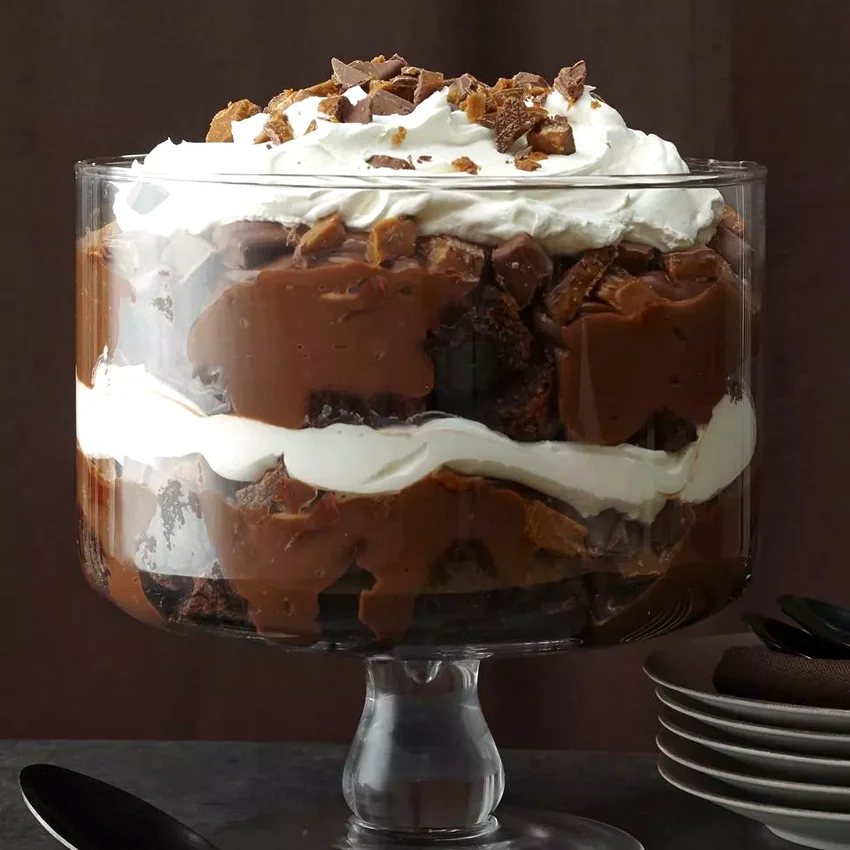
This indulgent layered chocolate dessert uses just four simple ingredients to create a showstopping treat. Multiple layers of rich chocolate goodness make this a guaranteed crowd-pleaser for any special occasion.
Ingredients: 1 box chocolate cake mix (plus ingredients called for on box), 2 boxes chocolate pudding mix, 12 oz frozen whipped topping (thawed), 6 chocolate candy bars (crushed).
How To Make Ultimate Death By Chocolate Dessert
1. Prepare chocolate cake according to package directions and bake in a 9×13 pan. Let cool completely, then crumble into bite-sized pieces. The irregular chunks create interesting texture layers throughout the dessert.
2. Prepare both boxes of chocolate pudding according to package directions using cold milk. Whisk until thick and smooth, then refrigerate for 30 minutes to ensure it’s properly set before layering.
3. In a large glass trifle bowl or 9×13 pan, layer half the crumbled cake pieces. The clear bowl showcases the beautiful layers, making this dessert as visually impressive as it is delicious.
4. Spread half the prepared pudding over the cake layer, then add half the whipped topping. Sprinkle with half the crushed candy bars, creating distinct chocolate layers that build anticipation with each bite.
5. Repeat layering with remaining cake, pudding, whipped topping, and candy bars. Refrigerate for at least 4 hours or overnight to allow flavors to meld and layers to set perfectly before serving.
07. Individual Mini Cheesecakes
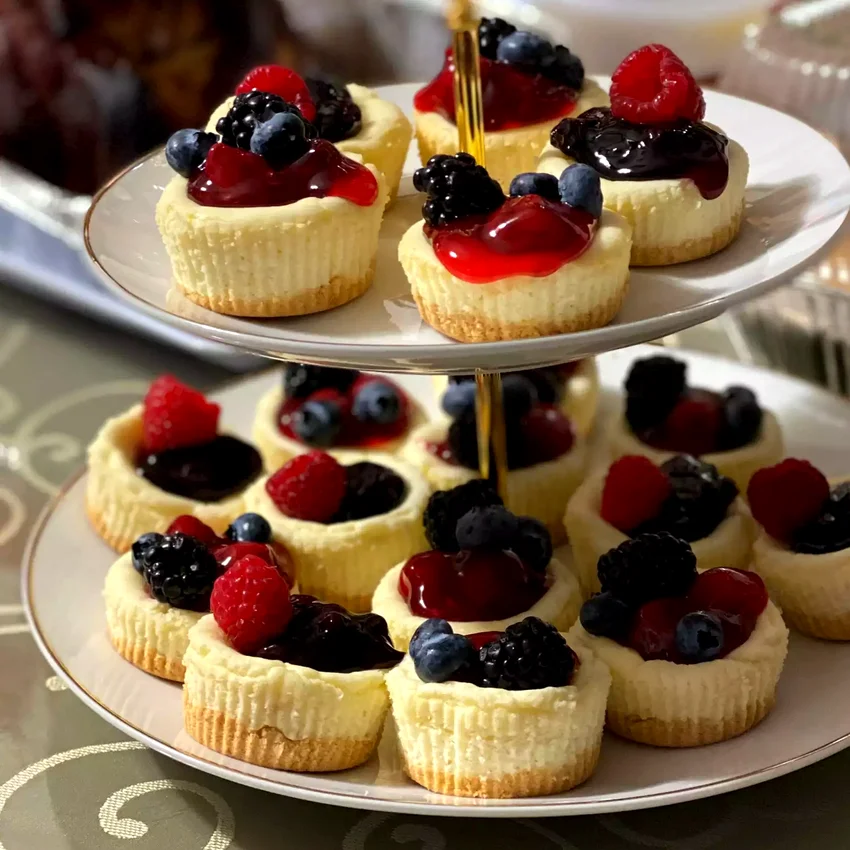
These elegant single-serving cheesecakes feature vanilla wafer crusts and creamy filling that’s easily customizable with different toppings. The individual portions make them perfect for entertaining and portion control.
Ingredients: 24 vanilla wafers, 24 oz cream cheese (softened), ¾ cup sugar, 3 large eggs, 1 tsp vanilla extract, 1 can cherry pie filling, whipped cream for garnish.
How To Make Individual Mini Cheesecakes
1. Line 24 muffin cups with paper liners and place one vanilla wafer in the bottom of each cup. The cookies create a sweet, crunchy base that eliminates the need for traditional graham cracker crust preparation.
2. Beat softened cream cheese until completely smooth and fluffy, scraping down the bowl sides frequently. Gradually add sugar, beating until light and creamy with no lumps remaining for the silkiest texture.
3. Add eggs one at a time, beating well after each addition, then mix in vanilla extract. Be careful not to overbeat once the eggs are added, as this can cause cracks during baking.
4. Divide the cheesecake mixture evenly among the prepared muffin cups, filling each about ¾ full. The batter will rise slightly during baking, so don’t overfill or they may overflow.
5. Bake at 350°F for 20-25 minutes until centers are almost set but still slightly jiggly. Cool completely, then refrigerate for at least 2 hours before topping with pie filling and whipped cream.
08. Gourmet Cream Cheese Truffles
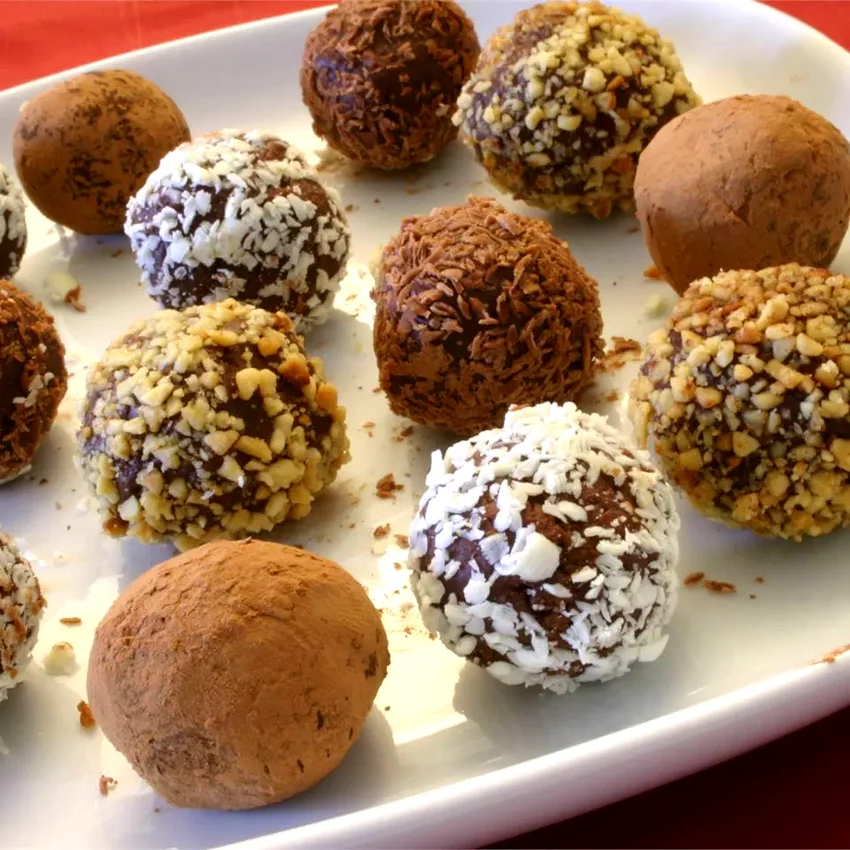
These sophisticated truffles combine rich semisweet chocolate shells with tangy cream cheese centers for an elegant treat. A small cookie scoop makes shaping effortless, and various coatings add visual appeal.
Ingredients: 8 oz cream cheese (softened), 2 cups powdered sugar, 12 oz semisweet chocolate chips, 2 tbsp coconut oil, assorted coatings (cocoa powder, chopped nuts, sprinkles, mini chocolate chips).
How To Make Gourmet Cream Cheese Truffles
1. Beat softened cream cheese until completely smooth, then gradually add powdered sugar until the mixture forms a firm, moldable consistency. Chill the mixture for 30 minutes to make it easier to handle and shape.
2. Using a small cookie scoop or teaspoon, portion the cream cheese mixture into uniform balls and place on a parchment-lined baking sheet. This ensures consistent sizing for professional-looking results.
3. Freeze the shaped truffles for 15 minutes while you prepare the chocolate coating. This brief freezing prevents the centers from melting when dipped in warm chocolate.
4. Melt chocolate chips with coconut oil in a microwave-safe bowl in 30-second intervals, stirring between each, until smooth and glossy. The coconut oil creates a thinner consistency perfect for dipping.
5. Dip each frozen truffle in melted chocolate using a fork, allowing excess to drip off. Immediately roll in your chosen coating before the chocolate sets, then refrigerate for 30 minutes until firm.
09. Perfect Chocolate Covered Strawberries
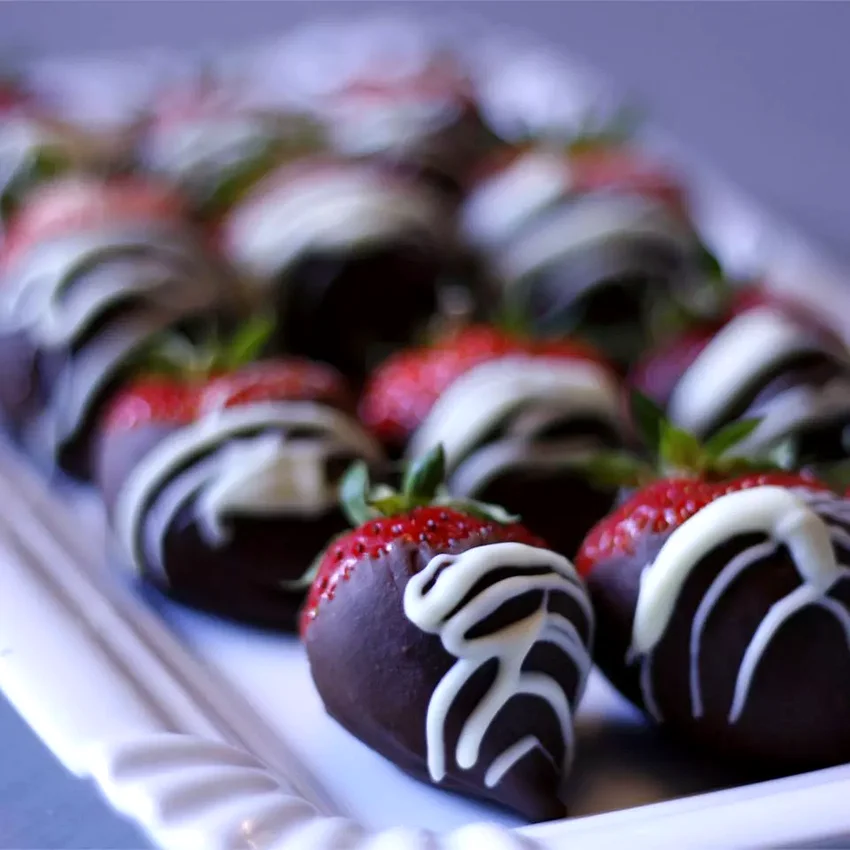
These elegant chocolate-dipped strawberries look expensive but cost a fraction of store-bought versions. The key to success lies in completely dry berries and properly tempered chocolate for a glossy finish.
Ingredients: 2 lbs fresh strawberries (with stems), 12 oz semisweet chocolate chips, 1 tbsp coconut oil, white chocolate chips for drizzling (optional).
How To Make Perfect Chocolate Covered Strawberries
1. Wash strawberries and pat completely dry with paper towels, ensuring no water remains on the surface. Even tiny droplets of moisture will cause the chocolate to seize and become grainy instead of smooth.
2. Line a baking sheet with parchment paper and set aside. Choose the largest, most perfect strawberries for the best presentation, saving any imperfect ones for eating fresh or other uses.
3. Melt chocolate chips with coconut oil in a microwave-safe bowl in 30-second intervals, stirring between each heating. Continue until the mixture is completely smooth and glossy, with no visible lumps.
4. Hold each strawberry by the stem and dip into the melted chocolate, rotating to coat evenly while leaving about ¼-inch of red showing at the top. Allow excess chocolate to drip back into the bowl.
5. Place dipped strawberries on the prepared parchment and refrigerate for 15 minutes until chocolate is set. For extra elegance, drizzle with melted white chocolate in a decorative pattern before the final chilling.
10. Bakery-Style Cinnamon Palmiers
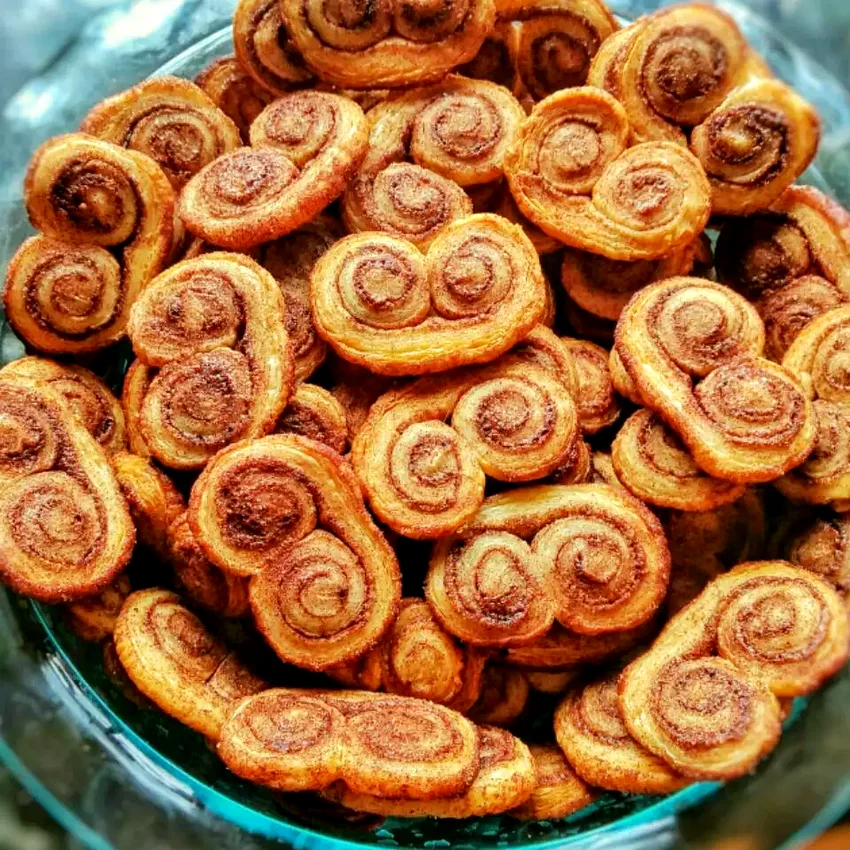
These buttery, flaky pastries shaped like palm leaves use store-bought puff pastry for effortless elegance. The cinnamon-sugar filling caramelizes during baking, creating irresistible sweet and crispy layers.
Ingredients: 2 sheets frozen puff pastry (thawed), ½ cup butter (softened), ¾ cup granulated sugar, 2 tsp ground cinnamon, ½ tsp ground cardamom, 1 egg (beaten).
How To Make Bakery-Style Cinnamon Palmiers
1. Roll each puff pastry sheet into a 12×10 rectangle on a lightly floured surface. The pastry should be even thickness throughout to ensure uniform baking and consistent palmier shapes.
2. Spread softened butter evenly over each pastry sheet, leaving a ½-inch border. Mix sugar, cinnamon, and cardamom, then sprinkle generously over the butter, pressing gently to adhere.
3. Starting from opposite long sides, tightly roll each side toward the center until the rolls meet in the middle. The double roll creates the characteristic palmier heart shape when sliced.
4. Wrap the formed logs in plastic wrap and refrigerate for 30 minutes. This chilling step makes slicing much easier and helps the pastries maintain their shape during baking.
5. Slice each log into ½-inch thick pieces and place on parchment-lined baking sheets. Brush with beaten egg and bake at 400°F for 12-15 minutes until golden brown and caramelized on both sides.
11. Easy Pineapple Upside-Down Cake
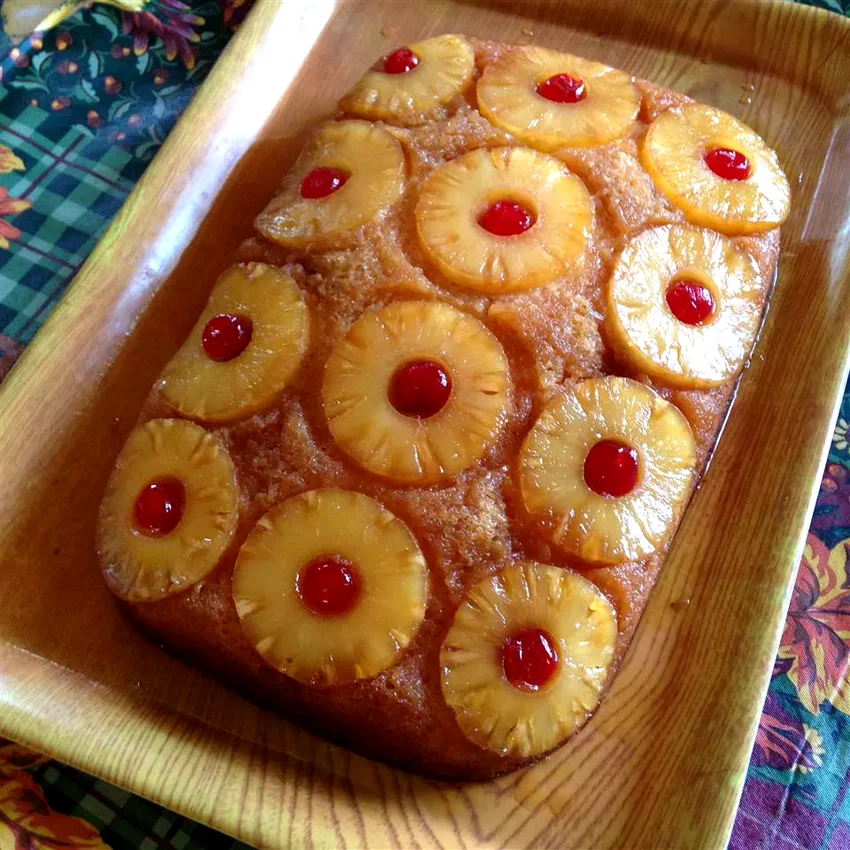
This classic crowd-pleasing cake uses convenient boxed mix and canned pineapple for foolproof results. The dramatic upside-down presentation never fails to impress, and it works in various pan sizes.
Ingredients: 1 box yellow cake mix (plus ingredients called for on box), ½ cup butter, 1 cup packed brown sugar, 1 can pineapple rings (drained), maraschino cherries, ½ cup chopped pecans (optional).
How To Make Easy Pineapple Upside-Down Cake
1. Preheat oven to 350°F and place butter in a 9×13 baking pan. Put the pan in the preheating oven just until butter melts, watching carefully to prevent burning. This creates the caramelized base.
2. Remove the pan and evenly sprinkle brown sugar over the melted butter. The sugar will dissolve and caramelize during baking, creating that signature glossy, amber-colored topping.
3. Arrange pineapple rings in a single layer over the brown sugar, placing a maraschino cherry in the center of each ring. Fill any gaps with additional cherries and pecans for a beautiful, colorful pattern.
4. Prepare cake mix according to package directions and carefully pour the batter over the fruit arrangement. Spread gently to avoid disturbing the decorative pattern underneath while ensuring even coverage.
5. Bake for 45-50 minutes until a toothpick inserted in center comes out clean. Immediately run a knife around edges, then invert onto a serving platter while still warm for the cleanest release.
12. Foolproof Crème Brûlée
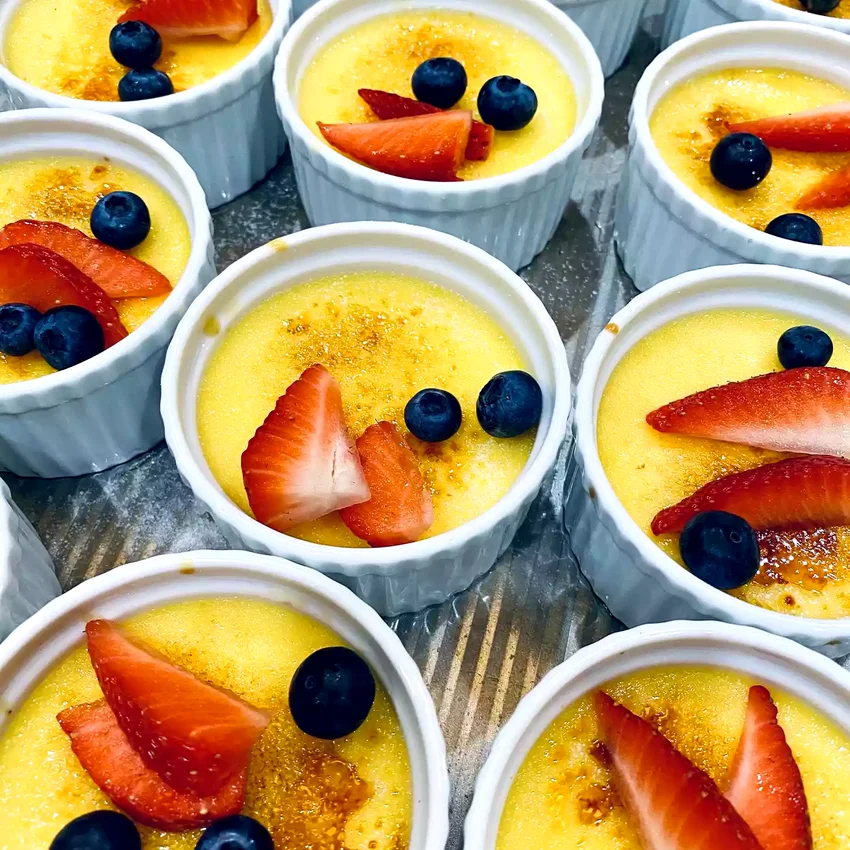
This simplified version of the classic French dessert requires no double boiling or straining, making it accessible to home cooks. The signature caramelized sugar top provides that satisfying crack when broken with a spoon.
Ingredients: 2 cups heavy cream, 5 large egg yolks, ⅓ cup granulated sugar (plus extra for topping), 1 tsp vanilla extract, pinch of salt.
How To Make Foolproof Crème Brûlée
1. Preheat oven to 325°F and place six 6-ounce ramekins in a large baking dish. Heat heavy cream in a saucepan over medium heat until it just begins to simmer, with small bubbles forming around the edges.
2. Whisk egg yolks with ⅓ cup sugar until pale and smooth. Slowly pour the hot cream into the yolk mixture while whisking constantly to prevent the eggs from scrambling and ensure a silky custard.
3. Stir in vanilla extract and salt, then divide the mixture evenly among the ramekins. Pour hot water into the baking dish until it reaches halfway up the sides of the ramekins, creating a gentle water bath.
4. Bake for 35-40 minutes until the centers are just set but still slightly jiggly when gently shaken. Remove from water bath and cool completely, then refrigerate for at least 2 hours.
5. Before serving, sprinkle 1 tablespoon sugar evenly over each custard. Use a kitchen torch to caramelize the sugar until golden brown and bubbling, creating that signature crispy top layer that defines crème brûlée.
13. Elegant Lemon Curd Tarts
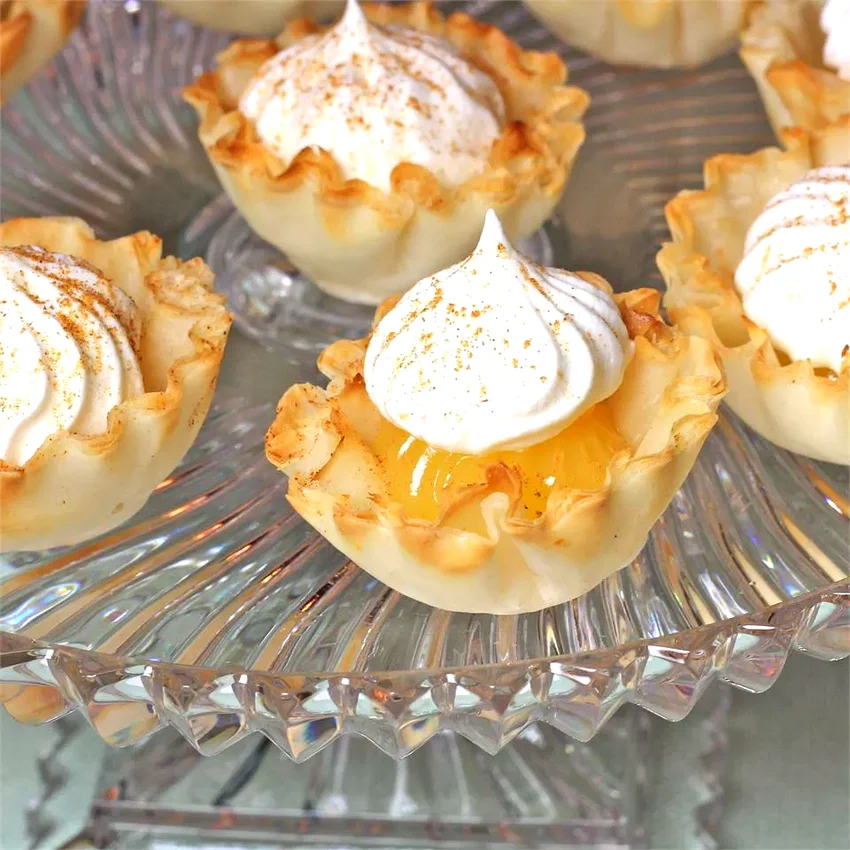
These delicate bite-sized tarts feature store-bought shells filled with tangy lemon curd for an impressive tea party presentation. The make-ahead friendly recipe allows for easy entertaining without last-minute stress.
Ingredients: 24 mini phyllo tart shells, 1 jar lemon curd, 1 cup heavy cream, 2 tbsp powdered sugar, fresh berries for garnish, ground cinnamon for dusting.
How To Make Elegant Lemon Curd Tarts
1. Arrange mini tart shells on a serving platter and inspect for any cracks that might cause filling to leak. The pre-made shells save significant time while still providing that satisfying crunch against the creamy filling.
2. If using homemade lemon curd, ensure it’s completely cooled. For store-bought, stir gently to smooth out any lumps. The curd should be thick enough to hold its shape but still easily spoonable.
3. Fill each tart shell with about 1 tablespoon of lemon curd using a small spoon or piping bag. Work efficiently but carefully to maintain the delicate shells’ integrity while creating uniform portions.
4. Whip heavy cream with powdered sugar until soft peaks form, then pipe or dollop a small amount on top of each tart. The cream adds richness and visual appeal while balancing the tart lemon flavor.
5. Garnish each tart with a fresh berry and light dusting of cinnamon. Refrigerate until ready to serve, up to 4 hours ahead. The shells will maintain their crispness for several hours when properly stored.
14. Classic Banana Pudding
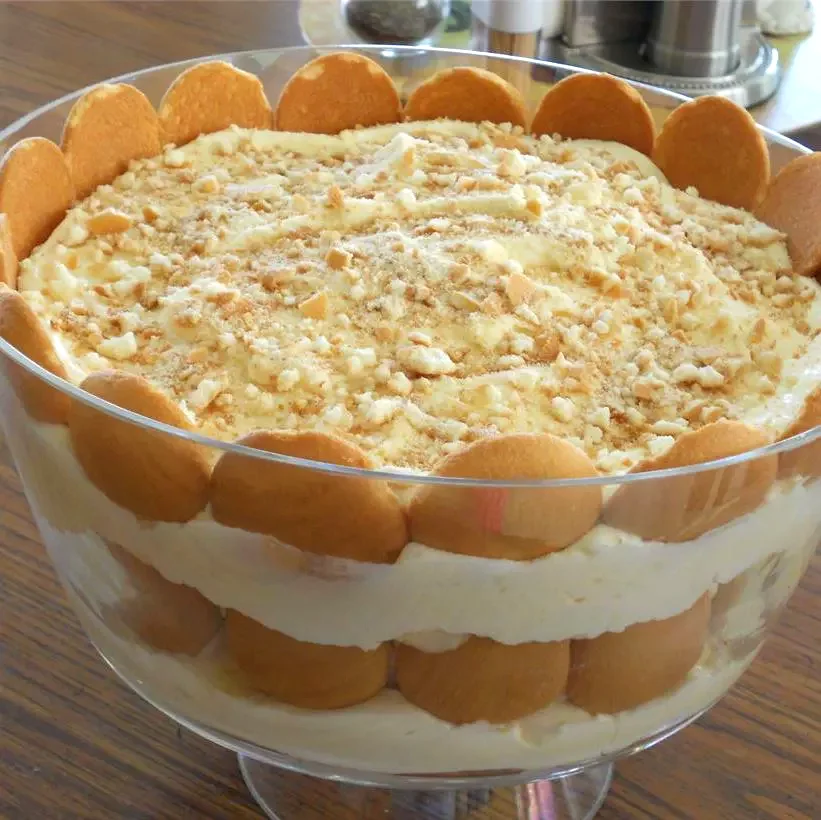
This beloved Southern dessert layers vanilla wafers, sliced bananas, and creamy pudding for comfort food perfection. Using instant pudding and store-bought cookies simplifies preparation without sacrificing the traditional flavors everyone loves.
Ingredients: 2 boxes instant vanilla pudding mix, 3 cups cold milk, 8 oz frozen whipped topping (thawed), 1 box vanilla wafers, 4-5 ripe bananas (sliced), additional whipped topping for garnish.
How To Make Classic Banana Pudding
1. Whisk pudding mix with cold milk for 2 minutes until thickened and smooth. Let stand for 5 minutes to fully set, then gently fold in half the whipped topping until just combined for a light, airy texture.
2. Line the bottom of a 9×13 dish with vanilla wafers, covering completely. The cookies will absorb moisture from the pudding and bananas, softening to cake-like consistency while maintaining some texture.
3. Slice bananas into ¼-inch rounds just before using to prevent browning. Layer half the banana slices over the wafers, covering as much surface as possible for banana flavor in every bite.
4. Spread half the pudding mixture over the bananas, then repeat with another layer of wafers, remaining bananas, and remaining pudding. Each layer builds flavor complexity and textural interest.
5. Top with remaining whipped topping and refrigerate for at least 4 hours or overnight. The resting time allows flavors to meld and wafers to soften perfectly. Garnish with additional wafers before serving for extra crunch.
15. Lemon Blueberry Pavlova
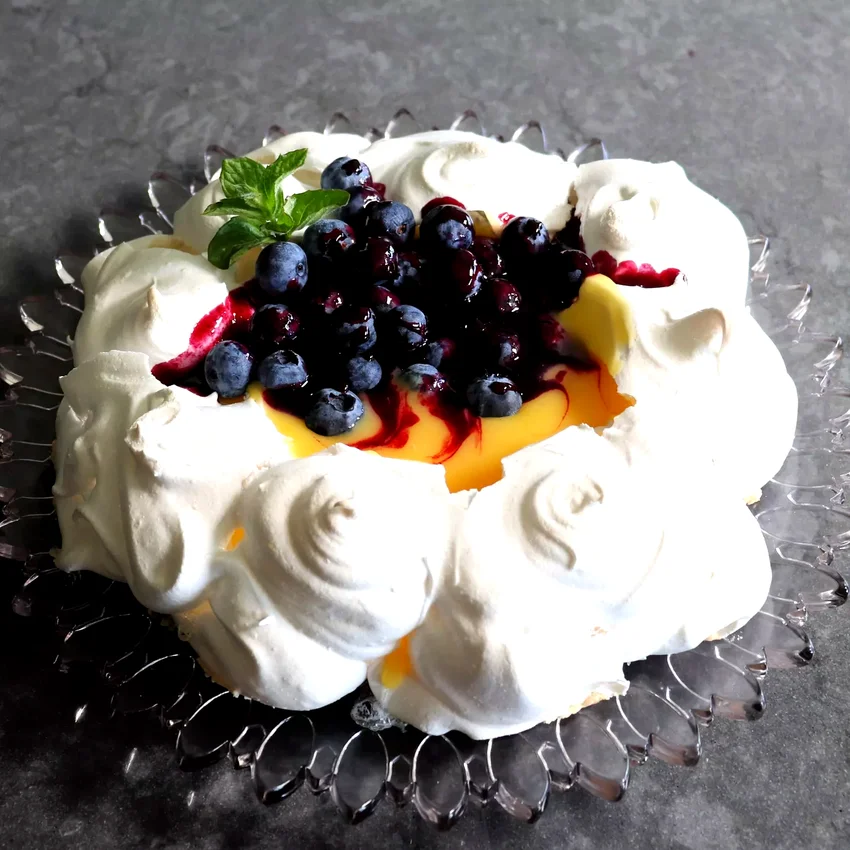
This stunning meringue-based dessert features a crispy exterior and marshmallow-soft center topped with tart lemon curd and fresh blueberries. The impressive presentation makes it perfect for special occasions despite its simple preparation.
Ingredients: 4 large egg whites (room temperature), 1 cup superfine sugar, 1 tsp vanilla extract, 1 tsp white vinegar, 1 tbsp cornstarch, 1 cup lemon curd, 2 cups fresh blueberries, 1 cup heavy cream.
How To Make Lemon Blueberry Pavlova
1. Preheat oven to 300°F and line a baking sheet with parchment paper. Draw a 9-inch circle on the parchment as a guide, then flip it over so the pencil marks don’t touch the meringue.
2. Beat egg whites until soft peaks form, then gradually add sugar one tablespoon at a time, beating well after each addition. Continue until the meringue is thick, glossy, and holds stiff peaks when the beaters are lifted.
3. Gently fold in vanilla, vinegar, and cornstarch using a large spoon. These ingredients help create the signature pavlova texture with its crispy shell and soft, marshmallow-like interior.
4. Spoon meringue onto the parchment circle, creating a shallow well in the center with slightly raised edges. Bake for 1 hour 15 minutes, then turn off oven and let cool completely inside with door ajar.
5. Just before serving, whip cream to soft peaks and spread in the pavlova center. Top with lemon curd and fresh blueberries, allowing the vibrant colors and textures to create a stunning presentation that tastes as good as it looks.
Final Thoughts
These elegant desserts prove that impressive results don’t require professional training or complicated techniques. With simple shortcuts and quality ingredients, you can create bakery-worthy treats at home.
Each recipe offers opportunities for personal touches and variations, letting you build confidence while developing your own signature dessert style for memorable occasions.