17 No-Heat Lunch Ideas That Kids Will Actually Eat
Packing school lunches can feel like a daily puzzle, especially when you want to avoid using the microwave. These cold lunch ideas solve that problem perfectly.
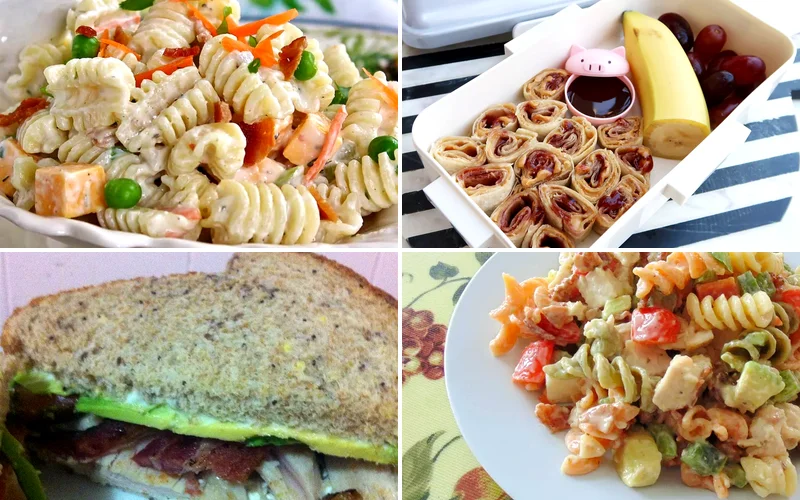
From creative wraps to fun bento boxes, these recipes will keep your kids excited about lunchtime all year long.
01. Club Style Chicken Pasta Salad
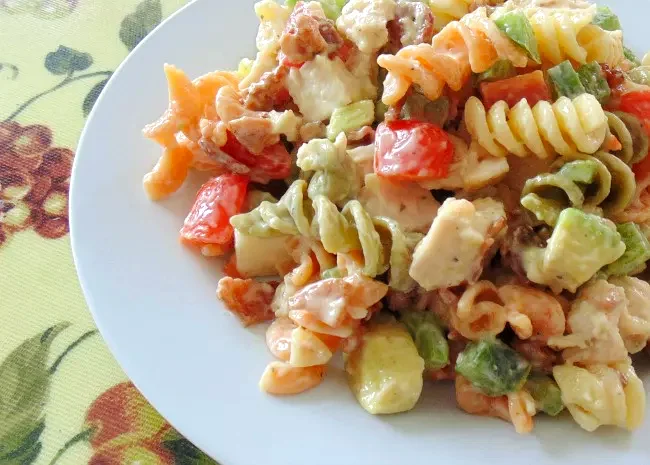
This hearty pasta salad combines all the flavors of a classic club sandwich in one bowl. It’s perfect for meal prep and tastes even better the next day.
Ingredients: 2 cups cooked rotini pasta, 1½ cups cooked chicken (diced), 6 strips bacon (cooked and crumbled), 1 cup cherry tomatoes (halved), ½ cup mayonnaise, 2 tablespoons ranch dressing, 1 cup romaine lettuce (chopped), ¼ cup red onion (thinly sliced), salt and pepper to taste.
How To Make Club Style Chicken Pasta Salad
1. Cook pasta according to package directions until al dente, then drain and rinse with cold water to stop the cooking process. Let it cool completely in a large mixing bowl while you prepare the other ingredients.
2. In a small bowl, whisk together mayonnaise and ranch dressing until smooth. This creamy base will coat everything perfectly and add that classic club sandwich flavor your kids love.
3. Add diced chicken, crumbled bacon, and halved cherry tomatoes to the cooled pasta. Toss gently to distribute evenly throughout the mixture.
4. Pour the dressing over the pasta mixture and stir until everything is well coated. Add chopped romaine and sliced red onion just before serving to keep the lettuce crisp and fresh.
02. Tomato Basil Cream Cheese Bagel
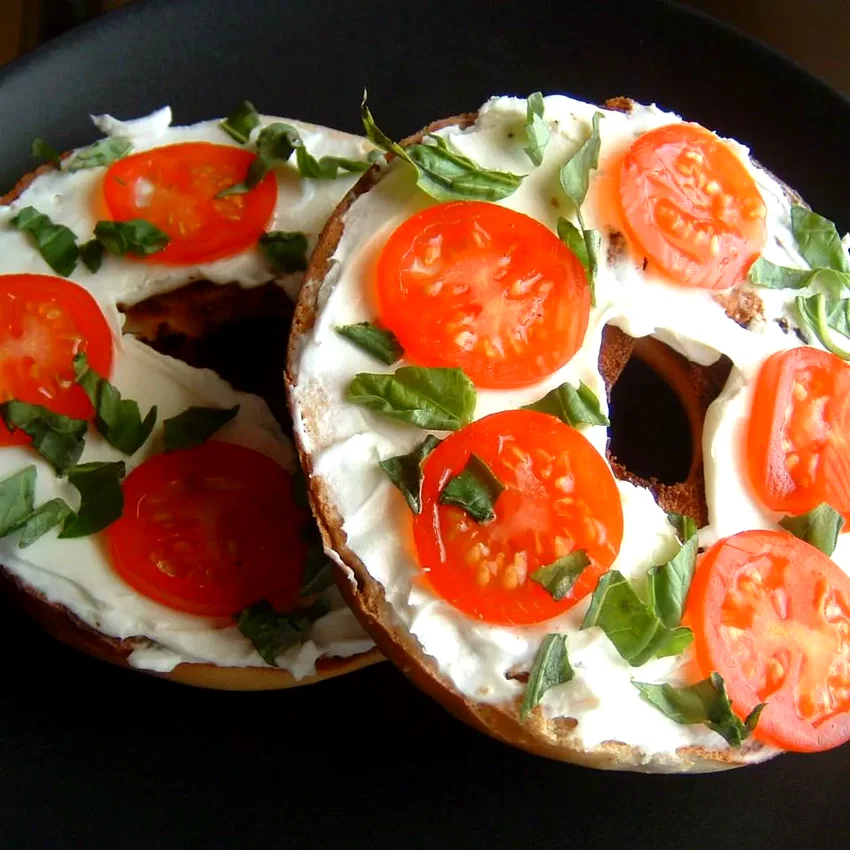
This bagel sandwich brings caprese flavors to lunchtime without any cooking required. Fresh basil makes all the difference in this simple yet delicious combination.
Ingredients: 1 everything bagel (sliced in half), 3 tablespoons cream cheese (softened), 1 large tomato (sliced), 4-5 fresh basil leaves, pinch of salt, pinch of black pepper, drizzle of olive oil.
How To Make Tomato Basil Cream Cheese Bagel
1. Spread softened cream cheese generously on both halves of the bagel, making sure to cover all the way to the edges. This creates a moisture barrier that prevents the bagel from getting soggy.
2. Layer tomato slices on the bottom half, overlapping slightly if needed. Pat the tomato slices dry with paper towels first, then sprinkle lightly with salt and pepper to enhance their natural sweetness.
3. Tear fresh basil leaves into smaller pieces and arrange them over the tomatoes. Tearing instead of cutting prevents the basil from browning and releases more of its aromatic oils.
4. Drizzle a tiny amount of olive oil over the basil, then top with the other bagel half. Wrap tightly in foil or plastic wrap to keep everything fresh until lunchtime.
03. Kid-Friendly Healthy Tuna Salad
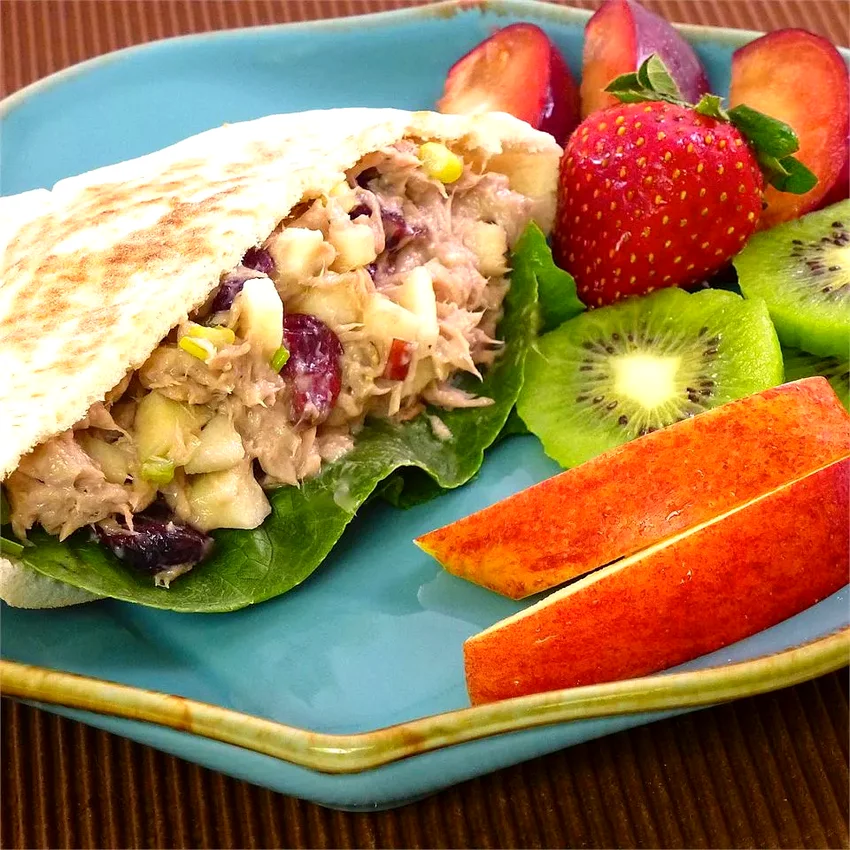
This lighter version of tuna salad uses Greek yogurt and hidden vegetables to pack in nutrition. Even picky eaters will love the creamy texture and mild flavors.
Ingredients: 2 cans tuna in water (drained), ⅓ cup plain Greek yogurt, 2 tablespoons mayonnaise, 1 tablespoon lemon juice, 1 small carrot (finely diced), 1 celery stalk (finely diced), 1 hard-boiled egg (chopped), salt and pepper to taste.
How To Make Kid-Friendly Healthy Tuna Salad
1. Drain tuna completely and flake it into small pieces in a medium bowl. Press out as much water as possible with paper towels to prevent the salad from becoming watery.
2. Mix Greek yogurt, mayonnaise, and lemon juice in a small bowl until smooth and creamy. This combination gives you the richness kids expect but with added protein and less fat than traditional recipes.
3. Dice carrot and celery very finely so they blend in seamlessly. Kids won’t even notice they’re eating vegetables when they’re cut this small, but they’ll add great crunch and nutrition.
4. Fold the dressing into the tuna, then gently stir in the diced vegetables and chopped hard-boiled egg. Season with salt and pepper to taste, then chill for at least 30 minutes before serving.
5. Serve on bread, crackers, or in a wrap. This tuna salad keeps well in the refrigerator for up to three days, making it perfect for meal prep.
04. Perfect Egg Salad Sandwich Filling

This classic egg salad recipe uses simple ingredients to create the most comforting sandwich filling. The secret is in getting the perfect creamy-to-chunky ratio that kids love.
Ingredients: 8 hard-boiled eggs (peeled), ⅓ cup mayonnaise, 1 tablespoon yellow mustard, 1 teaspoon white vinegar, ½ teaspoon salt, ¼ teaspoon black pepper, 2 tablespoons fresh chives (chopped, optional).
How To Make Perfect Egg Salad Sandwich Filling
1. Place peeled hard-boiled eggs in a large bowl and use a fork to mash them to your desired consistency. I like to leave some chunky pieces for texture, but mash them well enough that they’ll spread easily on bread.
2. Add mayonnaise, mustard, and vinegar to the mashed eggs. The vinegar adds a subtle tang that brightens the whole dish and balances the richness of the eggs and mayo.
3. Season with salt and pepper, then stir everything together until well combined. Taste and adjust seasonings as needed – some kids prefer less mustard, so start with a smaller amount and add more if desired.
4. Fold in chopped chives if using, then refrigerate for at least 30 minutes before serving. This allows all the flavors to meld together and makes the salad easier to spread on sandwiches.
05. Apple Cheddar Ham Roll-Ups

These sweet and savory roll-ups combine the classic flavors of ham and cheese with crisp apple pieces. They’re easy to eat and perfect for little hands.
Ingredients: 4 large flour tortillas, 4 ounces cream cheese (softened), 8 slices deli ham, 1 cup sharp cheddar cheese (shredded), 1 large apple (diced small), 2 tablespoons Dijon mustard, 2 tablespoons honey.
How To Make Apple Cheddar Ham Roll-Ups
1. Mix softened cream cheese with Dijon mustard and honey in a small bowl until smooth and spreadable. This sweet and tangy spread is what makes these roll-ups so special and kid-friendly.
2. Spread the cream cheese mixture evenly across each tortilla, leaving about a half-inch border around the edges. This prevents the filling from squeezing out when you roll them up.
3. Layer ham slices over the cream cheese, then sprinkle with shredded cheddar cheese. Add diced apple pieces on top, making sure they’re small enough that they won’t make rolling difficult.
4. Roll each tortilla tightly from one end to the other, then wrap individually in plastic wrap. Refrigerate for at least one hour before slicing into pinwheels with a sharp knife.
06. Simple Rotisserie Chicken Salad
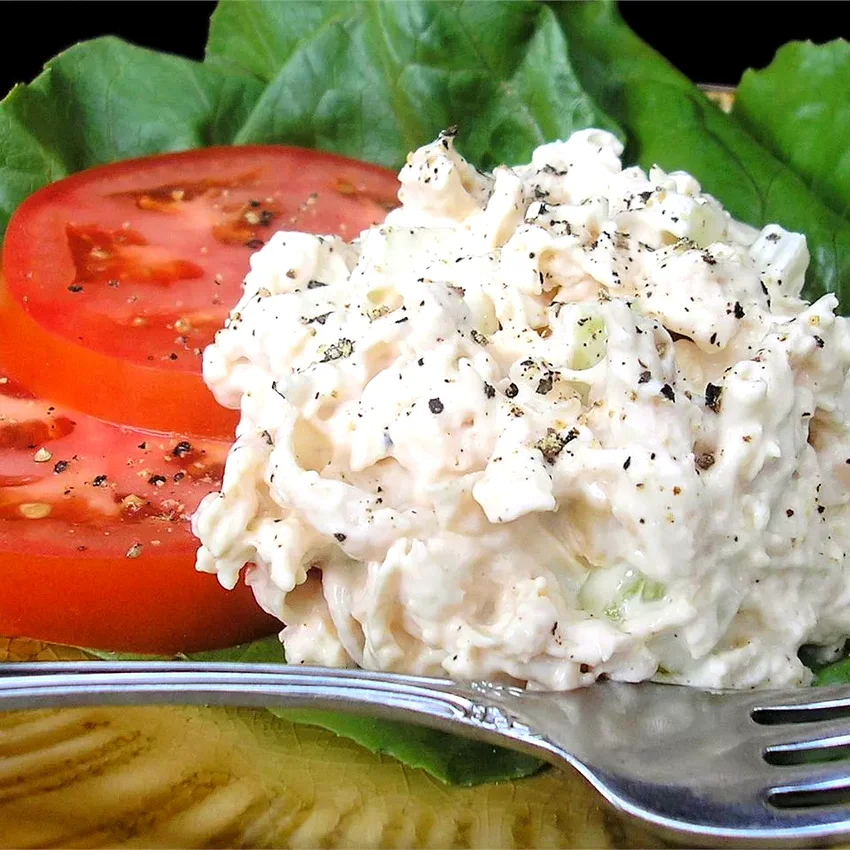
Using store-bought rotisserie chicken makes this classic chicken salad come together in minutes. It’s the perfect way to use up leftover chicken too.
Ingredients: 3 cups rotisserie chicken (shredded), ½ cup mayonnaise, 2 tablespoons lemon juice, 2 celery stalks (diced), ¼ cup red onion (finely diced), 2 tablespoons fresh parsley (chopped), salt and pepper to taste.
How To Make Simple Rotisserie Chicken Salad
1. Remove skin from rotisserie chicken and shred the meat into bite-sized pieces. I prefer using a mix of white and dark meat for the best flavor and texture combination.
2. Whisk together mayonnaise and lemon juice in a large bowl until smooth. The lemon juice not only adds flavor but also helps keep the chicken salad fresh longer.
3. Add shredded chicken to the mayo mixture and stir to coat evenly. Then fold in diced celery, red onion, and fresh parsley for crunch and color.
4. Season with salt and pepper to taste, then refrigerate for at least 30 minutes before serving. This chilling time allows the flavors to blend together perfectly.
5. Serve on bread, crackers, or lettuce cups. This chicken salad will keep in the refrigerator for up to four days, making it great for multiple lunches.
07. Triple-Layer Peanut Butter Jelly Sandwich
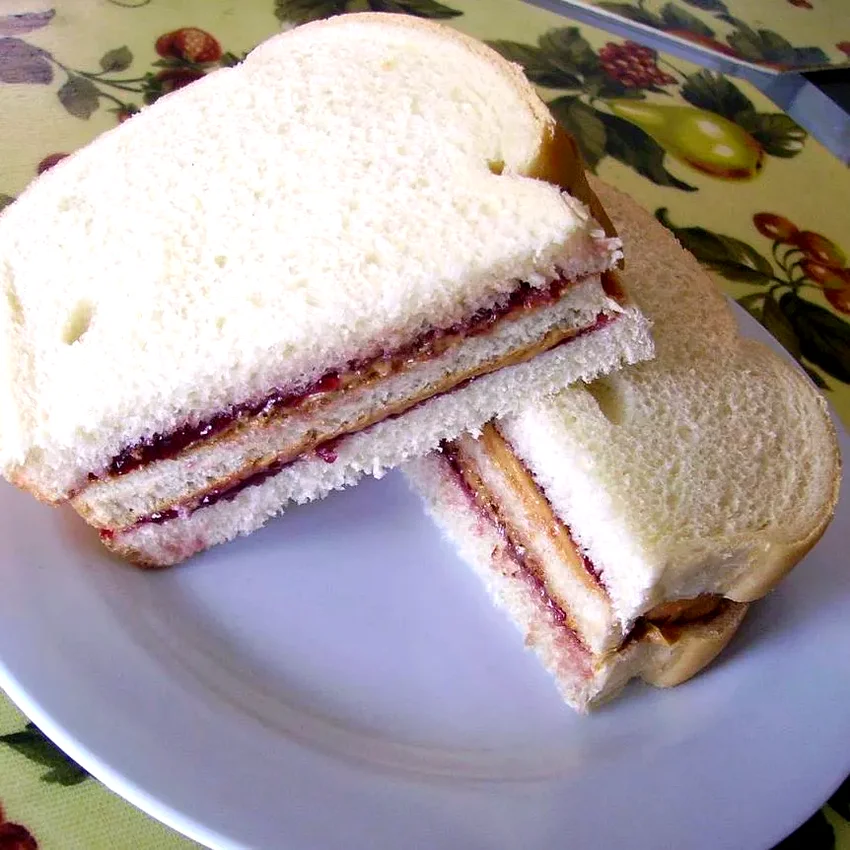
This elevated PB&J features three layers and a secret middle piece of toasted bread. It’s a fun twist that makes an ordinary sandwich feel extra special.
Ingredients: 3 slices soft white bread, 3 tablespoons peanut butter, 2 tablespoons grape jelly, 1 tablespoon strawberry jam, 1 teaspoon butter for toasting.
How To Make Triple-Layer Peanut Butter Jelly Sandwich
1. Toast the middle slice of bread until golden brown and let it cool completely. This toasted layer adds incredible texture and prevents the sandwich from getting soggy from the jelly.
2. Spread peanut butter on one side of two untoasted bread slices. Make sure to spread it all the way to the edges to create a seal that keeps the jelly from leaking out.
3. Spread grape jelly on the peanut butter of the first slice, then place the toasted bread on top. The contrast between the soft and crunchy textures makes every bite interesting.
4. Spread strawberry jam on the other side of the toasted bread, then top with the second peanut butter slice, peanut butter side down. Press gently and cut diagonally for the best presentation.
08. Ranch Bacon Parmesan Pasta Salad
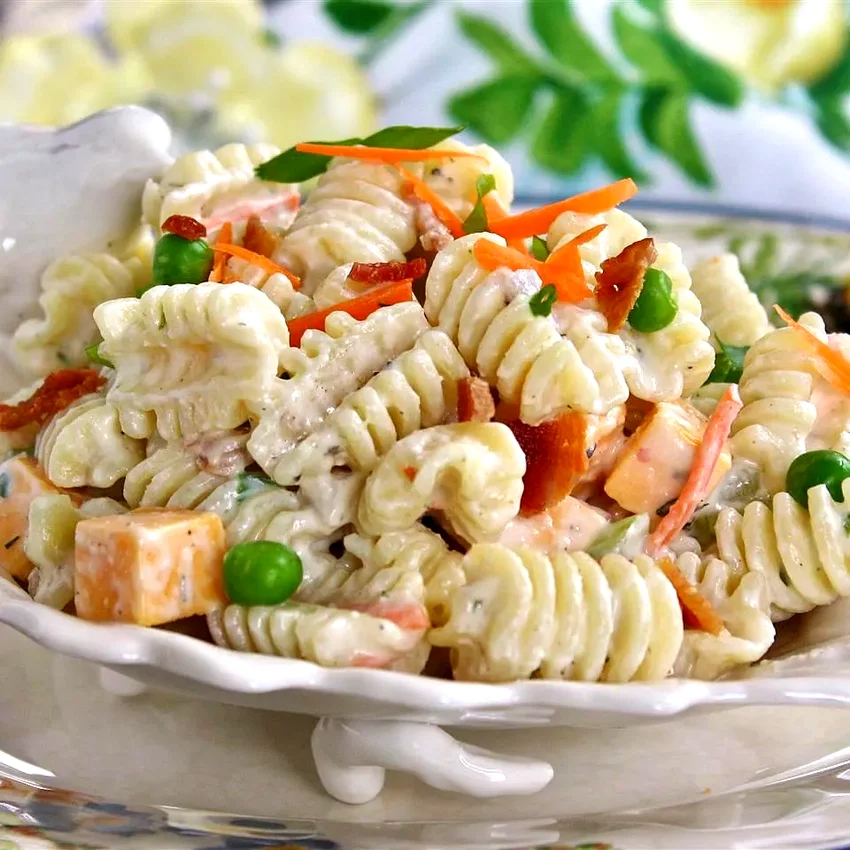
This crowd-pleasing pasta salad combines kids’ favorite flavors in one satisfying dish. The ranch dressing makes vegetables more appealing to picky eaters.
Ingredients: 3 cups cooked bowtie pasta, ¾ cup ranch dressing, 8 strips bacon (cooked and crumbled), ½ cup frozen peas (thawed), ½ cup carrots (diced), ¼ cup red onion (diced), ½ cup Parmesan cheese (grated), salt and pepper to taste.
How To Make Ranch Bacon Parmesan Pasta Salad
1. Cook pasta according to package directions until just tender, then drain and rinse with cold water until completely cooled. Slightly undercooking the pasta prevents it from becoming mushy when mixed with dressing.
2. Cook bacon until crispy, then drain on paper towels and crumble into small pieces. Save some larger pieces for garnish if you want to make the salad look extra appealing.
3. In a large bowl, toss the cooled pasta with ranch dressing until evenly coated. The pasta will absorb some of the dressing, so don’t be afraid to use the full amount.
4. Add thawed peas, diced carrots, and red onion to the pasta. These vegetables add color, crunch, and nutrition without overwhelming young palates.
5. Fold in crumbled bacon and grated Parmesan cheese just before serving. Season with salt and pepper if needed, though the bacon and cheese usually provide enough saltiness.
09. Waldorf Chicken Wrap Bento
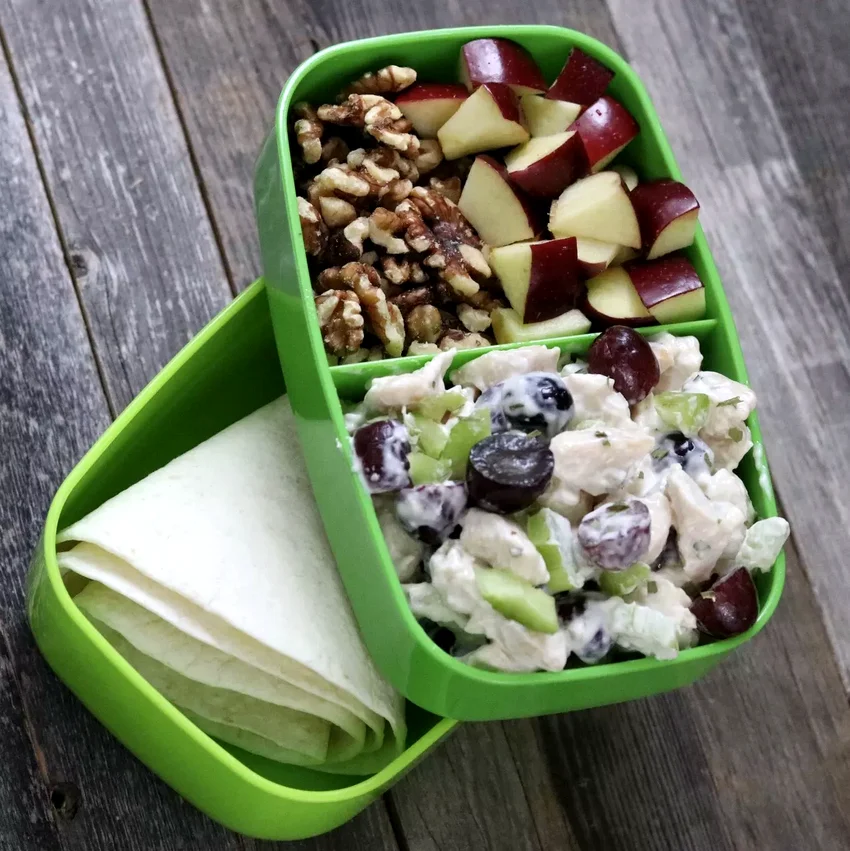
This bento-style lunch keeps the wrap components separate until eating time. The classic Waldorf flavors of apples, grapes, and walnuts make it special.
Ingredients: 1 large flour tortilla, 1 cup cooked chicken (diced), ¼ cup mayonnaise, ¼ cup red grapes (halved), ¼ cup apple (diced), 2 tablespoons walnuts (chopped), 2 tablespoons celery (diced), 1 tablespoon lemon juice, salt and pepper to taste.
How To Make Waldorf Chicken Wrap Bento
1. Toss diced apple with lemon juice immediately to prevent browning. This simple step keeps the apple pieces looking fresh and appealing throughout the day.
2. In a medium bowl, combine diced chicken with mayonnaise until well coated. The mayo acts as a binder that holds all the Waldorf ingredients together beautifully.
3. Fold in halved grapes, lemon-treated apple pieces, diced celery, and chopped walnuts. Mix gently to keep the fruit pieces intact and maintain nice texture contrast.
4. Season the chicken salad mixture with salt and pepper to taste. Pack the filling in one compartment of a bento box and the tortilla in another to prevent sogginess.
5. Include assembly instructions for your child, or pack it pre-assembled if they prefer. Either way, this protein-packed lunch will keep them satisfied all afternoon.
10. Applesauce Peanut Butter Sandwich
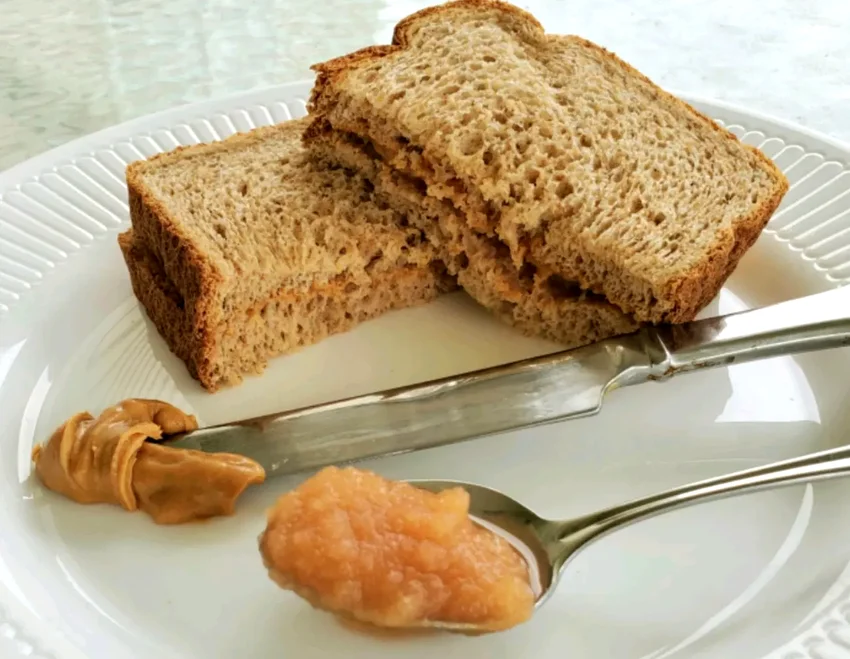
This healthier twist on the classic PB&J uses unsweetened applesauce instead of jelly. It’s naturally sweet and adds extra nutrition without any added sugar.
Ingredients: 2 slices whole wheat bread, 2 tablespoons natural peanut butter, 2 tablespoons unsweetened applesauce, pinch of cinnamon.
How To Make Applesauce Peanut Butter Sandwich
1. Spread peanut butter evenly on one slice of bread, making sure to cover all the way to the edges. Natural peanut butter works best because it has less added sugar and oil.
2. Mix applesauce with a pinch of cinnamon in a small bowl. The cinnamon adds warmth and makes the applesauce taste more like apple pie filling, which kids absolutely love.
3. Spread the cinnamon applesauce over the peanut butter layer. Don’t worry if it seems like a lot – the bread will absorb some of the moisture, and the flavors work perfectly together.
4. Top with the second slice of bread and press gently. Cut diagonally or into fun shapes with cookie cutters to make lunchtime more exciting for younger children.
11. Ham and Veggie Pita Pockets
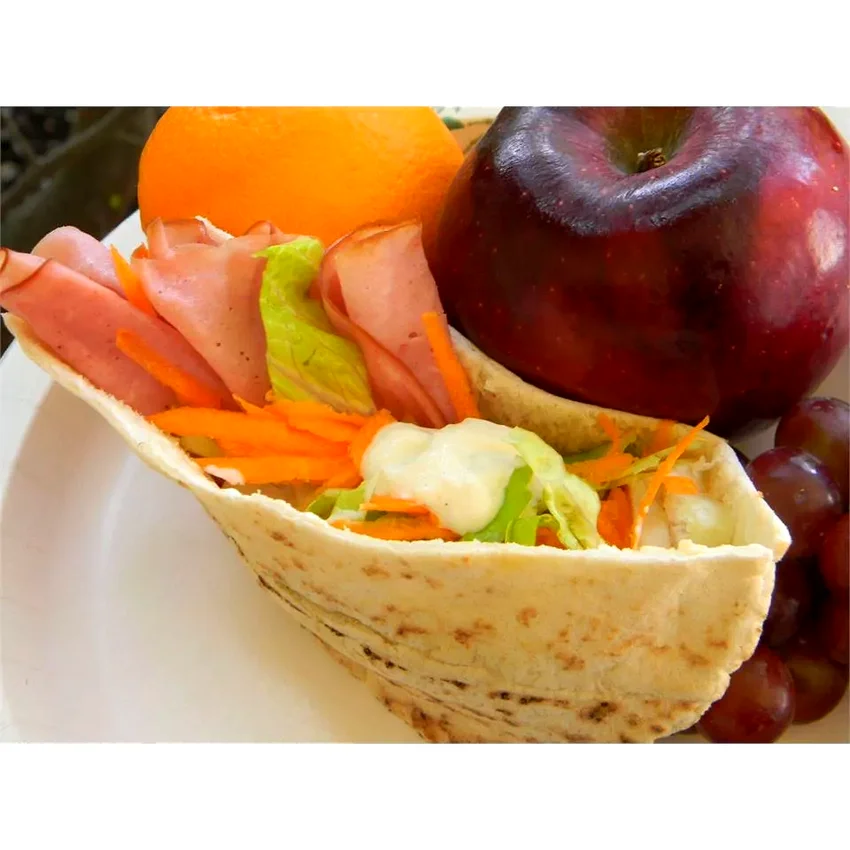
These stuffed pita pockets are like portable salads that kids can hold in their hands. The ranch dressing makes the vegetables much more appealing to young eaters.
Ingredients: 2 whole wheat pita pockets, 4 slices deli ham, 1 cup lettuce (shredded), ½ cup carrots (shredded), 3 tablespoons ranch dressing, ¼ cup cheddar cheese (shredded).
How To Make Ham and Veggie Pita Pockets
1. Cut pita pockets in half and gently open each half to create four small pockets. Be careful not to tear the bread – warming them slightly in the microwave for 10 seconds makes them more pliable.
2. Tear ham slices into smaller pieces that will fit easily inside the pita pockets. This makes the sandwiches easier for kids to bite and chew without everything falling out.
3. Mix shredded lettuce and carrots with ranch dressing in a bowl until the vegetables are lightly coated. This step ensures every bite has flavor and prevents dry vegetables.
4. Stuff each pita half with the dressed vegetables, torn ham pieces, and a sprinkle of cheddar cheese. Pack any extra filling on the side so kids can add more if they want.
12. PB&J Sushi Roll Bento
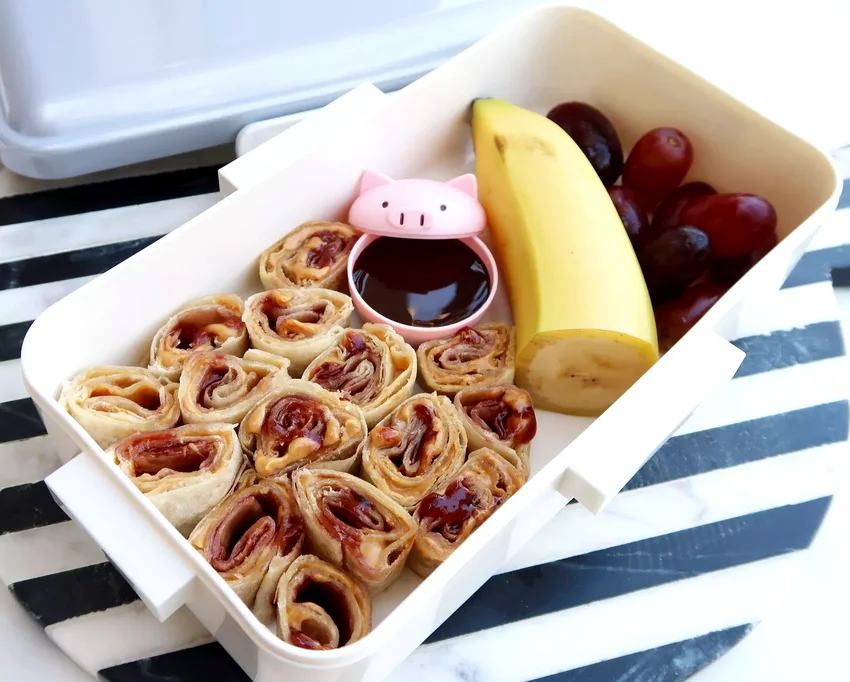
These fun “sushi” rolls are made with regular sandwich ingredients but look like something from a Japanese restaurant. Kids love the playful presentation and familiar flavors.
Ingredients: 2 slices soft white bread (crusts removed), 2 tablespoons peanut butter, 1 tablespoon grape jelly, 1 tablespoon chocolate sauce for dipping, ½ cup fresh strawberries (sliced).
How To Make PB&J Sushi Roll Bento
1. Remove crusts from bread slices and use a rolling pin to flatten each slice until it’s about ⅛ inch thick. This makes the bread pliable enough to roll without cracking or tearing.
2. Spread peanut butter thinly across each flattened bread slice, leaving about a half-inch border on one end. This border helps seal the roll when you finish rolling it up.
3. Add a thin line of jelly along one edge of each bread slice, then carefully roll the bread from the jelly end toward the plain border. The jelly acts as a colorful “filling” like in real sushi.
4. Wrap each roll tightly in plastic wrap and refrigerate for 30 minutes to help them hold their shape. Then slice each roll into 4-5 pieces using a sharp knife.
5. Arrange the “sushi” pieces in a bento box with chocolate sauce for dipping and fresh strawberry slices on the side. The presentation makes this ordinary sandwich feel like a special treat.
13. Creative Toolbox Bento Lunch
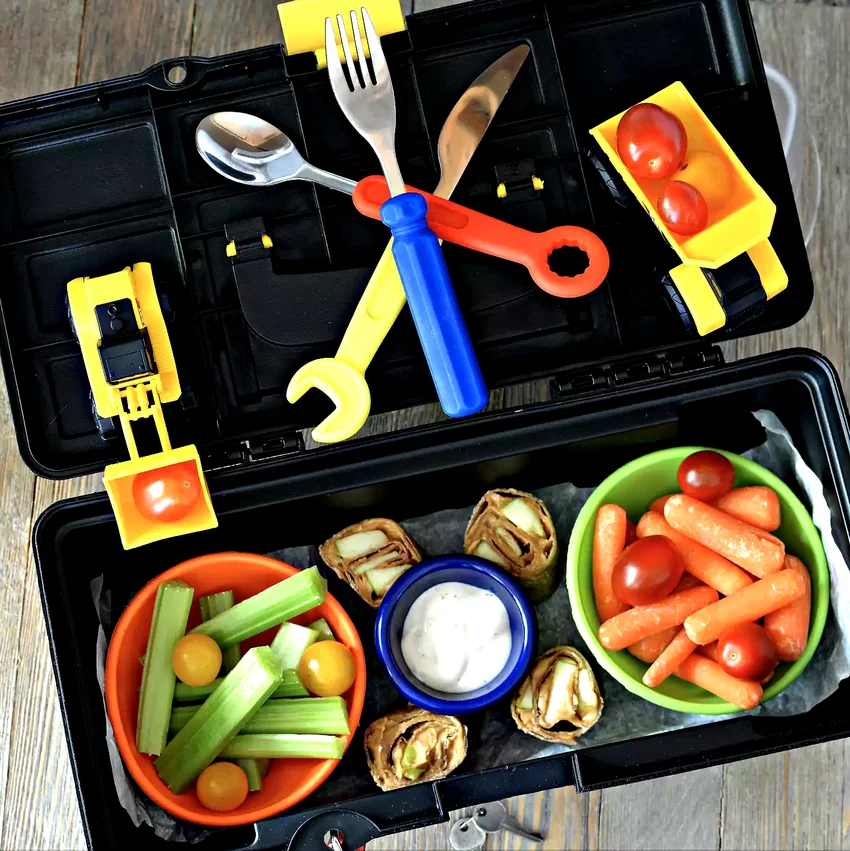
This themed bento box turns healthy foods into fun “tools” that spark imagination during lunchtime. It’s a great way to make vegetables and fruits more exciting.
Ingredients: 1 whole wheat sandwich (cut into rectangles), 6 baby carrots, 4 celery sticks, 2 tablespoons peanut butter, 8 cherry tomatoes, 6 pretzel sticks, 1 string cheese, ¼ cup ranch dressing.
How To Make Creative Toolbox Bento Lunch
1. Cut the sandwich into rectangular “wooden planks” and arrange them in one section of the bento box. These represent the wood pieces that would be in a real toolbox.
2. Use baby carrots as “screwdrivers” and celery sticks as “wrenches” in another compartment. Fill the celery with peanut butter to make them more appealing and add protein to the meal.
3. Cherry tomatoes become “nuts and bolts” while pretzel sticks work perfectly as “nails.” Arrange these small items in the smallest compartments of your bento box for the best visual effect.
4. Cut string cheese into small cubes to represent “dice” or “blocks,” and pack ranch dressing in a small container for dipping the vegetables.
5. Add a note explaining the “tool” theme to help your child get excited about eating their creative lunch. This interactive element makes healthy eating feel like playtime.
14. Classic Ants on a Log
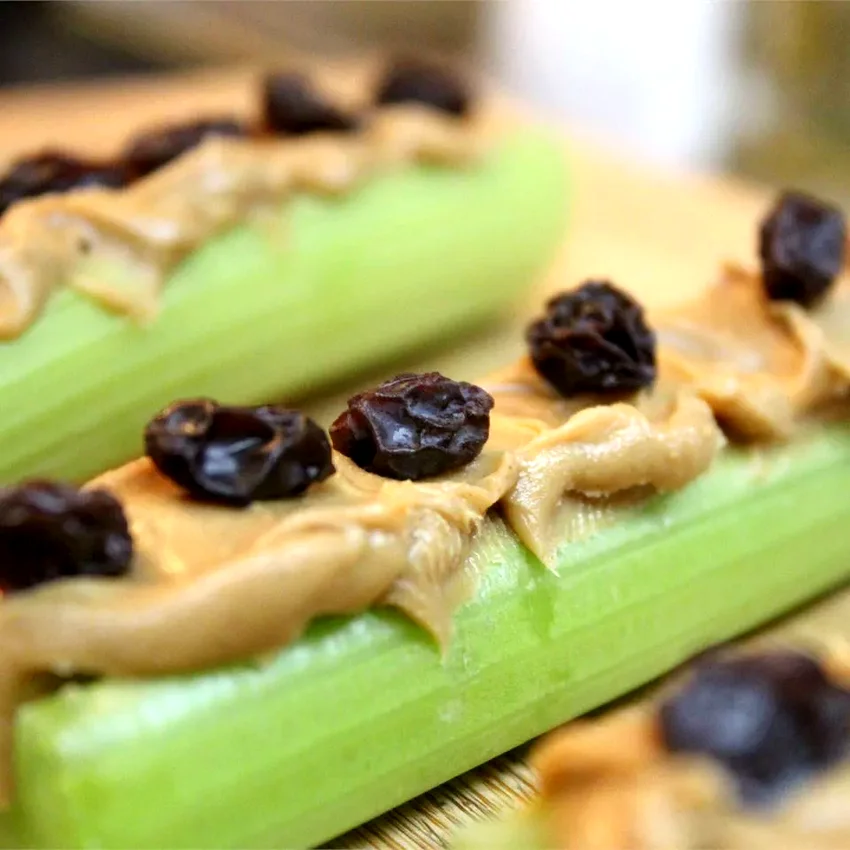
This timeless snack combines crunchy celery, creamy peanut butter, and sweet raisins in perfect harmony. It’s simple to make and provides great nutrition for growing kids.
Ingredients: 4 celery stalks, 3 tablespoons peanut butter, 2 tablespoons raisins.
How To Make Classic Ants on a Log
1. Wash celery stalks thoroughly and trim off the leafy tops and bottom ends. Cut each stalk into 3-inch pieces, creating the perfect size for little hands to hold and eat.
2. Use a butter knife to fill the natural groove of each celery piece with peanut butter. Spread it evenly and generously – the peanut butter is what makes this healthy snack appealing to kids.
3. Press raisins gently into the peanut butter, spacing them evenly along each celery stick. The raisins should look like little ants marching along their log, which is where this snack gets its fun name.
4. Arrange the finished “logs” in a lunch container with dividers to prevent them from sliding around. Pack them alongside a sandwich or wrap for a complete, balanced meal.
15. Easy BLT Wraps
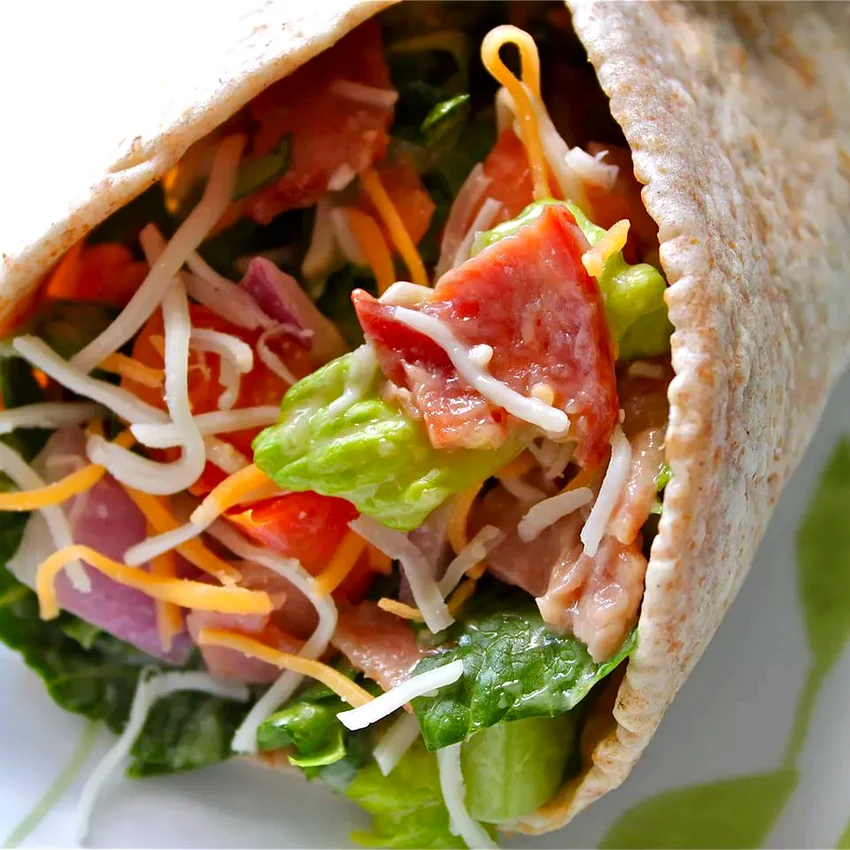
These handheld wraps capture all the flavors of a classic BLT sandwich in a more portable format. The cheese adds extra richness that kids love.
Ingredients: 2 large flour tortillas, 8 strips bacon (cooked), 1 cup iceberg lettuce (shredded), 1 large tomato (sliced), ½ cup cheddar cheese (shredded), 3 tablespoons mayonnaise.
How To Make Easy BLT Wraps
1. Cook bacon strips until crispy, then drain on paper towels to remove excess grease. Let them cool completely before using, or they’ll make the wrap soggy and difficult to roll.
2. Spread mayonnaise evenly across each tortilla, leaving about an inch border around the edges. This creates a moisture barrier and helps all the flavors stick together when rolled.
3. Layer shredded lettuce over the mayonnaise, followed by tomato slices that have been patted dry with paper towels. Removing excess moisture from tomatoes is crucial for preventing soggy wraps.
4. Add crispy bacon pieces and sprinkle with cheddar cheese, then roll each tortilla tightly from one end to the other. Secure with toothpicks if needed and slice in half diagonally.
16. Turkey Roll-Up Caprese Bento
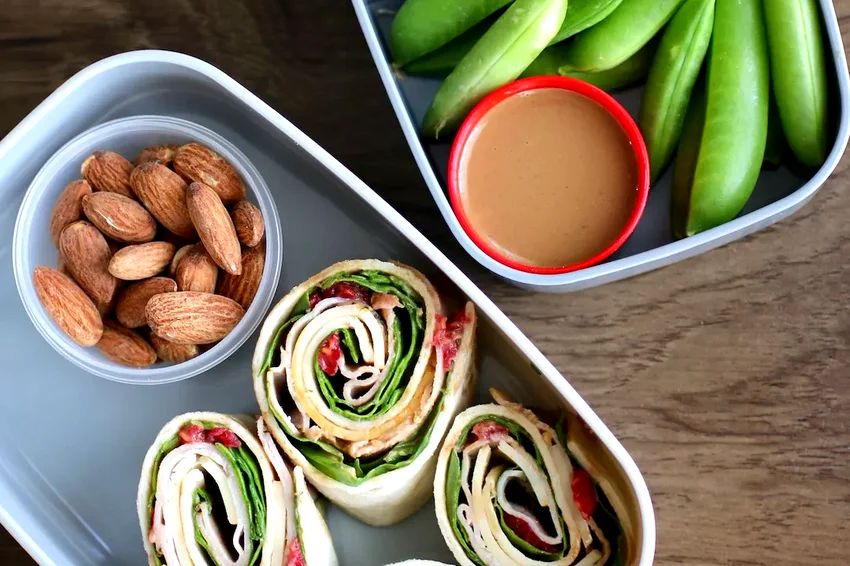
This well-rounded bento combines protein-rich turkey roll-ups with a fresh caprese salad and crunchy vegetables. It’s like having a fancy restaurant meal in a lunch box.
Ingredients: 4 slices deli turkey, 2 tablespoons cream cheese, 8 cherry tomatoes, 4 small mozzarella balls, 6 fresh basil leaves, 1 tablespoon balsamic glaze, 8 sugar snap peas, 2 tablespoons almonds (sliced).
How To Make Turkey Roll-Up Caprese Bento
1. Spread a thin layer of cream cheese on each turkey slice, then roll them up tightly. The cream cheese acts as both flavor and “glue” to keep the roll-ups from unraveling in the lunch box.
2. Arrange cherry tomatoes and mozzarella balls in one section of the bento box, alternating colors for visual appeal. Tuck fresh basil leaves between them for that classic caprese look.
3. Pack balsamic glaze in a small container so your child can drizzle it over the caprese salad just before eating. This prevents the tomatoes from getting too soggy during storage.
4. Fill remaining compartments with sugar snap peas for crunch and sliced almonds for healthy fats and protein. If there are nut allergies, substitute sunflower seeds or pumpkin seeds instead.
5. Include a small note explaining how to eat each component, or pack it all together if your child prefers everything mixed. Either way, this lunch provides balanced nutrition and exciting flavors.
17. California Club Turkey Sandwich
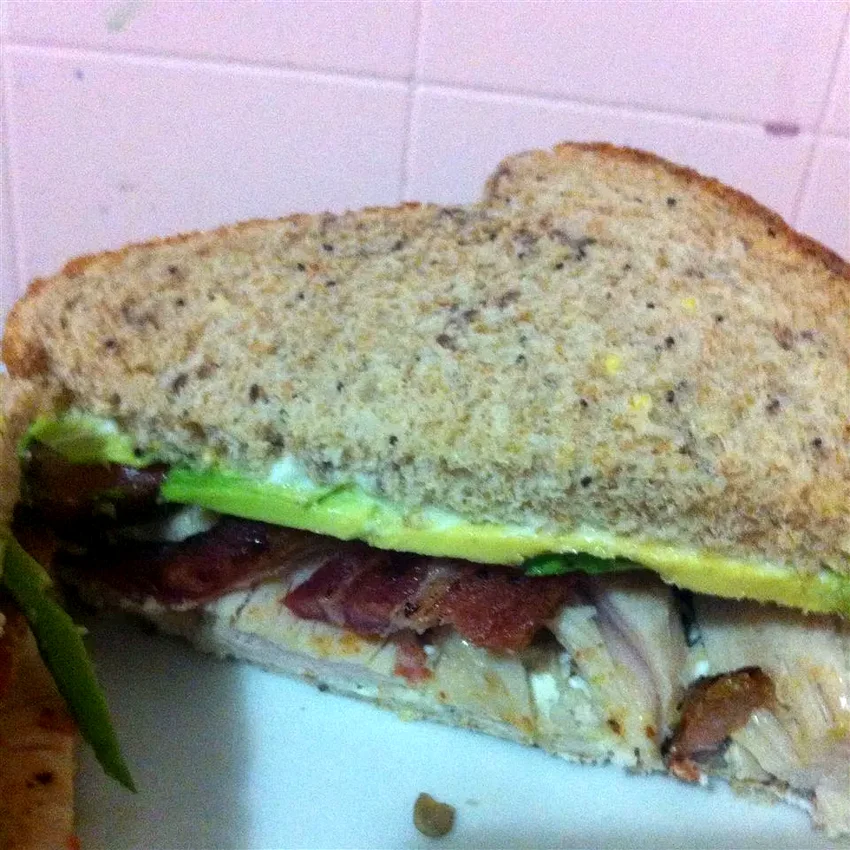
This elevated turkey sandwich includes all the fresh flavors of California cuisine. It’s endlessly customizable based on your child’s preferences and what you have available.
Ingredients: 2 slices whole grain bread, 4 ounces sliced turkey, ¼ avocado (sliced), 2 strips bacon (cooked), 2 lettuce leaves, 2 tomato slices, 1 slice cheddar cheese, 2 tablespoons mayonnaise, 1 teaspoon Dijon mustard.
How To Make California Club Turkey Sandwich
1. Toast bread lightly if desired, then spread one slice with mayonnaise and the other with Dijon mustard. The combination of both condiments adds more complex flavor than using just one.
2. Layer turkey slices on the mustard side, followed by the cheese slice. The cheese helps hold the turkey in place and adds richness that kids expect in a good sandwich.
3. Add crispy bacon, fresh lettuce leaves, and tomato slices that have been patted dry. Removing excess moisture from tomatoes prevents the bread from getting soggy before lunchtime.
4. Top with sliced avocado and press the sandwich together gently. Wrap tightly in foil or plastic wrap to keep everything fresh and prevent the avocado from browning.
5. Cut diagonally and secure each half with a toothpick if needed. Pack with a side of chips or fruit for a complete lunch that rivals any restaurant sandwich.
Final Thoughts
These cold lunch ideas prove that skipping the microwave doesn’t mean sacrificing flavor or nutrition. Each recipe offers something different to keep lunchtime interesting.
With a little creativity and preparation, you can send your kids to school with lunches they’ll actually be excited to eat.