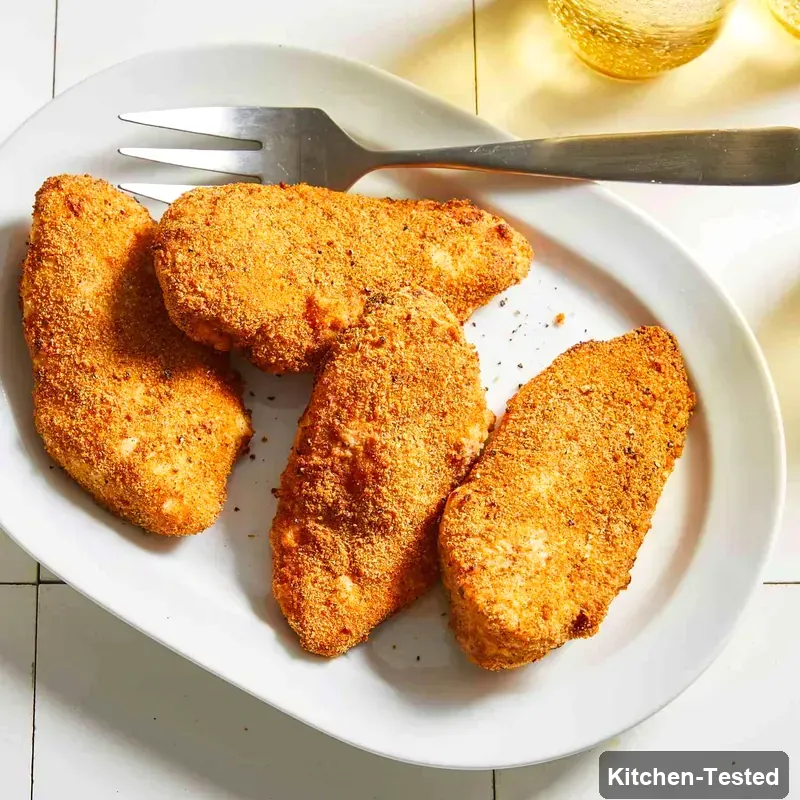
Air-Fryer Breaded Chicken Breast
Crispy, golden air-fryer breaded chicken breast is perfect for busy families who want delicious homemade meals without the fuss! This recipe gives you restaurant-quality chicken that’s juicy on the inside and perfectly crunchy on the outside. Plus, it’s ready in just 25 minutes and works for so many different eating styles.

Recipe Details
Timing & Servings: Active Time: 15 minutes, Total Time: 25 minutes, Serves: 4 people.
Nutrition Profile: Diabetes-Friendly, Nut-Free, Dairy-Free, Soy-Free, High-Protein, Egg-Free.
Nutrition Facts (per serving): 227 Calories, 7g Fat, 12g Carbs, 27g Protein.
Ingredients You’ll Need
Chicken breasts: You’ll need 4 boneless, skinless chicken breasts that are about 4 ounces each. Try to pick ones that are similar in thickness so they cook evenly!
Salt: Just 1/2 teaspoon of regular table salt helps bring out all the flavors. Don’t skip this step – it makes such a difference!
Extra-virgin olive oil: One tablespoon gives you that rich flavor and helps everything stick together perfectly.
Dijon mustard: Two teaspoons might sound fancy, but regular Dijon from the grocery store works great. This is the secret to getting the breadcrumbs to stick!
Breadcrumbs: Half a cup of whole-wheat breadcrumbs gives you the best crunch. You can totally use gluten-free breadcrumbs if you need to!
Paprika: Half a teaspoon adds that beautiful golden color and a tiny bit of smoky flavor.
Onion powder: Half a teaspoon gives you onion flavor without any chopping. So convenient!
Garlic powder: Another half teaspoon brings that savory garlic taste we all love.
Ground pepper: Half a teaspoon of regular black pepper adds just the right amount of kick.
How to Make Air-Fryer Breaded Chicken Breast

Step 1: Sprinkle salt evenly on all sides of your chicken breasts. Don’t forget the edges! Next, grab a medium bowl and whisk together the olive oil and Dijon mustard until they’re completely mixed.
Step 2: In a shallow dish, stir together the breadcrumbs, paprika, onion powder, garlic powder, and pepper. Mix it up really well so all the spices are evenly spread out.
Step 3: Dip each chicken breast in the oil mixture first, turning to coat both sides completely. Then press each piece into the breadcrumb mixture, making sure to press down so the coating really sticks.
Step 4: Place your breaded chicken breasts in the air fryer basket with at least 1/2 inch of space between each piece. This keeps them nice and crispy! Cook at 390°F for about 6 minutes until they’re golden brown.
Step 5: Gently flip each piece over and cook for another 5 to 6 minutes. You’ll know they’re done when an instant-read thermometer shows 165°F in the thickest part.
Easy and Quick Air-Fryer Breaded Chicken Breast Version
Want to make this even faster? You can use store-bought seasoned breadcrumbs instead of making your own spice mix! Just use 1/2 cup of Italian-seasoned breadcrumbs and skip the paprika, onion powder, garlic powder, and pepper. You’ll still get amazing flavor with way less measuring!
Serving Ideas
This crispy chicken makes a complete meal when you serve it over a fresh garden salad with your favorite dressing. Try it with creamy mashed potatoes and steamed green beans for a classic dinner everyone will love. You can also slice it up and put it in wraps or sandwiches for lunch the next day!
Storage
Store leftover chicken in the fridge for up to 3 days in a covered container. To reheat, pop it back in the air fryer at 350°F for 3-4 minutes to get that crispiness back. You can also reheat it in a 350°F oven for about 10 minutes.
Substitutions
No Dijon mustard? Regular yellow mustard works just fine! You can swap the olive oil for any cooking oil you have on hand. If you don’t have breadcrumbs, try crushing up some crackers or cornflakes for a fun twist. Panko breadcrumbs make things extra crispy too!
Pro Tips
• Even Cooking: Pound your chicken breasts to an even thickness (about 3/4 inch) so they cook at the same rate.
• Extra Crispy: Spray the breaded chicken lightly with cooking spray before air frying for an even crunchier coating.
• Batch Cooking: If your air fryer is small, cook in two batches rather than crowding them together.
• Temperature Check: Always use a meat thermometer to make sure your chicken reaches 165°F for food safety.
FAQs
Can I use frozen chicken breasts?
You bet! Just make sure to thaw them completely first and pat them really dry with paper towels. Frozen chicken won’t hold the coating as well and might not cook evenly.
What if I don’t have an instant-read thermometer?
Sure! You can cut into the thickest part of the chicken to check. The juices should run clear and the meat should be white all the way through with no pink spots.
Can I make this ahead of time?
You can bread the chicken up to 4 hours ahead and keep it in the fridge. Just cook it when you’re ready to eat for the best crispy results!
Why do I need to keep the chicken pieces apart in the air fryer?
Great question! The air needs to circulate around each piece to make them crispy. If they’re touching, those spots will stay soft instead of getting that perfect golden crust.
Closing
I hope you and your family love this crispy air-fryer chicken as much as mine does! It’s become our go-to weeknight dinner because it’s so quick and everyone asks for seconds. Let me know how it turns out for you – I’d love to hear about any fun variations you try!