13 Creative Christmas Cookie Decorating Ideas for the Holidays
Christmas cookie decorating brings families together during the most wonderful time of year. These festive treats create lasting memories while filling your home with delicious holiday spirit.
From adorable reindeer faces to elegant snowflakes, these creative decorating ideas will transform simple cookies into magical holiday masterpieces that everyone will love.


01. Adorable Reindeer Face Cookies
Transform basic round cookies into cute reindeer faces that kids absolutely love making. These charming treats bring Santa’s helpers right to your cookie platter.
Ingredients: 2 dozen round sugar cookies, 1 cup chocolate frosting, 1 cup vanilla frosting, 24 pretzel twists, 48 mini chocolate chips, 24 red candies, 1 tube black decorating gel.
How To Make Adorable Reindeer Face Cookies
1. Start by spreading chocolate frosting evenly across each cookie using an offset spatula, creating a smooth brown base that covers the entire surface. Let the frosting set for about 5 minutes before adding decorations.
2. Break pretzel twists in half to create antler shapes, then gently press two pieces into the top portion of each cookie. Position them at slight angles to look like natural reindeer antlers branching outward.
3. Add two mini chocolate chips for eyes, pressing them lightly into the frosting about halfway down the cookie. Place a red candy below the eyes for Rudolph’s nose, or use brown candies for regular reindeer.
4. Use black decorating gel to draw a small curved mouth below the nose, giving each reindeer a friendly smile that brings the face to life with personality.
02. Winter Snow Globe Sugar Cookies
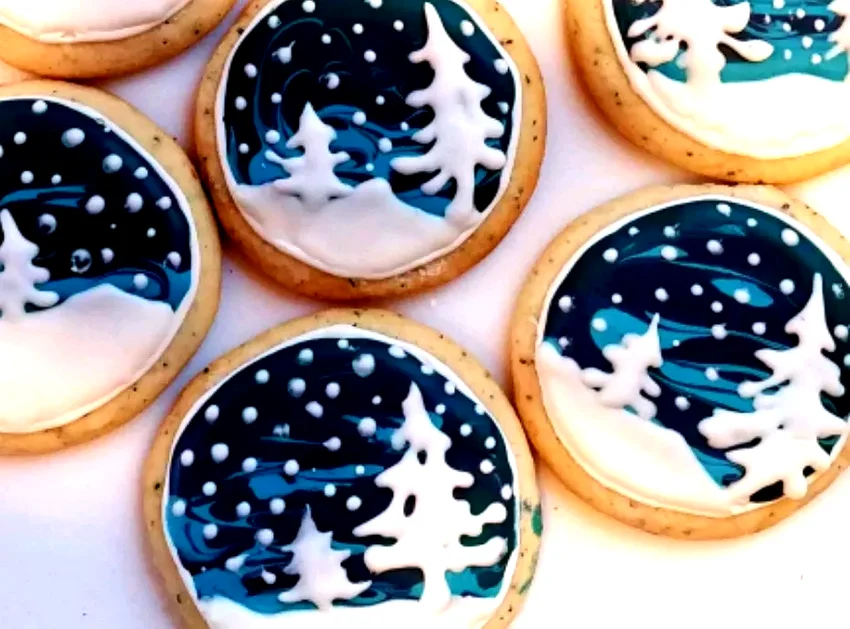
Create magical snow globe cookies using simple frosting techniques and imagination. These whimsical treats capture winter wonderland scenes in edible form.
Ingredients: 2 dozen round sugar cookies, 2 cups white royal icing, 1 cup blue royal icing, 1 cup black royal icing, white pearl sprinkles, small fondant trees, silver dragées.
How To Make Winter Snow Globe Sugar Cookies
1. Outline each cookie with white royal icing using a piping bag, creating a perfect circle border. Fill the center completely with white icing, using a toothpick to smooth any air bubbles or uneven spots.
2. While the white base is still wet, add a small dollop of blue icing in the center and gently swirl it with a toothpick to create sky effects within your snow globe scene.
3. Use black icing to pipe simple tree silhouettes or winter scenes directly onto the white background. Work quickly while the base icing is still manageable but not completely wet.
4. Immediately sprinkle white pearl sprinkles across the surface to simulate falling snow, then add silver dragées sparingly for extra sparkle.
5. Let cookies dry completely for at least 2 hours before handling to ensure the icing sets properly and maintains the snow globe effect.
03. Melting Snowman Cookie Treats
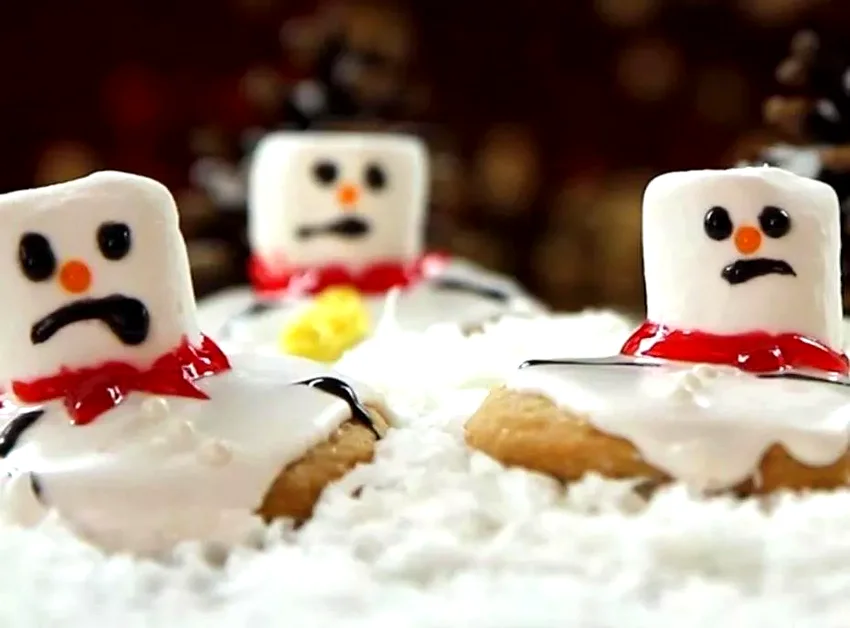
These playful melting snowman cookies embrace imperfection with their charmingly messy appearance. Perfect for kids who love silly, fun holiday treats.
Ingredients: 2 dozen oval sugar cookies, 2 cups white frosting, 1 cup orange frosting, mini chocolate chips, black decorating gel, pretzel sticks, red fruit leather strips.
How To Make Melting Snowman Cookie Treats
1. Spread white frosting generously over each cookie, intentionally making it slightly uneven and letting some drip over the edges to create that authentic melting effect that makes these cookies so charming.
2. Add two mini chocolate chips for eyes, positioning them slightly askew or at different heights to enhance the melting appearance. Don’t worry about perfect placement – wonky looks better here.
3. Create carrot noses by piping small triangular shapes with orange frosting, making some droop downward as if they’re sliding off the melting snowman’s face.
4. Use black gel to draw crooked smiles and coal buttons down the front, varying the placement on each cookie for unique melting personalities.
5. Break pretzel sticks in half and gently insert them as arms, angling them downward slightly to complete the melting snowman effect.
04. Family Pet Holiday Cookies
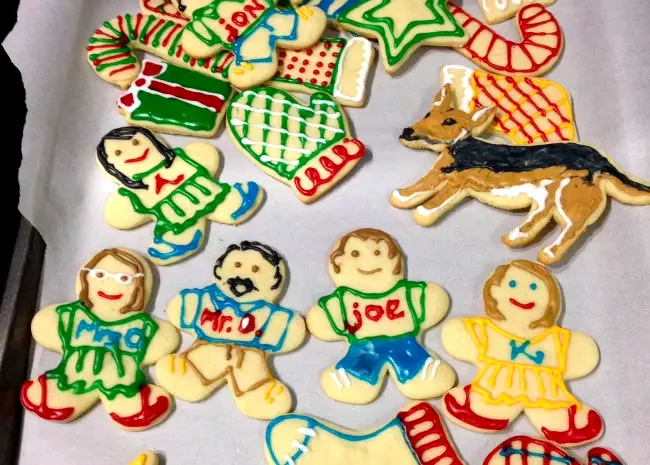
Include your furry family members in cookie form with these adorable pet-inspired treats. Dogs, cats, and other pets deserve holiday cookie recognition too.
Ingredients: 2 dozen animal-shaped sugar cookies, assorted colored royal icing, mini chocolate chips, pink candy melts, black decorating gel, various colored sprinkles.
How To Make Family Pet Holiday Cookies
1. Choose icing colors that match your pets’ fur, then flood each cookie completely with the base color using royal icing. Let this base layer dry for about 15 minutes before adding details.
2. Add distinctive markings using contrasting icing colors – spots for dalmatians, stripes for tabby cats, or patches for mixed breeds. Use a toothpick to blend colors naturally where they meet.
3. Press mini chocolate chips gently into the icing for eyes, positioning them to capture your pet’s unique expression. Add pink candy pieces for noses on dogs and cats.
4. Use black decorating gel to draw mouths, whiskers for cats, or any other distinctive features that make each cookie look like your specific pet.
5. Finish with colored sprinkles around the neck area to represent collars, choosing colors that match your pets’ actual accessories for authentic touches.
05. Gingerbread House Masterpiece Cookies
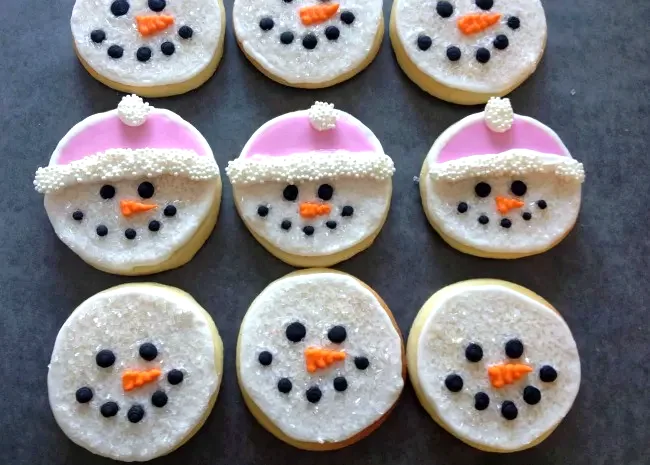
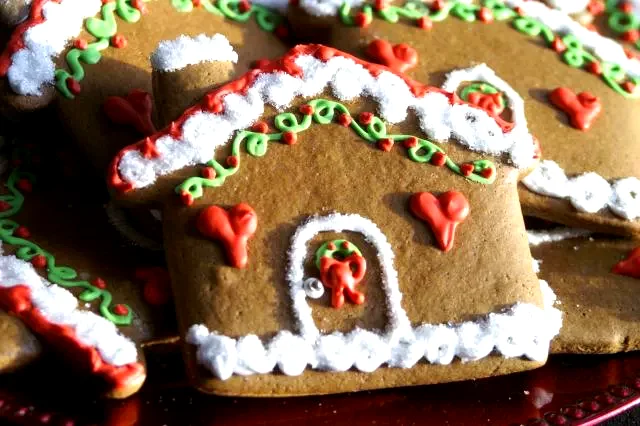
Create detailed gingerbread house cookies that capture all the charm of the full-sized version. These architectural treats make stunning holiday displays.
Ingredients: 2 dozen house-shaped gingerbread cookies, 3 cups royal icing in various colors, small candies for decoration, mini chocolate chips, coconut flakes, silver dragées.
How To Make Gingerbread House Masterpiece Cookies
1. Start by outlining the house structure with white royal icing, carefully piping along all edges including the roofline, walls, and door frame. This creates clean boundaries for your decorating sections.
2. Fill in the roof section with chocolate brown icing, then immediately drag a toothpick across in parallel lines to create realistic shingle texture before the icing sets completely.
3. Use different colored icing to fill wall sections, creating siding effects by dragging a fork gently through the wet icing in horizontal lines for wood grain texture.
4. Add architectural details like windows using small squares of yellow icing, doors with contrasting colors, and wreaths made from tiny green icing dots arranged in circles.
5. Press small candies into the wet icing to create decorative elements like door handles, window shutters, or pathway stones leading to the entrance.
6. Sprinkle coconut flakes around the base while icing is still wet to simulate snow accumulation around your gingerbread house foundation.
06. Circle-Cut Snowman Cookie Collection

Transform simple round cookies into delightful snowmen using creative stacking and decorating techniques. These prove that basic shapes create amazing results.
Ingredients: 3 dozen round cookies in various sizes, 3 cups white frosting, orange candy melts, mini chocolate chips, black decorating gel, colorful ribbon pieces, pretzel sticks.
How To Make Circle-Cut Snowman Cookie Collection
1. Arrange cookies in snowman formation on your work surface – large cookie for base, medium for middle, small for head. This helps you visualize proportions before decorating begins.
2. Cover each cookie completely with white frosting, spreading it evenly with an offset spatula. Work on one complete snowman at a time to maintain consistency in your decorating process.
3. While frosting is still wet, gently press the cookies together to create connected snowman bodies. The wet frosting acts as edible glue, securing the pieces together permanently.
4. Add facial features to the top cookie using mini chocolate chips for eyes and small triangular pieces of orange candy for carrot noses that look realistic.
5. Use black gel to pipe coal buttons down the middle cookie and draw smiling mouths on each snowman face, giving each one unique personality.
6. Insert broken pretzel stick pieces as arms and wrap tiny ribbon pieces around the neck area to create colorful scarves that add festive charm.
07. Ugly Sweater Pattern Cookies
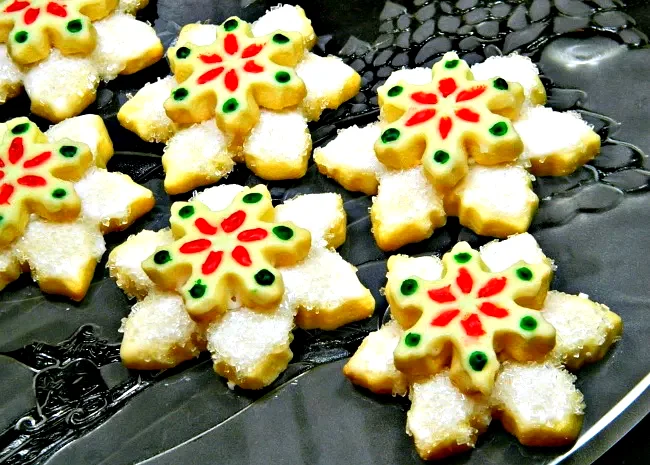
Celebrate the beloved ugly Christmas sweater tradition with cookies featuring hilariously tacky holiday patterns. These festive treats embrace delightfully gaudy design.
Ingredients: 2 dozen sweater-shaped cookies, royal icing in multiple bright colors, various holiday sprinkles, mini chocolate chips, small candy decorations, edible glitter.
How To Make Ugly Sweater Pattern Cookies
1. Choose the most garish color combination possible for your base – think bright red with green, or electric blue with gold. Flood the entire cookie with your chosen base color using royal icing.
2. While the base is still slightly wet, pipe contrasting patterns like zigzags, polka dots, or geometric shapes using different colored icing. Make them intentionally clashing and over-the-top for authentic ugliness.
3. Add holiday motifs like reindeer silhouettes, Christmas trees, or snowflakes using piped icing, making them purposefully crooked or disproportionate to enhance the tacky sweater aesthetic.
4. Press various sprinkles, mini chocolate chips, and small candies into the wet icing to create texture and additional visual chaos that mimics real ugly sweater embellishments.
5. Finish with a generous dusting of edible glitter because nothing says “ugly Christmas sweater” like excessive sparkle that catches every light in the room.
08. Layered Snowflake Stack Cookies
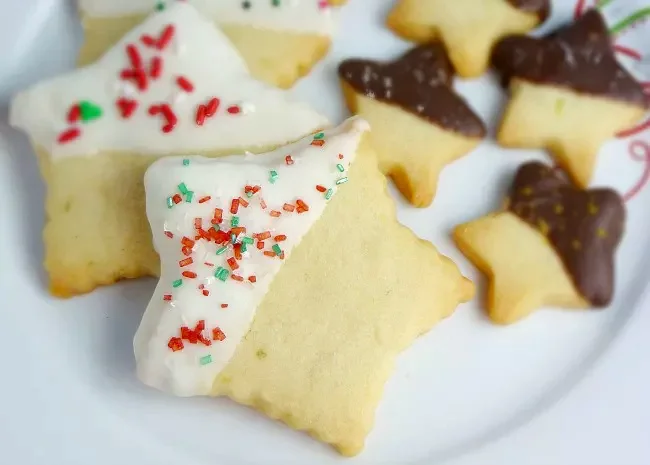
Create stunning dimensional snowflakes by layering different sized cookies with intricate icing patterns. These elegant treats showcase sophisticated decorating techniques.
Ingredients: 3 dozen snowflake cookies in three sizes, 3 cups white royal icing, 1 cup blue royal icing, silver pearl dust, white chocolate melts, edible silver spray.
How To Make Layered Snowflake Stack Cookies
1. Start with the largest snowflake cookies as your base layer. Pipe intricate patterns using white royal icing, creating detailed geometric designs that follow the natural snowflake points and curves.
2. Allow the base layer to dry completely for at least 30 minutes, then add the medium-sized snowflake on top, securing it with a small dollop of thick royal icing in the center.
3. Decorate the middle layer with complementary but different patterns, using blue icing to create contrast and depth. Focus on filling spaces that show between the layers for visual interest.
4. Attach the smallest snowflake on top using more icing, then pipe the most delicate details on this final layer, creating a focal point that draws the eye upward.
5. While all icing is still slightly damp, dust lightly with silver pearl dust and finish with a light mist of edible silver spray for magical shimmer effects.
09. Half-Dipped Star Shortbread Elegance

Achieve sophisticated simplicity by coating just half of each star cookie in glossy icing. This minimalist approach creates unexpectedly elegant holiday treats.
Ingredients: 2 dozen star-shaped shortbread cookies, 2 cups white chocolate melts, gold luster dust, 1 cup powdered sugar, 3 tablespoons milk, vanilla extract.
How To Make Half-Dipped Star Shortbread Elegance
1. Melt white chocolate in a microwave-safe bowl in 30-second intervals, stirring between each heating until completely smooth and glossy. The consistency should coat the back of a spoon evenly.
2. Hold each cookie by one point and dip exactly half of it into the melted chocolate, creating a clean diagonal line across the star shape. Let excess chocolate drip back into the bowl.
3. Place dipped cookies on parchment paper with the chocolate-covered portion facing up. Work quickly but carefully to maintain clean lines and prevent the chocolate from setting too fast.
4. While chocolate is still wet, dust the coated portion lightly with gold luster dust using a small brush, creating subtle shimmer that catches light beautifully.
5. Allow cookies to set at room temperature for 15 minutes, then refrigerate briefly to ensure the chocolate coating is completely firm and glossy before serving or packaging.
10. Winter Accessory Character Cookies
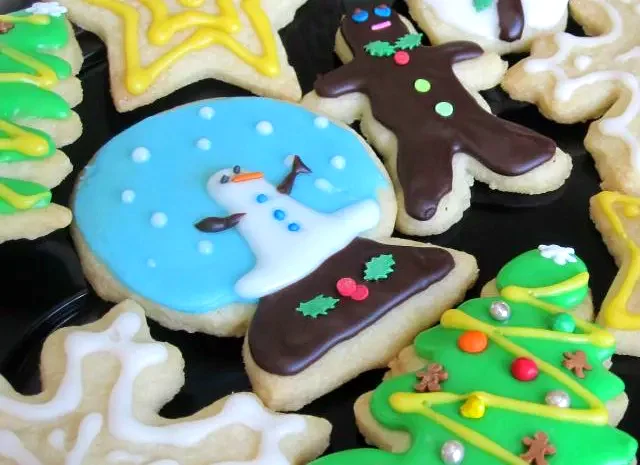
Transform basic shapes into cozy winter characters using frosted accessories like hats, scarves, and mittens. These charming details make simple cookies absolutely adorable.
Ingredients: 2 dozen various shaped cookies, assorted colored royal icing, mini marshmallows, striped candies, small chocolate chips, coconut flakes, food coloring gel.
How To Make Winter Accessory Character Cookies
1. Start by flooding your base cookies with skin-tone or white icing, depending on whether you’re making people or snowmen. Let this base layer set for about 10 minutes before adding accessories.
2. Pipe winter hats using thick royal icing in festive colors, creating realistic knit textures by dragging a toothpick through the wet icing in small horizontal lines across the hat surface.
3. Add scarves by piping long rectangular strips around the neck area, then use contrasting colors to create stripe patterns or plaid designs that look like real winter accessories.
4. Create mittens on stick figure arms using small dollops of colored icing, then add tiny details like stitching lines or snowflake patterns using thin piping techniques.
5. Top winter hats with mini marshmallows for pom-poms and sprinkle coconut flakes around the base of snowman cookies to simulate fresh snow accumulation.
6. Use small chocolate chips for buttons and facial features, pressing them gently into the wet icing while it’s still soft enough to hold decorations securely.
11. Miniature Snow Globe Tree Cookies
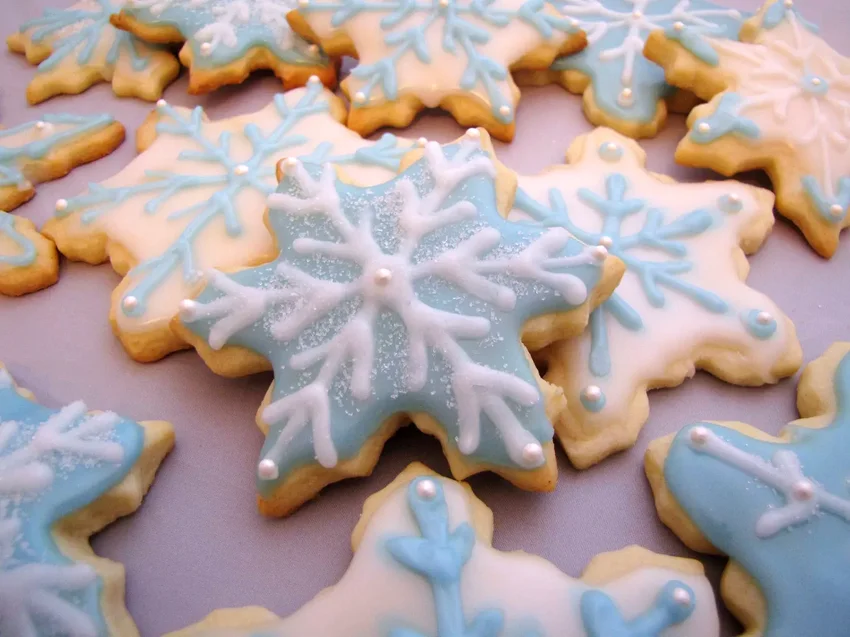
Create enchanting edible snow globes featuring tiny Christmas trees and falling snow effects. These magical cookies capture winter wonderland scenes perfectly.
Ingredients: 2 dozen round sugar cookies, 2 cups clear piping gel, green royal icing, brown royal icing, white pearl sprinkles, mini star candies, edible glitter.
How To Make Miniature Snow Globe Tree Cookies
1. Create a clear “glass” effect by spreading piping gel evenly across each cookie surface, leaving a small border around the edge to represent the snow globe base and rim.
2. While the gel is still workable, pipe small Christmas tree shapes using green royal icing, starting with a simple triangle base and adding layered branches for realistic tree texture.
3. Add tree trunks using brown royal icing, piping small rectangular shapes at the base of each tree. Make some trees different heights to create depth within your snow globe scene.
4. Immediately sprinkle white pearl sprinkles across the entire surface while all icing is still wet, creating the illusion of gently falling snow inside your magical globe.
5. Place tiny star candies on tree tops and dust lightly with edible glitter for extra sparkle that mimics light reflecting through glass and snow.
12. Pearl-Dusted Elegant Snowflakes
Transform delicate snowflake cookies into sophisticated treats using sugar pearls and strategic sprinkling techniques. These elegant cookies shine with winter beauty.
Ingredients: 2 dozen intricate snowflake cookies, 2 cups white royal icing, white sugar pearls in various sizes, white sanding sugar, pearl luster dust, clear piping gel.
How To Make Pearl-Dusted Elegant Snowflakes
1. Pipe detailed snowflake patterns using white royal icing, following the natural cut-out lines of your cookies and adding intricate geometric details that emphasize each point and curve beautifully.
2. While the icing is still wet, carefully place sugar pearls along the piped lines, varying sizes to create visual interest and depth. Focus on intersection points and outer tips for maximum impact.
3. Fill remaining spaces with smaller pearls and white sanding sugar, pressing gently into the wet icing to ensure all decorations adhere properly and won’t fall off when handled.
4. Allow cookies to dry for 20 minutes, then brush lightly with pearl luster dust using a soft paintbrush to add subtle shimmer that enhances the winter magic effect.
5. Finish with tiny dots of clear piping gel applied with a toothpick, then dust again with pearl powder for extra dimension and sparkle that catches light beautifully.
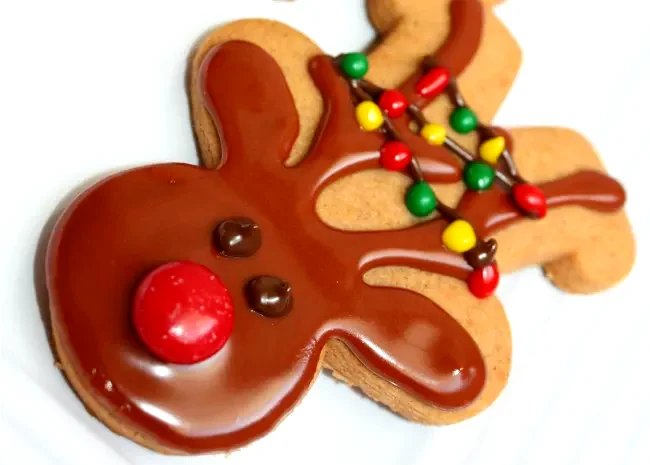
13. Upside-Down Gingerbread Reindeer
Cleverly transform traditional gingerbread men into festive reindeer by flipping them upside down and adding creative decorations. This ingenious trick creates adorable holiday characters.
Ingredients: 2 dozen gingerbread men cookies, chocolate royal icing, white royal icing, red candy pieces, mini chocolate chips, pretzel pieces, green decorating gel, small colorful candies.
How To Make Upside-Down Gingerbread Reindeer
1. Turn each gingerbread man cookie upside down so the legs become antlers and the head becomes the body. This simple flip transforms the entire cookie into a completely different character shape.
2. Cover the main body area with chocolate royal icing, spreading it evenly across what was originally the head portion of the gingerbread man. This creates the reindeer’s brown fur base.
3. Add reindeer faces on the original torso area using white icing for snouts, mini chocolate chips for eyes, and red candy pieces for noses that make each reindeer unique and charming.
4. Enhance the leg-antlers by breaking pretzel pieces and inserting them into the cookie ends, or pipe additional antler branches using chocolate icing for more elaborate horn structures.
5. Use green decorating gel to pipe tiny Christmas lights tangled in the antlers, adding small colorful candies along the green lines to represent individual bulbs on holiday light strings.
6. Finish by piping small details like hooves at the bottom and adding personality with different facial expressions using various sized candies and icing techniques.
Final Thoughts
These creative cookie decorating ideas prove that simple techniques can create absolutely magical results. Each design offers opportunities for personal creativity and family fun during the holidays.
Whether you’re making treats for parties or creating memories with loved ones, these festive cookies bring joy and delicious sweetness to every celebration.