14 Easy No-Bake Holiday Treats for Baking-Free Christmas
When holiday baking fatigue hits and your oven needs a break, these no-bake Christmas desserts come to the rescue. Each sweet treat delivers festive flavors without any baking required.
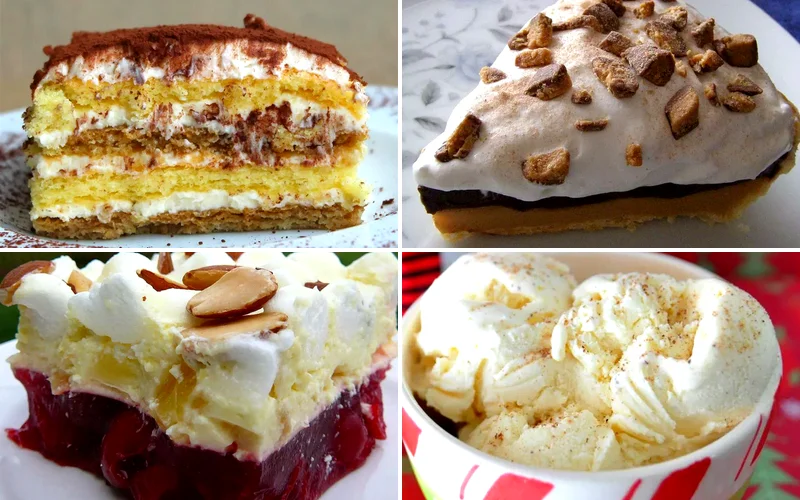
From creamy pies to chocolate delights, these simple recipes let you create impressive holiday desserts using just your refrigerator and a few mixing bowls.
01. Foolproof Peanut Butter Bars
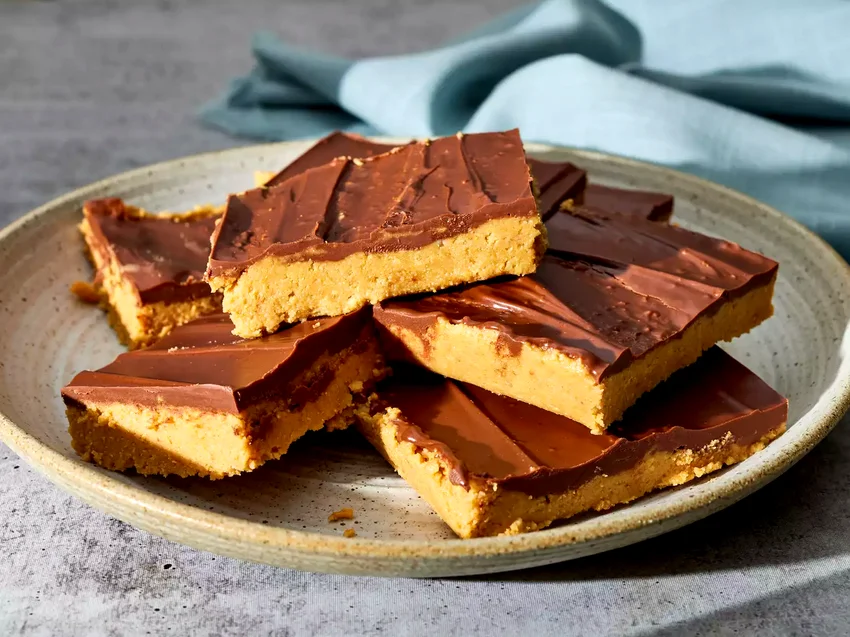
Rich peanut butter bars with a chocolate topping that taste just like your favorite candy bar. These foolproof treats require no baking skills and satisfy any sweet tooth perfectly.
Ingredients: 1 cup butter (melted), 2 cups powdered sugar, 1 cup creamy peanut butter, 1½ cups graham cracker crumbs, 1½ cups chocolate chips, ¼ cup peanut butter for topping.
How To Make Foolproof Peanut Butter Bars
1. Line a 9×13 inch pan with parchment paper, leaving overhang for easy removal. Mix melted butter, powdered sugar, 1 cup peanut butter, and graham cracker crumbs in a large bowl until well combined and mixture holds together when pressed.
2. Press peanut butter mixture firmly into prepared pan using your hands or the bottom of a measuring cup. Make sure the surface is smooth and even for the best-looking bars.
3. Melt chocolate chips and remaining ¼ cup peanut butter in microwave in 30-second intervals, stirring between each interval until smooth and glossy. Pour over peanut butter layer and spread evenly with an offset spatula.
4. Refrigerate for at least 2 hours until chocolate is completely set. Use parchment overhang to lift bars from pan, then cut into squares with a sharp knife for clean edges.
02. Toffee Tiramisu Delight
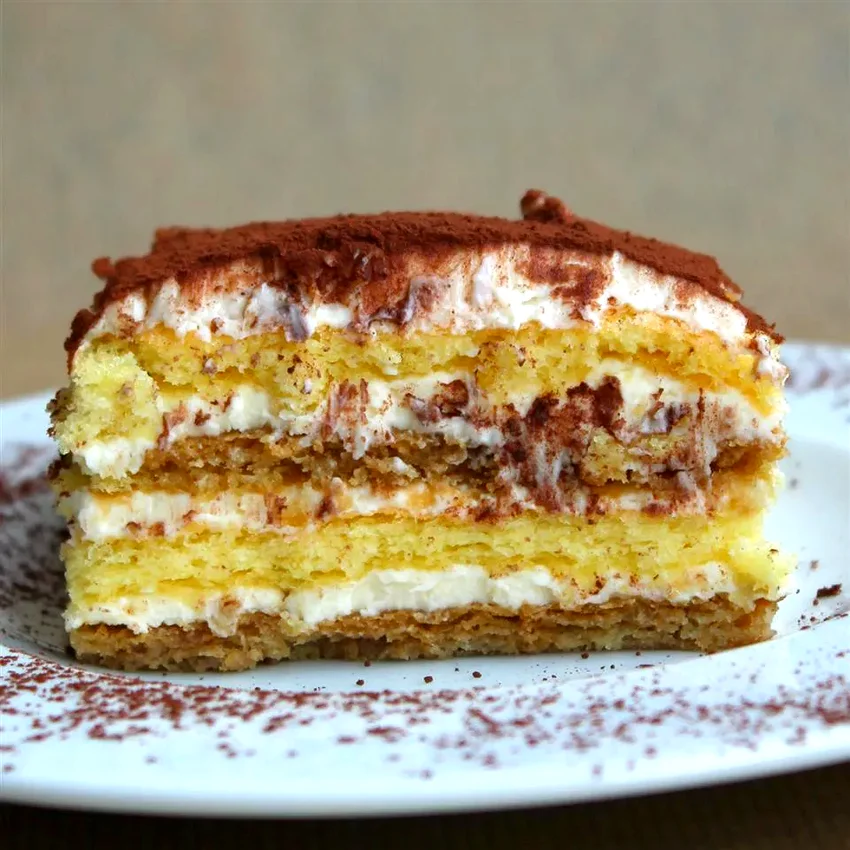
A twist on classic tiramisu featuring crunchy toffee pieces throughout. This make-ahead dessert combines coffee-soaked ladyfingers with creamy mascarpone for an elegant holiday treat.
Ingredients: 24 ladyfinger cookies, 1½ cups strong coffee (cooled), 6 egg yolks, ¾ cup sugar, 1¼ cups mascarpone cheese, 1¾ cups heavy cream, ½ cup toffee bits, cocoa powder for dusting.
How To Make Toffee Tiramisu Delight
1. Whisk egg yolks and sugar in a double boiler over simmering water for 5 minutes until thick and pale. Remove from heat and whisk in mascarpone until smooth. Let mixture cool completely to room temperature.
2. Whip heavy cream to stiff peaks in a separate bowl. Gently fold whipped cream into mascarpone mixture in three additions, being careful not to deflate the cream for maximum lightness.
3. Quickly dip each ladyfinger in cooled coffee and arrange in a single layer in a 9×13 dish. Don’t oversoak or cookies will become mushy and fall apart.
4. Spread half the mascarpone mixture over ladyfingers and sprinkle with half the toffee bits. Repeat layers, then cover and refrigerate for at least 4 hours or overnight.
5. Before serving, dust the top with cocoa powder and remaining toffee bits for a beautiful presentation that tastes as good as it looks.
03. Holiday Bourbon Balls
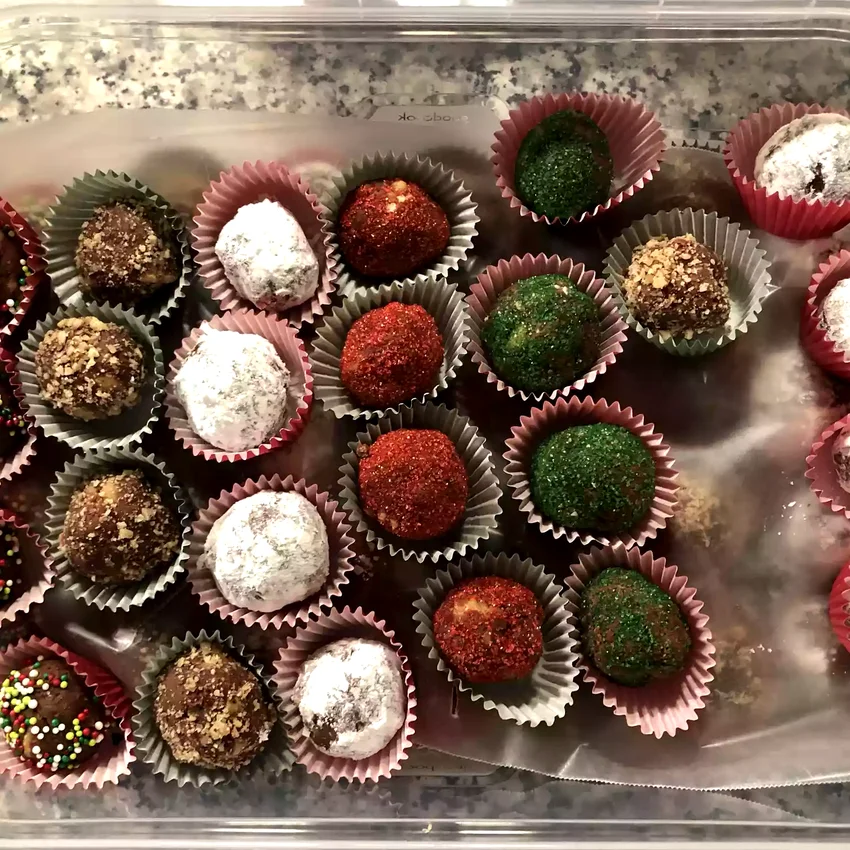
Sophisticated no-bake treats that get better with time as flavors meld together. These bourbon-spiked confections are perfect for adult holiday parties and gift-giving.
Ingredients: 3 cups vanilla wafer crumbs, 1 cup powdered sugar, 1 cup chopped pecans, 3 tablespoons cocoa powder, ¼ cup bourbon, 3 tablespoons corn syrup, additional powdered sugar for rolling.
How To Make Holiday Bourbon Balls
1. Combine vanilla wafer crumbs, 1 cup powdered sugar, chopped pecans, and cocoa powder in a large bowl. Mix thoroughly to ensure even distribution of all dry ingredients throughout the mixture.
2. Stir together bourbon and corn syrup in a small bowl, then pour over crumb mixture. Mix with your hands until mixture holds together when squeezed but isn’t too wet or sticky.
3. Roll mixture into 1-inch balls using your palms, placing them on a parchment-lined baking sheet. If mixture seems too dry, add bourbon one teaspoon at a time until it holds together properly.
4. Roll each ball in additional powdered sugar until completely coated. Store in an airtight container for up to one week, allowing flavors to develop and intensify over time for the best taste.
04. Rich Dark Chocolate Mousse
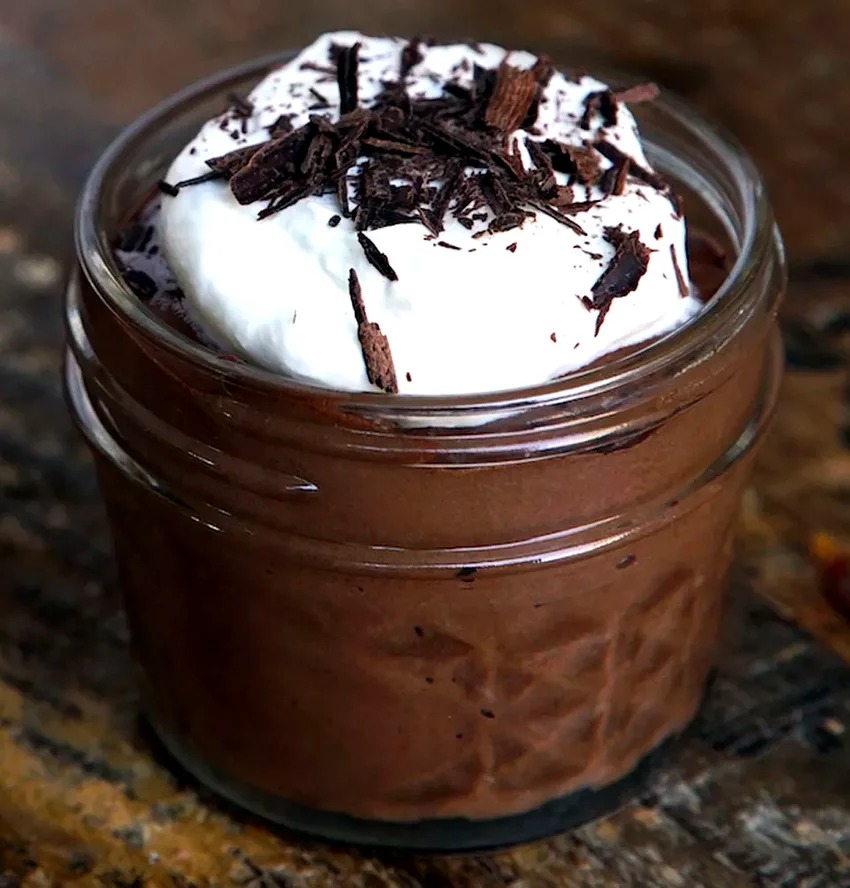
Silky smooth chocolate mousse that’s surprisingly simple to make at home. This elegant dessert works perfectly for individual servings or one impressive large presentation dish.
Ingredients: 8 ounces dark chocolate (chopped), 6 large eggs (separated), ¼ cup sugar, ½ cup heavy cream, 2 tablespoons butter, 1 teaspoon vanilla extract, pinch of salt.
How To Make Rich Dark Chocolate Mousse
1. Melt chocolate, butter, and 2 tablespoons cream in a double boiler over barely simmering water, stirring constantly until smooth and glossy. Remove from heat and whisk in vanilla, then let cool for 5 minutes.
2. Whisk egg yolks one at a time into chocolate mixture until fully incorporated. The mixture should be smooth and shiny without any streaks of egg yolk visible throughout.
3. Beat egg whites with salt until foamy, then gradually add sugar and continue beating until soft peaks form. Don’t overbeat or whites will become grainy and difficult to fold in.
4. Whip remaining cream to soft peaks in a separate bowl. Gently fold whipped cream into chocolate mixture, then fold in beaten egg whites in two additions using a light hand.
5. Divide mousse among serving glasses or pour into one large bowl. Refrigerate for at least 3 hours until set and serve chilled with a dollop of whipped cream if desired.
05. Tangy Lemon Icebox Pie
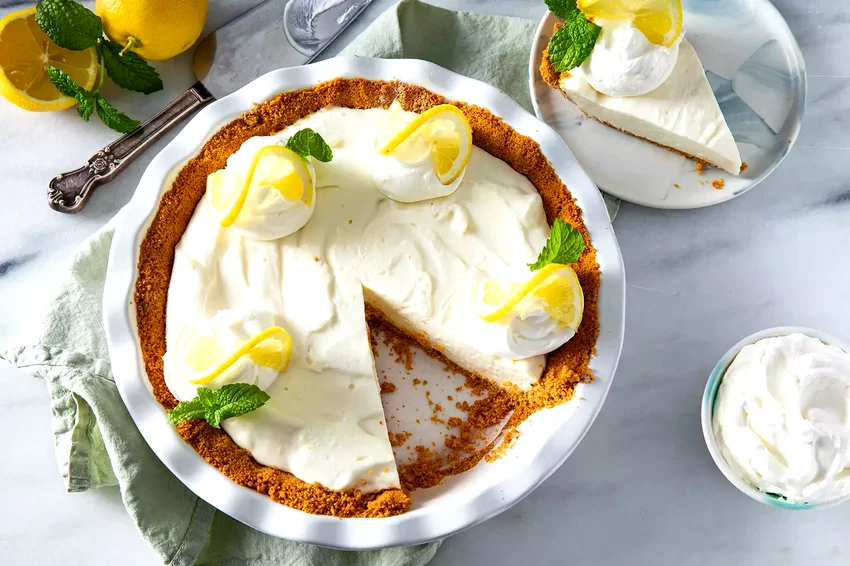
Refreshing citrus pie that balances sweet and tart flavors perfectly. This make-ahead dessert is light enough to follow any heavy meal and looks beautiful on any holiday table.
Ingredients: 1 prepared graham cracker crust, 1 can sweetened condensed milk, ½ cup fresh lemon juice, 2 tablespoons lemon zest, 3 egg yolks, 1 cup heavy cream, 2 tablespoons powdered sugar.
How To Make Tangy Lemon Icebox Pie
1. Whisk together sweetened condensed milk, lemon juice, lemon zest, and egg yolks in a medium bowl until mixture is smooth and well combined. The acid from lemon juice will help thicken the filling naturally.
2. Pour lemon mixture into graham cracker crust and smooth the top with a spatula. Cover with plastic wrap, pressing directly onto surface to prevent a skin from forming on top.
3. Refrigerate pie for at least 4 hours or overnight until filling is completely set and firm to the touch. The longer it chills, the better the texture will be when sliced.
4. Before serving, whip heavy cream with powdered sugar until soft peaks form. Spread or pipe whipped cream over pie and garnish with additional lemon zest for a beautiful finishing touch.
06. Creamy Eggnog Ice Cream
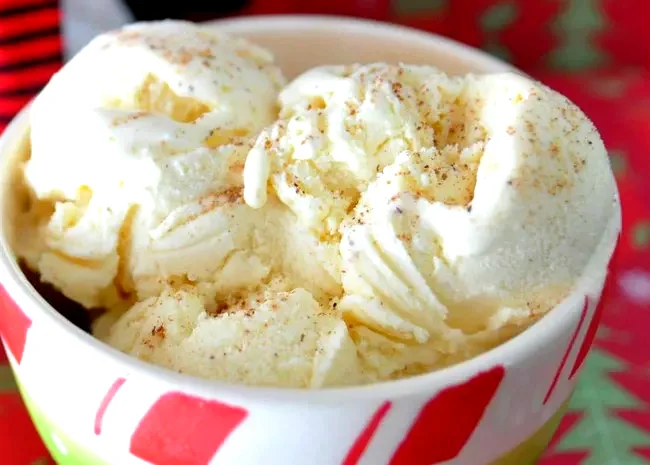
Homemade eggnog ice cream that’s incredibly rich and smooth. This festive frozen treat captures all the classic holiday spice flavors in a perfectly scoopable dessert.
Ingredients: 2 cups heavy cream, 1 cup whole milk, ¾ cup sugar, 6 egg yolks, ½ teaspoon vanilla extract, ¼ teaspoon nutmeg, ¼ teaspoon cinnamon, 3 tablespoons rum or bourbon (optional).
How To Make Creamy Eggnog Ice Cream
1. Heat cream, milk, and half the sugar in a heavy saucepan over medium heat until mixture just begins to simmer around the edges. Don’t let it boil or the mixture will curdle.
2. Whisk egg yolks with remaining sugar in a bowl until pale and thick. Slowly pour hot cream mixture into yolks while whisking constantly to prevent eggs from scrambling.
3. Return mixture to saucepan and cook over low heat, stirring constantly with a wooden spoon until mixture coats the back of the spoon and reaches 170°F on a thermometer.
4. Strain custard through a fine mesh sieve into a clean bowl, then stir in vanilla, nutmeg, cinnamon, and rum if using. Cover and refrigerate until completely cold, at least 4 hours.
5. Churn in an ice cream maker according to manufacturer’s instructions until thick and creamy. Transfer to an airtight container and freeze until firm, about 4 hours before serving.
07. Festive Cranberry Fluff Salad
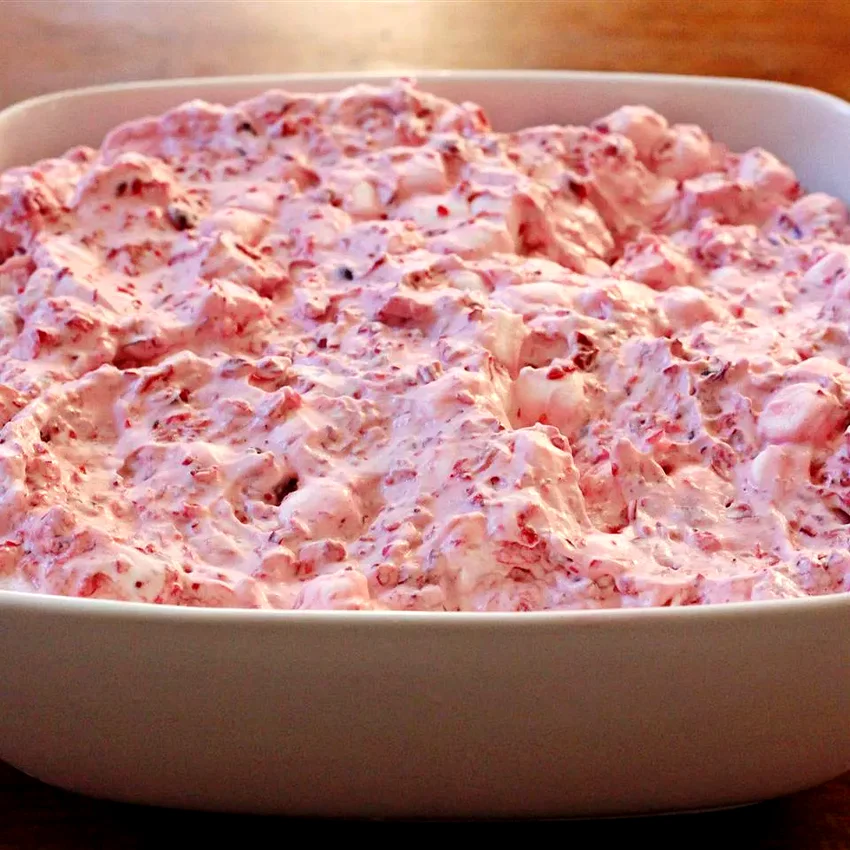
Pretty pink cranberry dessert that’s both sweet and refreshing. This fluffy treat combines tart cranberries with creamy ingredients for a perfect holiday side dish or light dessert.
Ingredients: 1 bag fresh cranberries (12 oz), 3 cups mini marshmallows, ¾ cup sugar, 2 cups diced apples, ½ cup chopped walnuts, 1 cup heavy cream, ¼ cup powdered sugar.
How To Make Festive Cranberry Fluff Salad
1. Pulse fresh cranberries in a food processor until coarsely chopped but not pureed. You want small pieces that still have some texture for the best bite in the finished salad.
2. Combine chopped cranberries with sugar in a large bowl and let stand for 15 minutes to allow cranberries to release their juices and sugar to dissolve slightly, creating a light syrup.
3. Add mini marshmallows, diced apples, and chopped walnuts to cranberry mixture. Toss gently to combine all ingredients evenly without breaking up the marshmallows too much.
4. Whip heavy cream with powdered sugar until soft peaks form. Fold whipped cream into cranberry mixture using a gentle motion to maintain the light, fluffy texture throughout.
5. Cover and refrigerate for at least 2 hours before serving to allow flavors to meld and marshmallows to soften slightly for the perfect creamy consistency.
08. No-Bake Cannoli Cream Pie
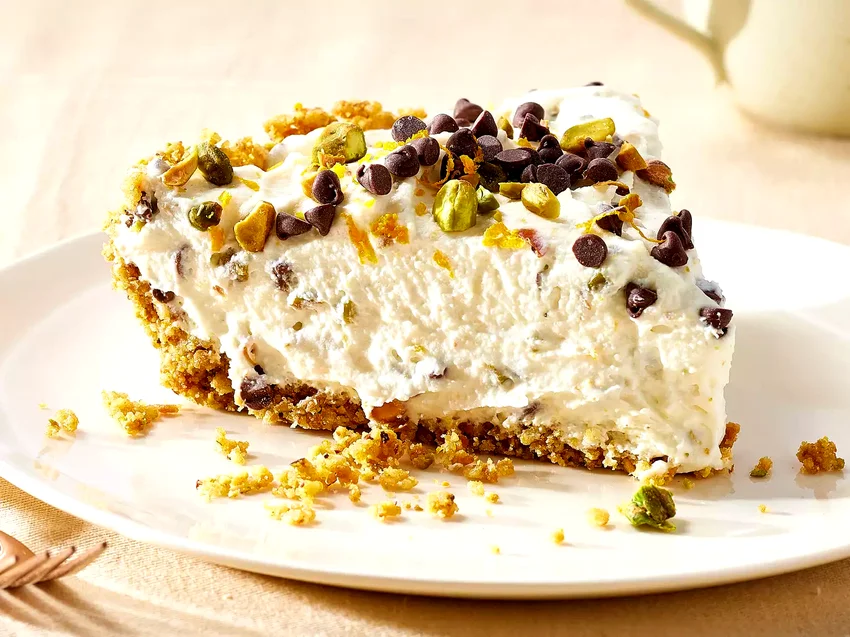
All the flavors of classic cannoli in an easy no-bake pie form. The waffle cone crust mimics traditional cannoli shells while the filling delivers authentic sweet ricotta flavor.
Ingredients: 12 waffle ice cream cones, 4 tablespoons butter (melted), 2 cups ricotta cheese, 1 cup powdered sugar, 1 teaspoon vanilla, 1 tablespoon orange zest, ½ cup mini chocolate chips, ¼ cup chopped pistachios.
How To Make No-Bake Cannoli Cream Pie
1. Crush waffle cones into fine crumbs using a food processor or by placing them in a sealed bag and crushing with a rolling pin until you have uniform crumbs.
2. Mix waffle cone crumbs with melted butter until evenly moistened, then press firmly into a 9-inch pie pan. Use the bottom of a measuring cup to create an even, compact crust.
3. Beat ricotta cheese until smooth and creamy, then gradually add powdered sugar, vanilla, and orange zest. Mix until filling is light and fluffy with no lumps remaining throughout.
4. Fold in mini chocolate chips and half the pistachios, reserving the rest for garnish. Spoon filling into prepared crust and smooth the top with an offset spatula.
5. Refrigerate for at least 4 hours until set. Before serving, sprinkle remaining pistachios on top and dust lightly with additional powdered sugar for an authentic cannoli presentation.
09. Pumpkin Pecan Cheesecake Pie
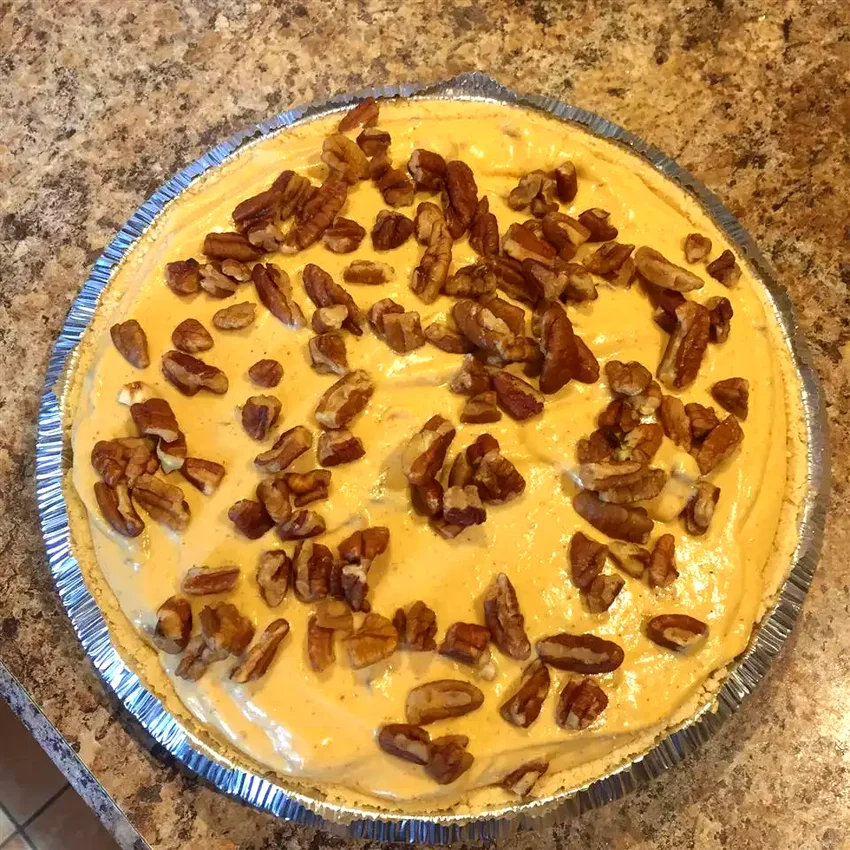
A happy accident turned into the perfect fall dessert combining pumpkin spice with creamy cheesecake. This no-bake pie features a crunchy pecan topping and graham cracker crust.
Ingredients: 1 prepared graham cracker crust, 16 oz cream cheese (softened), 1 cup pumpkin puree, ¾ cup powdered sugar, 1 teaspoon vanilla, 1 teaspoon pumpkin pie spice, 1 cup heavy cream, ½ cup chopped pecans.
How To Make Pumpkin Pecan Cheesecake Pie
1. Beat softened cream cheese with an electric mixer until light and fluffy with no lumps. This step is crucial for achieving a smooth, creamy texture in the finished pie.
2. Add pumpkin puree, powdered sugar, vanilla, and pumpkin pie spice to cream cheese. Beat until mixture is completely smooth and well combined with no streaks of pumpkin visible.
3. Whip heavy cream in a separate bowl until stiff peaks form. Gently fold whipped cream into pumpkin mixture in three additions, being careful not to deflate the cream.
4. Spoon filling into graham cracker crust and smooth the top with a spatula. Sprinkle chopped pecans evenly over the surface, pressing gently so they adhere to the filling.
5. Cover and refrigerate for at least 6 hours or overnight until completely set. The pie will firm up beautifully and develop deeper flavors as it chills in the refrigerator.
10. Classic Italian Tiramisu
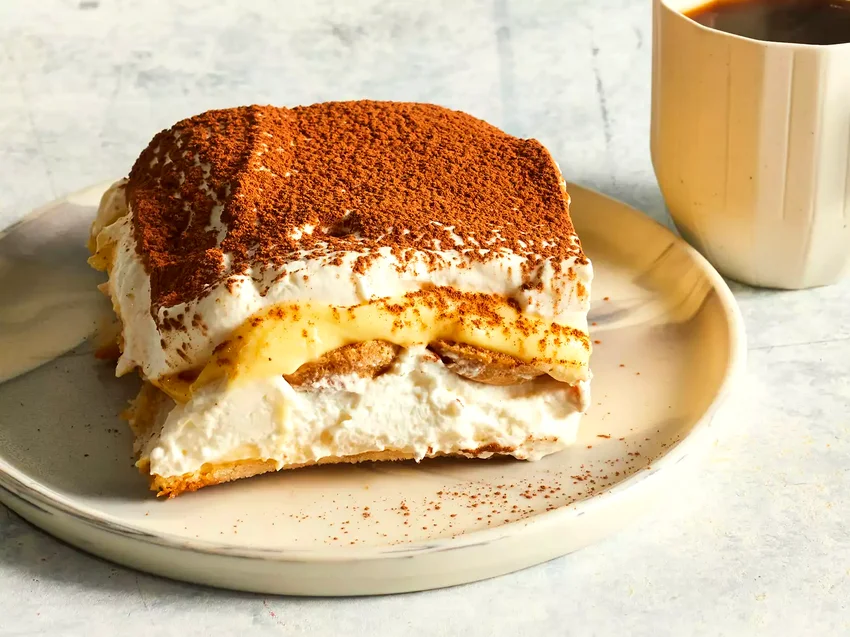
The ultimate make-ahead dessert that tastes like it came from an Italian restaurant. This traditional tiramisu requires patience for chilling but delivers incredible coffee and mascarpone flavors.
Ingredients: 6 egg yolks, ¾ cup sugar, 1¼ cups mascarpone cheese, 1¾ cups heavy cream, 2 packages ladyfinger cookies, 1½ cups strong espresso (cooled), 3 tablespoons coffee liqueur, unsweetened cocoa powder.
How To Make Classic Italian Tiramisu
1. Whisk egg yolks and sugar in a double boiler over simmering water for about 5 minutes until mixture is thick, pale, and ribbons fall from whisk when lifted. Remove from heat immediately.
2. Add mascarpone to egg mixture and whisk until completely smooth with no lumps. Let this mixture cool to room temperature while you prepare the other components.
3. Whip heavy cream to stiff peaks in a clean bowl. Gently fold whipped cream into mascarpone mixture in three additions, maintaining the light texture throughout the folding process.
4. Combine cooled espresso and coffee liqueur in a shallow dish. Quickly dip each ladyfinger in coffee mixture and arrange in a single layer in a 9×13 dish, working efficiently to prevent over-soaking.
5. Spread half the mascarpone mixture over ladyfingers, then repeat with remaining cookies and filling. Cover tightly and refrigerate overnight to allow coffee flavors to penetrate and filling to set properly.
6. Before serving, dust generously with cocoa powder using a fine mesh sieve for an elegant presentation that showcases the classic tiramisu appearance everyone expects.
11. Cornflake Christmas Wreaths
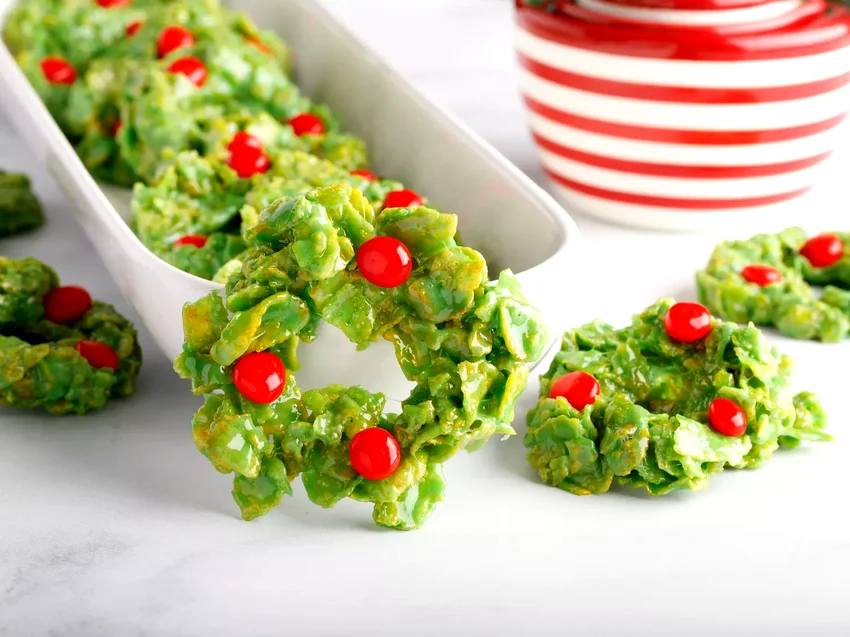
Fun no-bake cookies that get kids involved in holiday baking without using the oven. These colorful treats look like tiny wreaths and taste like sweet, crunchy cereal bars.
Ingredients: 6 cups cornflakes cereal, ½ cup butter, 30 large marshmallows, 1 teaspoon vanilla extract, green food coloring, ½ cup red cinnamon candies, cooking spray for hands.
How To Make Cornflake Christmas Wreaths
1. Melt butter and marshmallows in a large saucepan over low heat, stirring constantly until completely smooth and no marshmallow lumps remain. Remove from heat immediately to prevent mixture from getting too hot.
2. Stir in vanilla extract and enough green food coloring to achieve desired wreath color. Add coloring gradually since you can always add more but can’t take it away once mixed in.
3. Add cornflakes cereal and stir gently until all cereal is evenly coated with the green marshmallow mixture. Work quickly since mixture will start to set as it cools down.
4. Spray your hands with cooking spray and quickly shape mixture into small wreaths on wax paper-lined baking sheets. Make a hole in the center of each wreath using your finger.
5. Press red cinnamon candies onto each wreath while mixture is still warm and pliable. Let cool completely until set, about 30 minutes, before removing from wax paper for serving or storage.
12. Cherry Supreme Fruit Salad
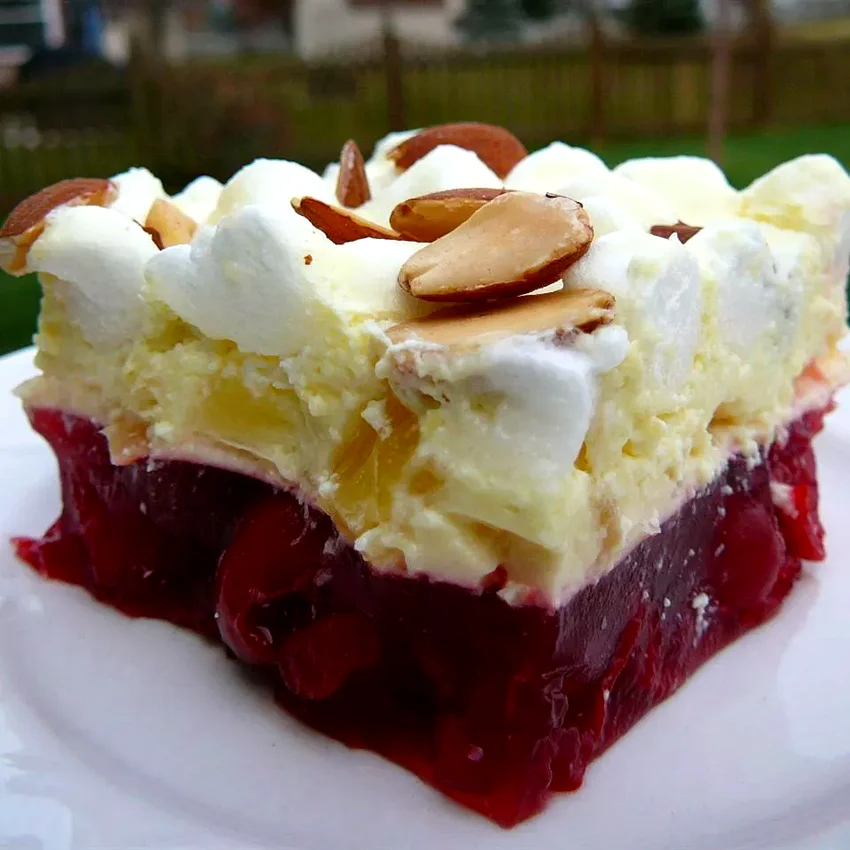
A family recipe that transforms leftover cherry pie filling into an elegant fruit salad. This creamy, sweet dessert combines tart cherries with fluffy cream cheese mixture for perfect balance.
Ingredients: 1 can cherry pie filling, 1 package lemon Jello (3 oz), 8 oz cream cheese (softened), ½ cup mayonnaise, 2 tablespoons lemon juice, 1 cup mini marshmallows, 1 cup chopped walnuts.
How To Make Cherry Supreme Fruit Salad
1. Prepare lemon Jello according to package directions but use ¼ less water than called for to create a slightly firmer set. Refrigerate until just beginning to thicken but not completely set.
2. Beat softened cream cheese until light and fluffy, then gradually add mayonnaise and lemon juice. Continue beating until mixture is completely smooth with no lumps of cream cheese remaining.
3. Fold thickened Jello into cream cheese mixture until well combined and evenly colored throughout. The mixture should be smooth and hold its shape when spooned.
4. Gently fold in cherry pie filling, mini marshmallows, and chopped walnuts until evenly distributed. Be careful not to break up the cherries or marshmallows too much during mixing.
5. Transfer to a serving bowl and refrigerate for at least 2 hours until completely set and chilled. The salad will firm up nicely and flavors will meld together beautifully.
13. Chocolate Peanut Butter Dream Pie
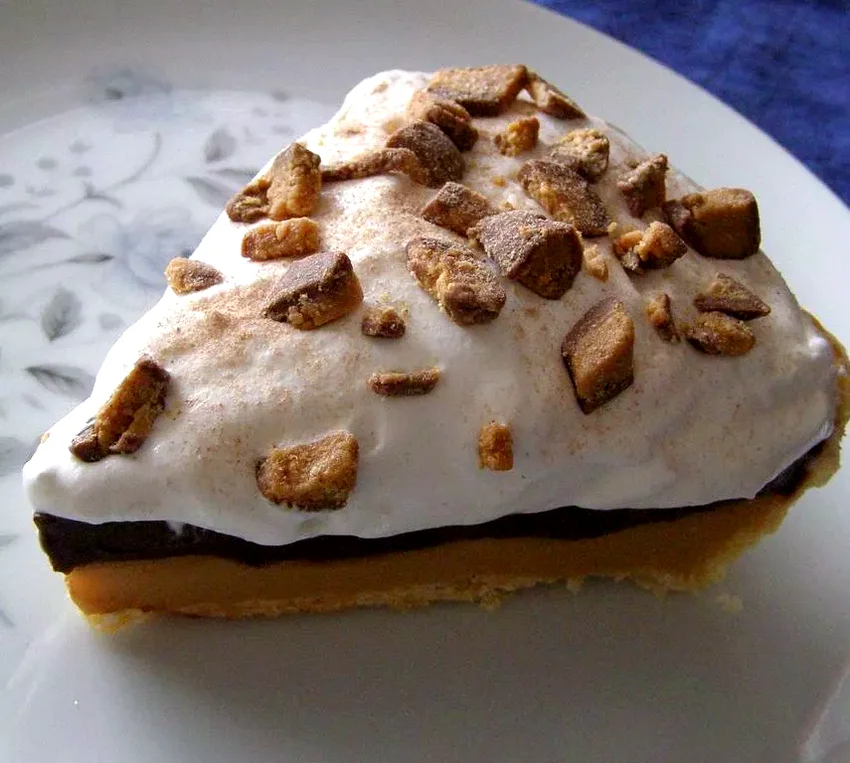
Rich, creamy pie that combines two favorite flavors in one spectacular dessert. This simple recipe takes just minutes to prepare but delivers restaurant-quality results every time.
Ingredients: 1 prepared chocolate cookie crust, 8 oz cream cheese (softened), 1 cup creamy peanut butter, 1 cup powdered sugar, 1 container whipped topping (8 oz), ½ cup chocolate chips, 2 tablespoons peanut butter for drizzling.
How To Make Chocolate Peanut Butter Dream Pie
1. Beat cream cheese until light and fluffy, about 3 minutes with an electric mixer. Add peanut butter and continue beating until mixture is completely smooth and well combined throughout.
2. Gradually add powdered sugar and beat until mixture is creamy with no lumps remaining. Scrape down sides of bowl as needed to ensure even mixing of all ingredients.
3. Fold in whipped topping gently until just combined, being careful not to overmix and deflate the light texture. The mixture should be smooth and hold its shape when spooned.
4. Spoon filling into chocolate crust and smooth the top with an offset spatula. Sprinkle chocolate chips over surface and drizzle with melted peanut butter in decorative patterns.
5. Refrigerate for at least 4 hours or overnight until completely set and firm. The pie will slice cleanly and maintain its shape when properly chilled before serving.
14. Silky French Chocolate Pie
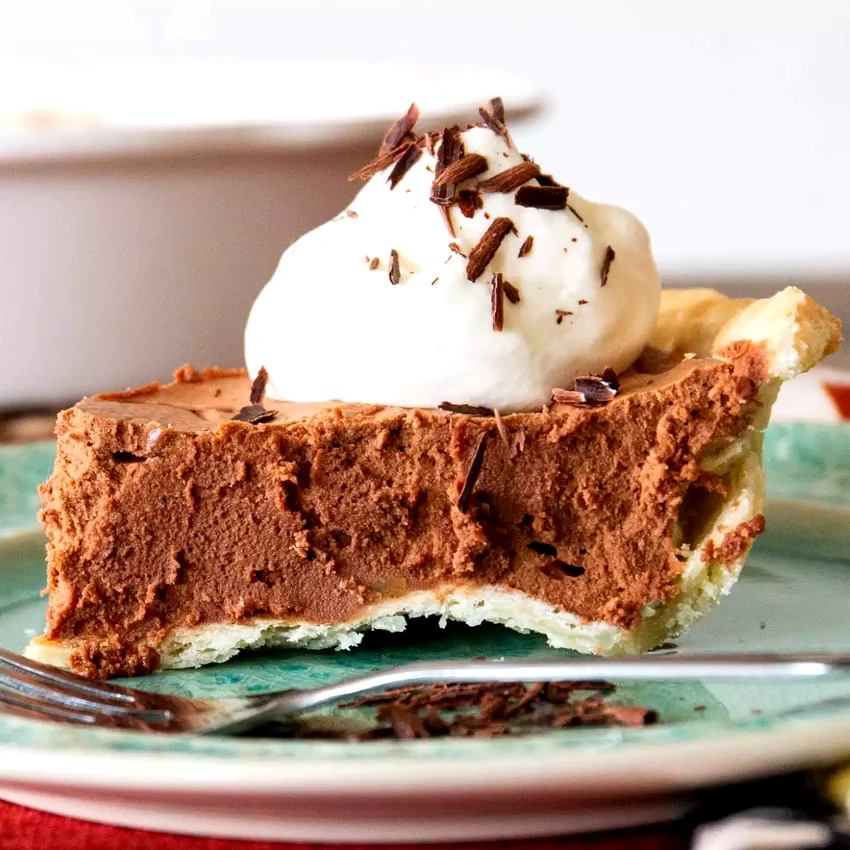
Elegant chocolate pie with a silky smooth texture that melts in your mouth. This impressive dessert looks like you spent hours making it but comes together surprisingly easily.
Ingredients: 1 prepared pie crust (baked and cooled), ½ cup butter, ¾ cup sugar, 2 oz unsweetened chocolate (melted), 2 large eggs, 1 teaspoon vanilla extract, whipped cream and chocolate shavings for garnish.
How To Make Silky French Chocolate Pie
1. Beat butter with an electric mixer until light and fluffy, about 3 minutes. Gradually add sugar and continue beating until mixture is pale and creamy with no grittiness from sugar remaining.
2. Add melted chocolate and vanilla to butter mixture, beating until well combined and smooth. Make sure chocolate is completely cool before adding to prevent melting the butter mixture.
3. Add eggs one at a time, beating each egg for exactly 5 minutes before adding the next. This extended beating time is crucial for achieving the signature silky texture of French silk pie.
4. Pour chocolate mixture into cooled pie crust and smooth the top with a spatula. Cover and refrigerate for at least 4 hours until filling is completely set and firm to the touch.
5. Before serving, top with dollops of whipped cream and garnish with chocolate shavings or curls. The contrast of textures makes this pie absolutely irresistible to chocolate lovers everywhere.
Final Thoughts
These no-bake Christmas desserts prove you don’t need an oven to create memorable holiday treats. Each recipe offers make-ahead convenience while delivering impressive flavors and presentation.
From rich chocolate pies to festive fruit salads, these simple desserts let you focus on enjoying time with family instead of worrying about complicated baking techniques.