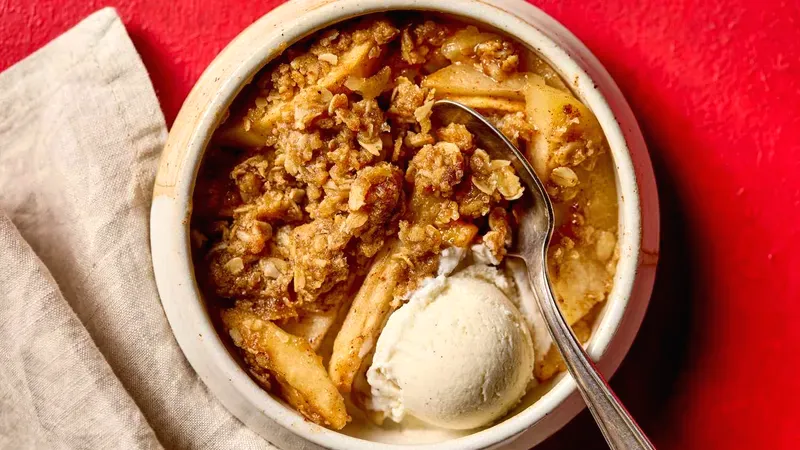
Healthy Apple Crisp
Nothing says comfort like the warm, cozy smell of apple crisp baking in your oven! This healthy apple crisp is perfect for anyone who wants that classic fall dessert without all the guilt. You get all the sweet, cinnamon-spiced goodness with way less sugar and butter than traditional recipes.

Recipe Details
Timing & Servings: Prep Time: 20 minutes, Total Time: 50 minutes, Serves: 8 people.
Nutrition Profile: Sesame-Free, Nut-Free, Soy-Free, Vegetarian, Egg-Free.
Nutrition Facts (per serving): 154 Calories, 6g Fat, 25g Carbs, 1g Protein.
Ingredients You’ll Need
Baking apples: You’ll need 5 cups of sliced and peeled apples. Granny Smith, Honeycrisp, or Braeburn work perfectly here – they hold their shape and won’t turn to mush when baked.
Brown sugar: Just 6 tablespoons total, divided between the filling and topping. The brown sugar adds that rich, caramel-like sweetness that makes this crisp so special.
All-purpose flour: 4 tablespoons divided – some goes in the apple filling to thicken those delicious juices, and the rest makes the topping perfectly crumbly.
Lemon juice: One teaspoon keeps your apples from browning and adds a bright pop of flavor that balances all that sweetness.
Apple pie spice: ¾ teaspoon divided gives you that classic warm spice blend. If you don’t have it, mix cinnamon, nutmeg, and a tiny bit of allspice.
Salt: ¼ teaspoon plus a pinch – trust me, this little bit of salt makes all the flavors pop and taste way more delicious.
Old-fashioned rolled oats: ½ cup creates that amazing crunchy topping we all love. Don’t use quick oats – they’ll get too mushy.
Unsalted butter: 4 tablespoons gets cut into the oat mixture to make those perfect golden crumbs on top.
How to Make Healthy Apple Crisp

Step 1: Preheat your oven to 375°F. Grab a large bowl and toss together your sliced apples, 2 tablespoons brown sugar, 1 tablespoon flour, the lemon juice, ½ teaspoon apple pie spice, and just a pinch of salt. Mix it all up until the apples are nicely coated. Transfer this sweet apple mixture to a 2-quart square baking dish and spread it out evenly.
Step 2: In a medium bowl, combine the oats with the remaining brown sugar, flour, apple pie spice, and salt. Cut in the cold butter using a pastry cutter or two forks until the mixture looks like coarse crumbs – you want some bigger butter pieces for extra flavor. Sprinkle this crumbly topping evenly over your apples.
Step 3: Bake for 30 to 35 minutes until the apples are fork-tender and the topping is golden brown and smells amazing. Let it cool for just a few minutes before serving – it’s best enjoyed warm!
Easy and Quick Healthy Apple Crisp Version
Want to save even more time? You can use pre-sliced apples from the store – just grab about 5 cups worth! Also, if you have apple pie filling on hand, use 2 cans and skip the first mixing step entirely. Just pour the filling into your baking dish and add the crumb topping. This cuts your prep time down to just 10 minutes!
Serving Ideas
This apple crisp is absolutely perfect on its own, but a scoop of vanilla ice cream takes it to the next level. Try it with some whipped cream or even a drizzle of caramel sauce. For breakfast lovers, this makes an amazing morning treat with a dollop of Greek yogurt.
Storage
Store any leftovers covered in the fridge for up to 4 days. To reheat, pop individual servings in the microwave for 30-45 seconds, or warm the whole dish in a 350°F oven for about 10 minutes until heated through.
Substitutions
No apple pie spice? Just use 1 teaspoon cinnamon instead. You can swap the brown sugar for coconut sugar or even maple syrup (use 4 tablespoons). For a gluten-free version, use your favorite gluten-free flour blend in place of regular flour.
Pro Tips
- Apple choice matters: Firm apples like Granny Smith or Honeycrisp hold their shape best and won’t turn mushy.
- Cold butter is key: Make sure your butter is cold when you cut it into the oat mixture – this creates those perfect crumbly pieces.
- Don’t skip the salt: That little bit of salt really makes all the flavors pop and taste more delicious.
- Check for doneness: The topping should be golden brown and the apples should be easily pierced with a fork.
FAQs
Can I make this apple crisp ahead of time?
You bet! You can assemble the whole thing up to a day ahead and keep it covered in the fridge. Just add about 5 extra minutes to the baking time since it’ll be cold from the fridge.
What’s the best type of apples to use?
Granny Smith apples are my go-to because they hold their shape and have that perfect tart flavor. But Honeycrisp, Braeburn, or even a mix of different apples works great too!
Can I freeze apple crisp?
Sure! You can freeze the baked crisp for up to 3 months. Just thaw it overnight in the fridge and reheat in a 350°F oven until warmed through.
Why did my topping get soggy?
This usually happens when the butter gets too warm or if there’s too much moisture from the apples. Make sure to use cold butter and don’t skip the flour in the apple mixture – it helps absorb those juices!
I hope you love this healthier take on classic apple crisp as much as my family does! Let me know how it turns out for you – I always love hearing about your baking adventures. Happy baking!